Ingredients
Equipment
Method
- Step 1: Preheat the Oven and Prepare Your Baking Station. Preheat your oven to 425°F (220°C) and position an oven rack in the lower third of the oven. This placement helps direct heat toward the bottom crust while allowing the creamy pumpkin filling to bake more evenly. Gather the pie plate, mixing bowls, whisk, spatula, measuring tools, and ingredients before beginning. Place a wire cooling rack in a convenient location for the finished pie. If using homemade pastry, make sure the dough has been prepared and properly chilled. The oven should reach the full recommended temperature before baking because this recipe begins with a short, high-temperature stage before finishing at a lower heat.
- Step 2: Prepare the Deep-Dish Pie Crust. Place one unbaked 9-inch (23 cm) deep-dish pie crust into a suitable pie plate with approximately 4-cup capacity. If using homemade pastry, gently roll it out on a lightly floured surface, transfer it to the dish, and press it into the bottom and sides without stretching. Trim any excessive pastry, leaving enough to fold the edge under and create a decorative crimp. If using a ready-made crust, check the package instructions and confirm that it is suitable for baking with a custard filling. Refrigerate the prepared crust while mixing the pumpkin filling. Keeping the pastry cold helps maintain its shape during baking. This recipe does not require blind-baking the crust first.
- Step 3: Combine the Brown Sugar and Pumpkin Pie Spices. In a small mixing bowl, combine 3/4 cup (150 g) packed light brown sugar, 1 1/2 teaspoons ground cinnamon, 1/2 teaspoon ground ginger, 1/4 teaspoon ground nutmeg, 1/8 teaspoon ground cloves, and 1/2 teaspoon fine salt. Whisk thoroughly until the spices are distributed throughout the sugar. Break apart any large brown sugar lumps so they don't remain in the finished filling. Cinnamon provides the familiar sweet-spiced aroma, ginger adds gentle warmth, nutmeg contributes rich fragrance, and cloves give a subtle depth of flavor. Mixing these ingredients first helps prevent concentrated pockets of spice in the pumpkin custard.
- Step 4: Beat the Eggs Gently. Crack 2 large eggs into a separate large mixing bowl. Using a hand whisk, beat gently until the yolks and whites are fully combined. There's no need to beat the eggs until fluffy or use an electric mixer. Pumpkin pie is a custard dessert, so incorporating excessive air isn't necessary and may produce bubbles on the baked surface. The eggs play an important role in setting the pumpkin-and-milk mixture as it bakes. Whisk until smooth, then scrape down the bowl as needed to make sure the mixture is evenly combined.
- Step 5: Add the Pure Pumpkin Purée. Add one 15-ounce (425 g) can of 100% pure pumpkin purée to the beaten eggs. Whisk gently until the mixture becomes thick, smooth, and evenly orange. Add the prepared brown sugar and spice mixture, then continue whisking until fully incorporated. The mixture should have a rich pumpkin aroma with recognizable cinnamon and ginger notes. Make sure you're using plain pumpkin purée rather than pre-seasoned pumpkin pie filling. Prepared pie filling may contain added sugar and spices, which would change the intended sweetness and flavor. If using homemade pumpkin purée, it should be smooth, thick, and free of excess liquid.
- Step 6: Gradually Incorporate the Evaporated Milk. Slowly pour one 12-fluid-ounce (354 ml) can of unsweetened evaporated milk into the pumpkin mixture, adding it in several portions while whisking gently. Continue until the filling is smooth, creamy, and evenly blended. The consistency should be pourable and noticeably thinner than plain pumpkin purée. Avoid vigorous beating because incorporating excessive air may contribute to bubbles or an uneven surface. If large bubbles appear, let the mixture stand briefly and gently tap the bowl to release some of them. Do not substitute sweetened condensed milk directly, since it contains substantial added sugar and would change the recipe's sweetness and texture.
- Step 7: Fill the Prepared Pie Crust. Remove the chilled crust from the refrigerator and position the pie plate on a rimmed baking sheet if needed for easier handling and to catch drips. Slowly pour the prepared pumpkin custard into the unbaked pastry shell. The filling should settle naturally into an even layer. Leave enough space below the upper edge of the crust to prevent overflowing. If your pie shell is shallower than the recommended deep-dish size, do not force all the filling into it. Transfer any excess to a small oven-safe ramekin and bake separately, checking earlier for doneness. Gently tap the filled dish once or twice to release large surface bubbles. The filling should now look smooth, creamy, and beautifully pumpkin-orange.
- Step 8: Bake at 425°F (220°C) for 15 Minutes. Carefully transfer the filled pumpkin pie to the fully preheated oven. Bake at 425°F (220°C) for 15 minutes. This initial high-temperature stage helps the pastry begin baking and starts setting the custard. Avoid opening the oven door unnecessarily. The outer edges of the filling may begin to look slightly firmer while the center remains very soft. This is completely normal at this stage. Keep the pie supported securely on the baking sheet or oven rack and avoid moving it while the custard is still liquid.
- Step 9: Reduce the Temperature to 350°F (175°C). After the first 15 minutes, reduce the oven temperature to 350°F (175°C) without removing the pie. Continue baking for approximately 40–50 additional minutes. The total baking time will generally be around 55–65 minutes, depending on the oven, crust, and filling depth. During this second stage, the custard gradually thickens as the eggs set. Keep an eye on the crust edges during the final portion of baking. If they become too dark, carefully protect them with a pie shield or loosely fitted aluminum foil. Avoid repeatedly opening the oven, and begin checking for doneness before the end of the estimated baking window.
- Step 10: Check the Pumpkin Pie for Doneness. The pumpkin pie is ready when the outer edges of the custard look set and a small area in the center still moves with a gentle, gelatin-like wobble. Carefully nudge the supported pie plate to check the movement. The filling should not slosh or ripple like a liquid. For additional guidance, an instant-read thermometer inserted into the center may show approximately 160–170°F (71–77°C) when the custard is approaching the correct doneness. Avoid continuing to bake until the entire center becomes completely rigid, as this can cause a dry filling or cracked surface. Residual heat will continue setting the custard after removal from the oven.
- Step 11: Cool the Pumpkin Pie Safely. Carefully remove the baked pumpkin pie from the oven and transfer it to a wire cooling rack. Allow it to cool at room temperature for approximately 1 hour, or until it has cooled enough to refrigerate comfortably. As the pie cools, the filling continues firming and its texture becomes more stable. Slight settling is normal. Avoid cutting into the pie while it is hot because the custard may still be too soft to hold a clean slice. Since this recipe contains eggs and evaporated milk, refrigerate the pie within 2 hours of removing it from the oven. Do not leave homemade pumpkin pie on the countertop overnight.
- Step 12: Refrigerate Until Completely Set. Transfer the cooled pumpkin pie to the refrigerator and chill for approximately 3–4 hours, preferably until thoroughly cold and firm enough to slice neatly. An overnight chilling period is also convenient when preparing dessert ahead for Thanksgiving or another gathering. Once the pie is cool, cover it to help prevent drying and absorption of refrigerator odors. Chilling allows the pumpkin custard to develop its final smooth, sliceable texture. For the best presentation, avoid rushing this step. A thoroughly chilled pie usually produces much cleaner slices than one served immediately after baking.
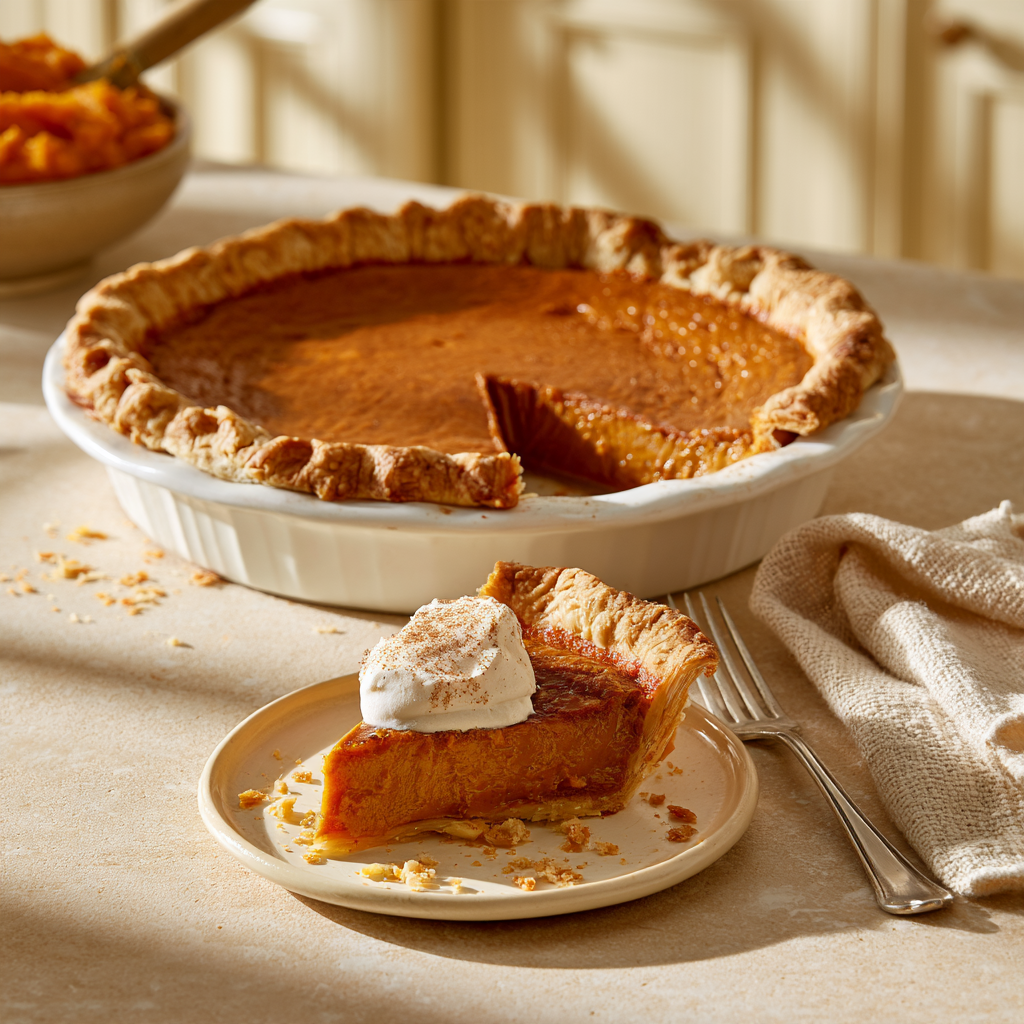
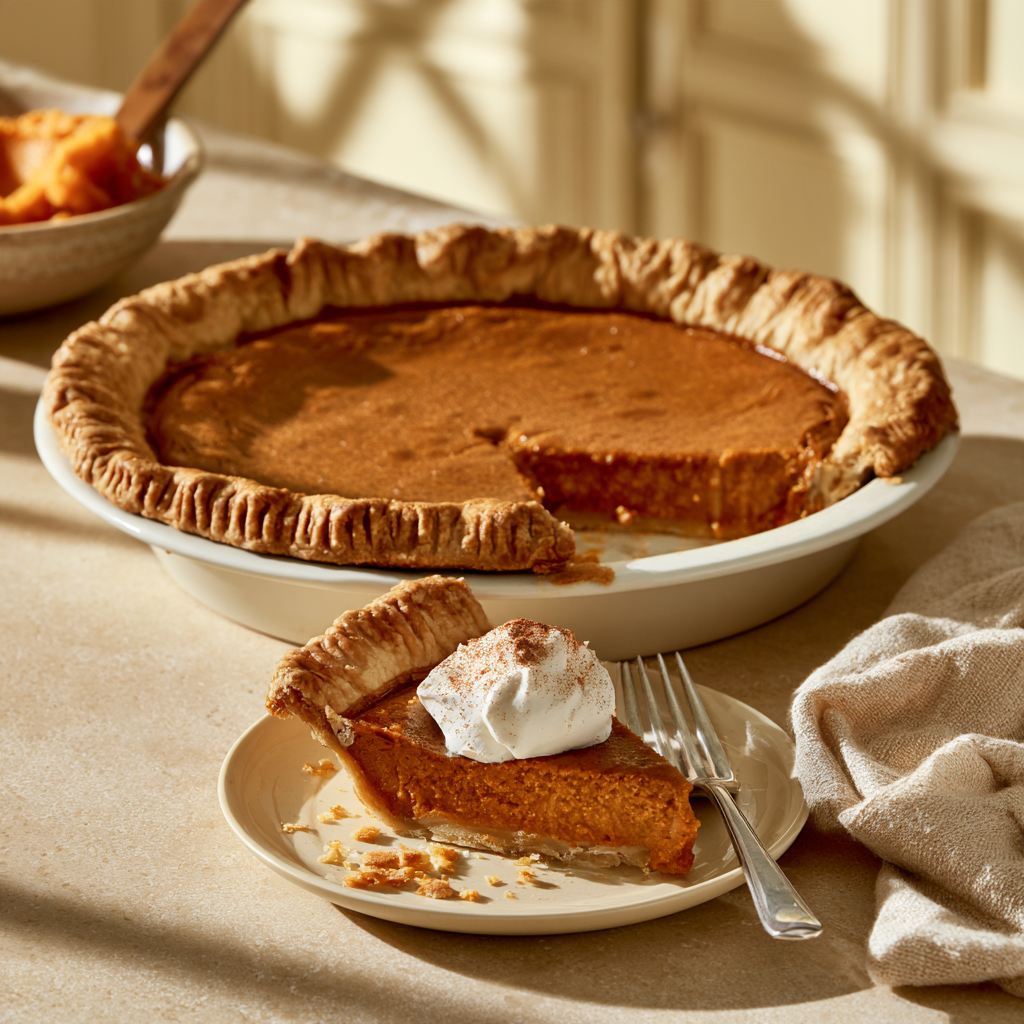
- Step 13: Slice and Serve With Optional Toppings. Once the pumpkin pie is fully chilled, remove it from the refrigerator and cut it into 8 equal slices using a sharp knife. Wipe the knife between cuts to keep the edges neat. Carefully transfer the portions onto serving plates with a pie server. The finished filling should be smooth, creamy, and firm enough to retain its shape, while the pastry provides a tender, golden contrast. Serve plain or finish each slice with a small spoonful of lightly sweetened whipped cream. A delicate sprinkle of ground cinnamon, pumpkin pie spice, or chopped toasted pecans makes an attractive optional garnish. Add toppings shortly before serving rather than before storage.
- Step 14: Store Leftover Pumpkin Pie. Cover leftover pumpkin pie securely and refrigerate at 40°F (4°C) or below. Homemade pumpkin pie should generally be enjoyed within approximately 3–4 days when stored properly. Do not leave slices at room temperature for prolonged periods, especially during holiday gatherings. For longer storage, wrap the fully cooled pie or individual portions securely and freeze for approximately 1–2 months for best quality. Thaw frozen pumpkin pie in the refrigerator before serving. Keep in mind that freezing and thawing can slightly affect the creamy custard texture and may soften the pastry crust. For the best appearance and flavor, preparing the pie a day ahead and refrigerating it is usually preferable.
Notes
The secret to the Best Pumpkin Pie Recipe is using 100% pure pumpkin purée, properly measured ingredients, a balanced blend of warm spices, and a baking method that allows the custard to set without becoming dry.
Use one 15-ounce (425 g) can of 100% pure pumpkin purée. Do not confuse it with prepared pumpkin pie filling, which may contain added sugar and spices.
Choose smooth, thick canned pumpkin purée for consistent results. If using homemade purée, remove excess moisture before measuring because watery pumpkin may affect the custard's texture.
This recipe uses one 12-fluid-ounce (354 ml) can of unsweetened evaporated milk. Evaporated milk helps create a smooth, creamy filling with a concentrated dairy flavor.
Do not substitute sweetened condensed milk directly for evaporated milk. It contains added sugar and will change the filling's sweetness and structure.
Use 2 large eggs for the pumpkin custard. The eggs gradually set during baking, helping the filling become firm enough for neat slices while remaining creamy.
Whisk the eggs gently rather than beating them until fluffy. Pumpkin pie is a custard, so excessive air can create bubbles and an uneven surface.
Use 3/4 cup (150 g) packed light brown sugar for gentle caramel-like sweetness. Dark brown sugar may be used for a stronger molasses note, although the flavor and color will differ slightly.
For the classic pumpkin pie spice flavor, combine ground cinnamon, ginger, nutmeg, and cloves. Measure carefully to prevent the stronger spices from overpowering the pumpkin.
The recipe uses 1 1/2 teaspoons cinnamon, 1/2 teaspoon ginger, 1/4 teaspoon nutmeg, and 1/8 teaspoon cloves. This creates a balanced, warmly spiced custard.
Mix the brown sugar, spices, and salt in a separate bowl before adding them to the pumpkin. This helps distribute the seasonings evenly throughout the filling.
A premeasured pumpkin pie spice blend can replace the individual spices, but its flavor will depend on the brand. Approximately 2 1/4–2 1/2 teaspoons is a starting point for an alternative version.
Use a 9-inch deep-dish pie crust with approximately 4-cup capacity. A shallow crust may not hold the full amount of filling.
A homemade all-butter pie crust provides rich flavor and a flaky texture. A suitable ready-made deep-dish pastry shell also works well and saves preparation time.
Keep the unbaked pastry chilled until you're ready to fill it. Cold pastry helps maintain its shape when placed into the hot oven.
This recipe is intended for an unbaked crust. You don't need to blind-bake the pastry first when following the established two-temperature baking method.
For an especially crisp bottom crust, consider a tested partial blind-baking method for custard pies. If you choose that variation, the final baking procedure may need adjustment.
Preheat your oven completely to 425°F (220°C) before baking. Beginning at the correct temperature helps the pastry and filling start setting as intended.
Position the pie toward the lower third of the oven to encourage more effective baking of the bottom crust. Check your appliance's instructions for appropriate rack placement.
Bake at 425°F (220°C) for the first 15 minutes, then reduce the oven temperature to 350°F (175°C) for approximately 40–50 additional minutes.
The expected total baking time is approximately 55–65 minutes, but the exact time depends on oven accuracy, pie plate material, and the depth of the filling.
Avoid overfilling the pastry shell. If the crust is too shallow, bake the extra filling separately in a suitable oven-safe dish and adjust its baking time.
If the pastry edges become too dark before the filling finishes baking, carefully use a pie shield or loosely fitted aluminum foil to protect the crust.
The best sign of doneness is a filling with set outer edges and a small, gently wobbling center. The center should move like soft gelatin rather than slosh like liquid.
An instant-read thermometer inserted into the center can provide additional guidance. A reading around 160–170°F (71–77°C), combined with the correct visual cues, indicates the custard is approaching doneness.
Don't wait until the entire pumpkin pie filling becomes completely rigid in the oven. Overbaking can cause cracks, a dry texture, or a grainy custard.
If the pie develops a small crack, it is usually still delicious. A modest spoonful of whipped cream can provide an attractive finishing touch.
For a smoother filling, whisk gently and allow large air bubbles to rise before pouring the custard into the crust. Avoid vigorous beating.
If the filling seems watery, confirm that you measured the pumpkin, milk, and eggs correctly. Excess liquid or insufficient baking can prevent the custard from setting properly.
Allow the baked pumpkin pie to cool on a wire rack before refrigerating. Because it contains eggs and dairy, place it in the refrigerator within two hours after baking.
Refrigerate the pie for approximately 3–4 hours or until thoroughly chilled. This allows the custard to firm up and makes slicing easier.
For a Thanksgiving dinner or other holiday gathering, prepare the pumpkin pie the day before. Overnight refrigeration produces a convenient, thoroughly chilled dessert that's ready to slice.
Use a clean, sharp knife for slicing and wipe the blade between cuts. This helps create neat portions with smooth custard edges.
Serve homemade pumpkin pie plain or with a small swirl of lightly sweetened whipped cream. A sprinkle of cinnamon or pumpkin pie spice makes a simple decorative finish.
For a little crunch, sprinkle chopped toasted pecans over individual slices just before serving. Check for nut allergies before adding them.
A lightly spiced pumpkin pie pairs beautifully with milk, coffee, tea, or a simple homemade dessert platter featuring other autumn favorites.
Store homemade pumpkin pie covered in the refrigerator at 40°F (4°C) or below and consume within approximately 3–4 days.
Pumpkin pie can be frozen for approximately 1–2 months for best quality. Wrap securely and thaw in the refrigerator, but expect possible changes in the custard texture or crust crispness.
This recipe contains eggs, dairy, and usually wheat from the pastry crust. Check labels and use a specially tested variation when preparing gluten-free, dairy-free, or vegan pumpkin pie.
Pure pumpkin contributes carotenoids and some dietary fiber, but the finished pumpkin pie also contains added sugar and pastry. Enjoy it as a dessert rather than treating it as a health food.
OoohDelish Perfect Pumpkin Pie Secret: For a creamy, beautifully sliceable homemade pumpkin pie, combine smooth pumpkin purée with eggs, evaporated milk, brown sugar, and a balanced blend of warm spices. Pour gently into a chilled deep-dish crust, bake at 425°F for 15 minutes, then continue at 350°F until the edges are set and the center still wobbles slightly. Cool safely, chill thoroughly, and serve with a delicate swirl of whipped cream. The result is a golden pastry crust surrounding a silky, warmly spiced pumpkin filling that's perfect for sharing with family and friends!