Ingredients
Equipment
Method
- Step 1: Prepare the Dry Ingredients. In a medium mixing bowl, combine the all-purpose flour, baking soda, and fine sea salt, then whisk everything together for approximately 30 seconds until the ingredients are evenly distributed. This important preparation step ensures that the baking soda is incorporated throughout the flour, helping the choc chunk biscuits rise and spread consistently during baking while preventing concentrated pockets of salt or leavening. If your flour contains lumps, gently break them apart with the whisk or sift the flour before combining it with the remaining dry ingredients. Once the mixture is uniform and free of visible clumps, set the bowl aside while preparing the butter and sugar mixture, making sure your ingredients are measured accurately for the best biscuit texture.
- Step 2: Cream the Butter and Sugars. Place the softened unsalted butter, packed light brown sugar, and granulated sugar into a large mixing bowl, then beat the ingredients together using an electric hand mixer or stand mixer fitted with the paddle attachment on medium speed for approximately 2–3 minutes, until the mixture becomes creamy, slightly lighter in color, and evenly blended. Scrape down the sides and bottom of the bowl occasionally with a silicone spatula to ensure that no pockets of butter or sugar remain unmixed. The combination of brown and white sugar helps produce a balanced biscuit texture, with brown sugar contributing moisture and caramel-like flavor while granulated sugar encourages lightly crispy edges. Be sure to use softened butter rather than fully melted butter, because excessively warm butter can encourage the biscuits to spread too much during baking.
- Step 3: Add the Egg, Egg Yolk, and Vanilla Extract. Add the whole egg and additional egg yolk to the creamed butter mixture, followed by the pure vanilla extract, and beat on low to medium speed until the ingredients are smoothly incorporated and the mixture appears thick, creamy, and uniform. The whole egg contributes moisture and structure, while the additional egg yolk adds richness and supports the soft, chewy texture that makes homemade choc chunk biscuits so appealing. The vanilla extract enhances the chocolate flavor and creates a delicious bakery-style aroma as the biscuits bake. Scrape the sides of the bowl once or twice during mixing to incorporate any remaining ingredients, but avoid beating excessively after everything has combined, as the goal is a smooth, balanced dough rather than an overly aerated mixture.
- Step 4: Combine the Wet and Dry Ingredients. Gradually add the prepared flour mixture to the butter-and-egg mixture in two separate additions, using the mixer on its lowest speed or a sturdy silicone spatula to gently incorporate the dry ingredients into the wet mixture. Continue mixing only until the flour disappears and a thick, soft biscuit dough forms, scraping the bottom of the bowl to make sure no dry flour remains hidden underneath. Avoid excessive mixing at this stage, because working the dough too much after adding flour can encourage gluten development and produce biscuits that are tougher or denser than intended. The finished mixture should feel soft, rich, and slightly sticky while still being firm enough to hold its shape when scooped, providing a suitable base for the generous chocolate chunks that will be added next.
- Step 5: Prepare and Fold in the Chocolate Chunks. Using a sharp knife and cutting board, chop the dark or semisweet chocolate into irregular pieces approximately 1/4–1/2 inch in size, keeping a mixture of smaller chocolate fragments and larger chunks to create different textures throughout the biscuits. Reserve approximately two tablespoons of the most attractive chocolate pieces for decorating the tops before baking, then add the remaining chocolate to the prepared dough and gently fold everything together using a silicone spatula until the chocolate is evenly distributed. The larger pieces will create rich chocolate pockets, while smaller fragments will spread chocolate flavor throughout the buttery biscuit mixture. Avoid stirring too aggressively, as the goal is to preserve the larger chocolate chunks and maintain the soft dough texture, ensuring that every homemade choc chunk biscuit contains a satisfying combination of chocolate and biscuit.
- Step 6: Shape the Choc Chunk Biscuit Dough. Using a large cookie scoop or digital kitchen scale, divide the prepared chocolate chunk dough into approximately 18 equal portions, each weighing around 58 g, and gently roll or shape each portion into a thick, rounded mound using clean hands. For attractive bakery-style biscuits with soft centers, shape the dough slightly taller rather than flattening it into thin discs, allowing the biscuits to spread naturally while baking without losing too much height. Place the shaped portions onto a parchment-lined tray or large plate, leaving a little space between them so they do not stick together during chilling. Making the portions as uniform as possible helps the biscuits bake evenly, preventing smaller pieces from becoming overly browned while larger ones remain underdone, and also creates a consistent, professional-looking batch.
- Step 7: Chill the Biscuit Dough. Cover the tray of shaped biscuit dough with food-safe wrap or a suitable reusable cover, then place it in the refrigerator for at least 30 minutes to allow the butter to firm up and the dough to become easier to handle. This chilling period can help reduce excessive spreading when the biscuits enter the hot oven, encouraging a thicker appearance with lightly crisp edges and tender centers. Resting the dough also gives the flour time to absorb some of the moisture from the other ingredients, which may contribute to a more consistent final texture. If you prefer to prepare the recipe in advance, the covered dough can be refrigerated overnight, although very cold dough may require a small adjustment to baking time. Keep the dough refrigerated until you are ready to bake.
- Step 8: Preheat the Oven and Prepare the Baking Sheets. Near the end of the chilling period, preheat your oven to 350°F (175°C) using conventional oven settings, allowing sufficient time for the temperature to stabilize before placing the biscuits inside. Line two large, light-colored baking sheets with parchment paper to prevent sticking and encourage consistent browning, then arrange approximately nine chilled dough portions on each tray, leaving at least 2–3 inches of space between them to accommodate spreading during baking. Keep the dough portions rounded rather than flattening them, and gently press the reserved chocolate chunks onto the tops so they remain visible as the biscuits spread and bake. If your oven has uneven heat distribution, position the racks in the upper-middle and lower-middle sections and plan to rotate the trays halfway through baking, or bake the trays individually for more consistent results.
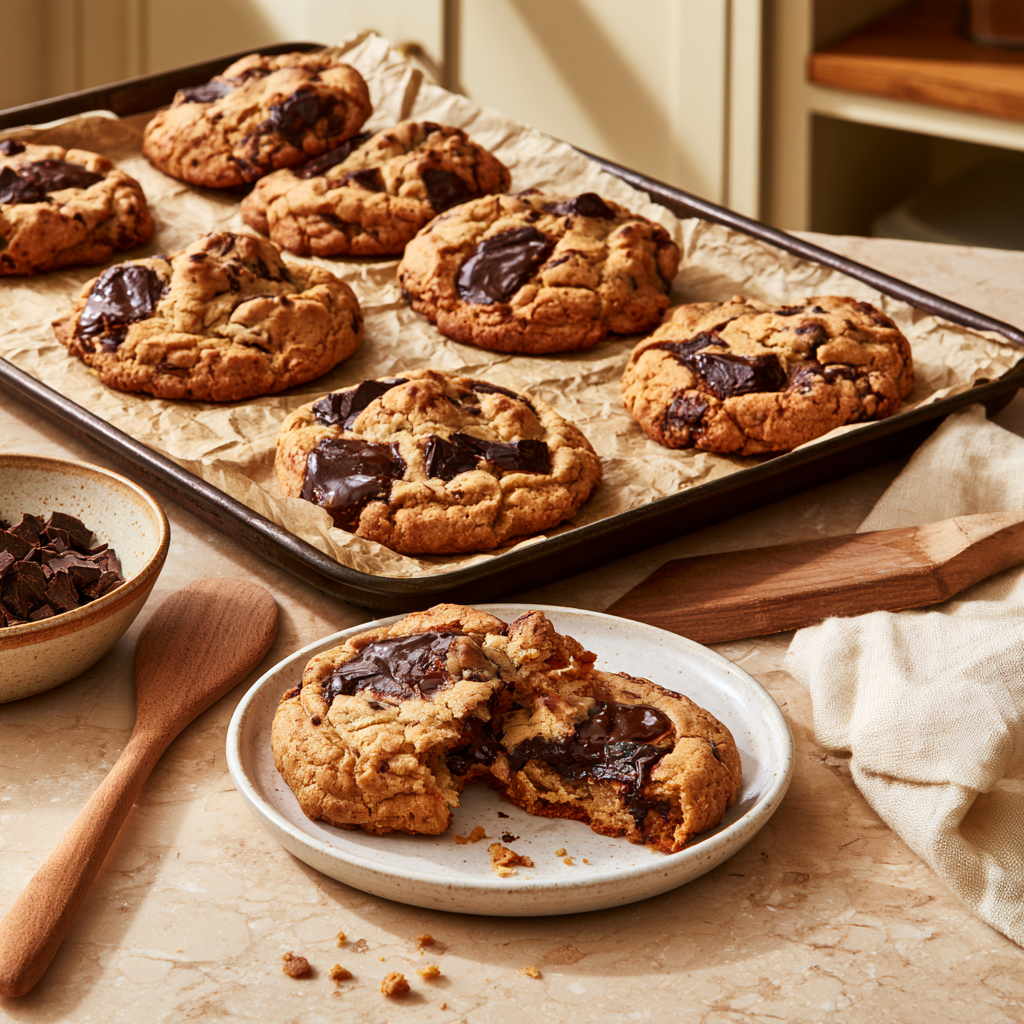
- Step 9: Bake the Choc Chunk Biscuits Until Golden. Place the prepared baking sheets into the fully preheated oven and bake the choc chunk biscuits at 350°F (175°C) for approximately 12–15 minutes, switching the trays between oven racks and rotating them halfway through baking to encourage even browning. Watch the biscuits carefully during the final few minutes, looking for lightly golden edges that appear set and centers that remain slightly soft but no longer look wet or raw. The chocolate chunks may become glossy and softened as they warm, creating delicious chocolate pockets across the biscuit surfaces. Avoid baking the biscuits until the entire surface turns dark brown, because they continue to firm up after leaving the oven, and excessive baking can result in dry, hard centers. If baking one tray at a time, follow the same temperature and approximate baking duration for each batch.
- Step 10: Allow the Biscuits to Rest on the Baking Sheets. Once the choc chunk biscuits have developed beautifully golden edges and slightly soft centers, carefully remove the baking sheets from the oven and place them on heat-resistant surfaces, allowing the biscuits to rest undisturbed for approximately 8–10 minutes before transferring them to a cooling rack. During this important resting period, the residual heat helps the centers finish setting while the biscuits become firm enough to handle without breaking apart. The chocolate pieces may remain very hot and soft, so avoid touching them directly while the biscuits cool. If you enjoy sweet-and-salty desserts, sprinkle a very small amount of flaky sea salt over the warm biscuits to create a pleasant contrast with the rich chocolate and buttery dough, taking care not to overpower their natural sweetness.
- Step 11: Transfer the Biscuits to a Wire Cooling Rack. After the biscuits have rested on their baking sheets for approximately 8–10 minutes, carefully slide a thin spatula underneath each biscuit and transfer it to a wire cooling rack, leaving a little space between the pieces so air can circulate freely around them. Allow the biscuits to cool for another 10–15 minutes if you prefer warm, soft-centered treats, or let them cool completely if you want a firmer texture that is easier to package and store. As the biscuits cool, the outer edges become more structured while the centers retain their pleasant chewiness, and the chocolate gradually firms from its melted state into deliciously rich pockets. Avoid stacking the biscuits while they are still warm, as trapped moisture can soften their surfaces and make them stick together.
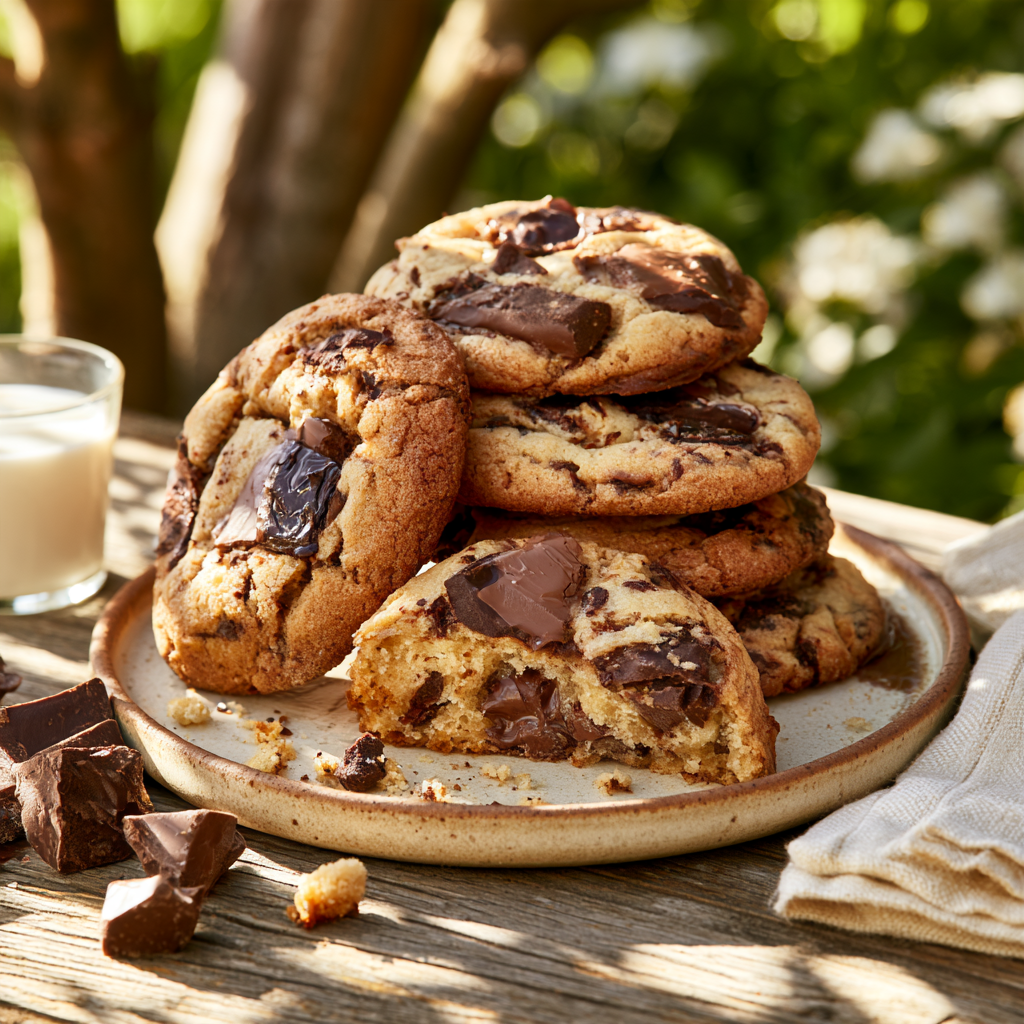
- Step 12: Serve and Enjoy Your Homemade Choc Chunk Biscuits. Serve your freshly baked choc chunk biscuits slightly warm or at room temperature, pairing them with a glass of cold milk, freshly brewed coffee, hot chocolate, or your favorite tea for a comforting homemade treat. For an extra-indulgent dessert, place a warm biscuit alongside a scoop of vanilla ice cream, allowing the cold, creamy ice cream to contrast with the buttery biscuit and soft chocolate pieces, or arrange several biscuits on a serving platter with fresh strawberries for a beautiful presentation. These chocolate-loaded biscuits are wonderful for weekend baking, family gatherings, birthday celebrations, homemade gifts, and afternoon snacks, thanks to their familiar flavor and satisfying combination of chewy centers and lightly crispy edges. Once completely cooled, transfer any remaining biscuits to an airtight container and store them properly to preserve their freshness.
Notes
Use high-quality dark or semisweet chocolate containing approximately 50–70% cocoa for a rich, balanced chocolate flavor. A combination of dark and milk chocolate can also create deliciously creamy chocolate pockets.
For authentic bakery-style choc chunk biscuits, chop a real chocolate bar into irregular pieces instead of relying entirely on regular chocolate chips. Larger chunks create soft chocolate pockets, while smaller fragments distribute chocolate flavor throughout the dough.
Always use softened butter rather than melted butter unless the recipe specifically calls for it. Properly softened butter should feel slightly cool and yield gently when pressed without becoming greasy or liquid.
For the best texture, use a combination of light brown sugar and granulated sugar. Brown sugar contributes moisture and chewiness, while granulated sugar helps create lightly crisp, golden edges.
Use room-temperature eggs for easier mixing. The additional egg yolk adds richness and helps produce a soft, chewy biscuit center.
Measure flour accurately. A digital kitchen scale is recommended because too much flour can make chocolate chunk biscuits dry, dense, or crumbly. If using measuring cups, spoon the flour into the cup and level it without packing.
Avoid overmixing the dough after adding flour. Mix only until the dry ingredients disappear. Excessive mixing can develop gluten and produce tougher biscuits.
Chill the dough for at least 30 minutes before baking. This firms the butter, makes portioning easier, and can help reduce excessive spreading in the oven.
For thick bakery-style biscuits, shape the dough into tall, rounded mounds rather than flattening it completely. This encourages the dough to retain more height during baking.
For consistently sized biscuits, use a kitchen scale to divide the dough into approximately 18 portions weighing around 58 g each. Uniform portions bake more evenly and create a professional-looking batch.
Reserve a few chocolate chunks and press them gently onto the dough balls before baking. This creates attractive visible chocolate pieces on top and gives homemade biscuits a bakery-style appearance.
Preheat the oven completely to 350°F (175°C) before baking. An oven that has not reached the correct temperature may cause the dough to spread before its structure begins setting.
Line baking sheets with parchment paper to prevent sticking and make cleanup easier. Avoid placing chilled dough directly onto a hot baking sheet, as it can cause the butter to soften too quickly.
Leave at least 2–3 inches of space between dough portions because the biscuits will spread as they bake. Overcrowding can cause neighboring biscuits to merge and may reduce even browning.
Bake for approximately 12–15 minutes, checking for lightly golden edges and centers that are set but still slightly soft. Exact baking time depends on biscuit size, dough temperature, baking sheet material, and oven performance.
For soft and chewy choc chunk biscuits, avoid overbaking. The biscuits should not look completely firm in the center when removed from the oven, but they should no longer appear wet or raw.
Allow the biscuits to rest on their baking sheets for approximately 8–10 minutes before transferring them to a wire rack. This resting period helps them firm up without becoming unnecessarily dry.
For a delicious sweet-and-salty contrast, sprinkle a small amount of flaky sea salt over the warm biscuits. The salt enhances the chocolate flavor and balances the sweetness without overpowering the recipe.
For extra-crispy biscuits, gently flatten the chilled dough portions before baking and allow a little additional baking time. Watch carefully because thinner biscuits can brown quickly.
For a richer chocolate flavor, add approximately 1/2 teaspoon of instant espresso powder to the dry ingredients. This optional addition deepens the chocolate notes without necessarily creating a noticeable coffee flavor.
For a nutty variation, fold approximately 1/4 cup of chopped toasted walnuts or pecans into the dough. These ingredients add a pleasant crunch that contrasts with the soft biscuit centers and melted chocolate.
For a citrus-inspired version, add 1 teaspoon of finely grated orange zest to the butter-and-sugar mixture. The fresh citrus aroma pairs beautifully with dark chocolate and creates a more distinctive flavor.
For a double-chocolate variation, replace some of the dark chocolate chunks with white or milk chocolate. Avoid adding excessive extra chocolate because overloading the dough may affect its structure.
Make Ahead: Prepare the dough in advance, portion it into balls, cover tightly, and refrigerate for up to 48 hours. Chilled dough may require a slight adjustment to baking time depending on its temperature.
Freezing Cookie Dough: Arrange the shaped dough balls on a parchment-lined tray and freeze until firm. Transfer to a freezer-safe bag or airtight container and store for approximately 2–3 months for best quality. Bake from frozen, adding a few extra minutes if necessary.
Storage: Allow baked chocolate chunk biscuits to cool completely before placing them in an airtight container. Store at room temperature in a cool, dry kitchen for approximately 3–5 days. Keep away from direct sunlight or excessive heat.
Freezing Baked Biscuits: Place completely cooled biscuits in a freezer-safe container with parchment paper separating the layers. Freeze for approximately 2–3 months for best quality. Thaw at room temperature before serving.
Reheating: For a freshly baked texture, warm an individual biscuit in a preheated oven at 300°F (150°C) for approximately 3–5 minutes. Watch carefully to avoid drying the biscuit or overheating the chocolate.
Serving Suggestion: Enjoy choc chunk biscuits with a glass of cold milk, hot chocolate, freshly brewed coffee, or tea. For a special dessert, serve a slightly warmed biscuit with vanilla ice cream and fresh berries.
OoohDelish Baking Secret: The secret to irresistible choc chunk biscuits is using accurately measured ingredients, real chopped chocolate, chilled dough, and careful baking. Remove the biscuits when the edges are golden and the centers are still tender, then allow them to finish setting on the baking sheet for the perfect balance of crispy edges and chewy middles.