Ingredients
Equipment
Method
- Step 1: Chill the Ingredients and Prepare Your Equipment. Before making your homemade Cold Foam Recipe, ensure that the whole milk and heavy whipping cream are thoroughly chilled straight from the refrigerator, ideally at or below 40°F (4°C). Cold ingredients are especially useful when preparing sweet cream cold foam because they help maintain a pleasant consistency as the mixture aerates. Gather a handheld milk frother, a clean tall narrow glass or frothing container, measuring spoons, and a small mixing spoon. Make sure the container is large enough to accommodate the foam as it expands, preferably leaving at least half the container empty after adding the liquid. If you plan to serve your cold foam over iced coffee, have the coffee brewed and chilled beforehand so the topping can be enjoyed immediately after preparation.
- Step 2: Measure the Whole Milk and Heavy Cream. Pour ¼ cup (60 ml) of cold whole milk into your frothing container, followed by ¼ cup (60 ml) of cold heavy whipping cream. This equal-parts combination creates a rich homemade vanilla sweet cream cold foam that is creamier than a traditional nonfat-milk foam but lighter and more pourable than fully whipped heavy cream. Measure both liquids accurately so the finished mixture develops the intended consistency. Whole milk provides a smooth base, while heavy cream contributes richness and body. If you prefer a lighter foam, you can experiment with a higher proportion of milk in a future batch, keeping in mind that changing the ratio may alter the thickness and stability of the topping.
- Step 3: Add the Vanilla Syrup and Vanilla Extract. Add 2 teaspoons (10 ml) of vanilla syrup and ¼ teaspoon of pure vanilla extract to the chilled milk-and-cream mixture. Stir gently with a clean spoon for approximately 10 seconds until the ingredients are evenly combined. Vanilla syrup adds a mild sweetness and familiar coffee-shop flavor, while the vanilla extract deepens the aroma without requiring additional syrup. If your vanilla syrup is particularly sweet, you may prefer to begin with a smaller quantity and adjust future batches according to taste. Avoid adding large quantities of thick caramel sauce, cocoa paste, or other heavy flavorings at this stage because they can interfere with foam formation and produce an uneven texture.
- Step 4: Froth the Mixture Until Silky and Pourable. Place the head of your handheld milk frother below the surface of the chilled mixture, then switch it on and begin frothing. Keep the frother mostly submerged, adjusting its position slightly as needed to incorporate air and produce small, fine bubbles rather than large splashes. Froth for approximately 15–30 seconds initially, checking the consistency frequently; depending on your frother and cream formulation, the mixture may require additional time. Stop when the cold foam becomes visibly thicker, smooth, airy, and capable of pouring in a soft ribbon from a spoon. The goal is a velvety topping that retains some fluidity rather than stiff whipped cream. If the foam becomes too thick, gently fold in a teaspoon or two of cold milk until the desired consistency returns.
- Step 5: Prepare the Iced Coffee for Serving. If serving the cold foam with coffee, divide ice cubes between two clean serving glasses and pour approximately 1 cup (240 ml) of chilled cold brew coffee or iced coffee into each glass, leaving enough space above the coffee for the topping. You can also use iced espresso or an iced latte prepared according to your personal preference. For a visually attractive layered drink, choose transparent glasses and avoid filling them all the way to the rim. Taste the coffee before adding any additional sweetener, as the vanilla cold foam already provides sweetness. Preparing the beverage before adding the topping is important because freshly made cold foam has its best volume and texture immediately after frothing.
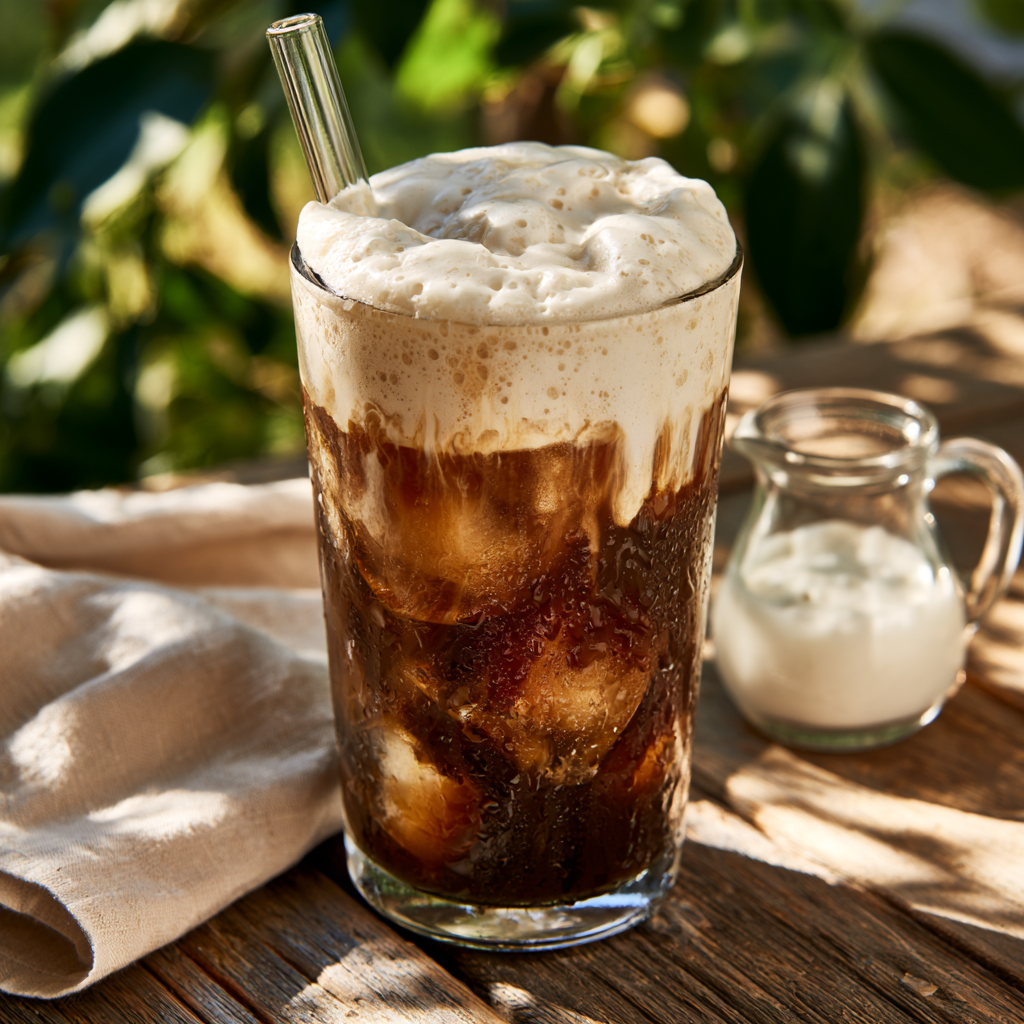
- Step 6: Gently Pour the Cold Foam Over the Coffee. Divide the freshly prepared vanilla sweet cream cold foam evenly between the two glasses, pouring it slowly over the surface of the chilled coffee or gently over the ice to encourage a visible creamy layer. The foam should settle into a soft, pale topping that briefly rests above the darker beverage before gradually blending into it. Avoid stirring immediately if you want to preserve the attractive layered appearance. If desired, finish with a very light dusting of cinnamon or cocoa powder, taking care not to add so much garnish that the delicate foam becomes weighed down. Serve promptly while the topping is fresh, airy, and beautifully silky.
- Step 7: Taste, Adjust, and Enjoy Immediately. Take a sip through the creamy cold foam and into the chilled coffee to experience the contrast between the smooth vanilla topping and the richer coffee beneath it. The foam should taste lightly sweet, creamy, and balanced rather than excessively sugary or dense. If you prefer a stronger vanilla flavor, increase the vanilla extract slightly in your next batch; if you want a sweeter topping, adjust the syrup in small increments. Because cold foam gradually loses volume as its air bubbles collapse, it is best served shortly after frothing rather than prepared hours in advance. Enjoy with cold brew, iced coffee, iced espresso, or another chilled beverage of your choice.
- Step 8: Store Unfrothed Cold Foam Base Properly. If you would like to prepare the recipe ahead of time, combine the milk, cream, vanilla syrup, and vanilla extract without frothing, then transfer the mixture to a clean, airtight food-safe container and refrigerate promptly at or below 40°F (4°C). For best quality, use the prepared base within approximately 24–48 hours, provided the original dairy ingredients remain within their safe storage periods. Stir or shake the refrigerated mixture gently before frothing, as minor separation may occur naturally. Froth only the portion needed immediately before serving, since already-aerated cold foam will gradually collapse and lose its smooth texture during storage. Discard any dairy mixture that has been left at room temperature for more than two hours, or one hour if the surrounding temperature exceeds 90°F (32°C).
Notes
Use Very Cold Ingredients. For the best homemade Cold Foam Recipe, use whole milk and heavy whipping cream directly from the refrigerator. Cold ingredients help maintain a pleasant texture during frothing and are particularly important for cream-based foam. Avoid allowing the mixture to sit at room temperature while preparing your iced coffee. For convenience, measure the ingredients just before serving and keep unused dairy products refrigerated.
Choose the Right Milk-to-Cream Ratio. This recipe uses equal parts whole milk and heavy whipping cream to produce a rich, silky vanilla sweet cream cold foam. If you prefer a lighter topping, experiment with increasing the amount of milk while reducing the heavy cream. Keep in mind that a higher proportion of milk may produce a thinner, airier foam, while more cream can create a thicker consistency resembling lightly whipped cream. Adjust the ratio gradually to find your preferred texture.
Avoid Over-Frothing. One of the most common mistakes when making cream-based cold foam is frothing the mixture for too long. Begin with approximately 15–30 seconds using a handheld frother, then check the texture. The ideal consistency is smooth, airy, lightly thickened, and still pourable. If the mixture begins holding stiff peaks, stop immediately. Over-frothed cold foam can become too thick to spread gently over iced coffee.
Use Pure Vanilla Extract for Better Flavor. Pure vanilla extract contributes a warm, fragrant aroma that complements the sweetness of vanilla syrup and the rich flavor of coffee. This recipe uses ¼ teaspoon of vanilla extract for two servings, creating a noticeable but balanced vanilla flavor. If you prefer a milder result, reduce the amount slightly. Avoid adding too much extract, as it can overpower the delicate creaminess of the foam.
Customize the Sweetness. Vanilla syrup provides the familiar lightly sweetened coffee-shop flavor in this Cold Foam Recipe. The recipe includes 2 teaspoons for two servings, but you can adjust the quantity depending on your preferred sweetness and the coffee you're serving. For a less-sweet version, start with 1 teaspoon of syrup or omit it entirely and rely on vanilla extract for aroma. Taste the mixture before frothing and make small adjustments.
Use a Tall Narrow Container. A tall, narrow frothing container allows the handheld milk frother to circulate the liquid efficiently while reducing splashing. Choose a container with enough empty space to accommodate expansion as air enters the mixture. Keep the frother head submerged when starting, then adjust its position slightly to produce fine bubbles. Avoid using an excessively wide bowl for a very small batch, since the frother may struggle to aerate the shallow liquid.
Make Cold Foam Without a Frother. If you do not own a handheld milk frother, try using a clean French press or a suitable electric frother with a cold setting. For the French press method, pour the chilled mixture into the container, leaving generous space for expansion, then repeatedly move the plunger until the topping becomes airy. A small blender may also work, especially for larger batches. Different methods produce different textures, so use the appearance and pourability of the foam to decide when it is ready.
Try a Lighter Milk-Only Version. For a lighter cold foam, omit the heavy whipping cream and froth thoroughly chilled nonfat or low-fat milk with a small amount of vanilla flavoring. This produces a different style of foam that is generally airier and less rich than vanilla sweet cream. Plain nonfat milk can froth effectively because its proteins help stabilize air bubbles. The result will not have the same creamy mouthfeel as the original recipe, but it can be a pleasant everyday alternative.
Make Dairy-Free Cold Foam. For a dairy-free variation, replace the dairy ingredients with a plant-based beverage specifically formulated for frothing, such as some barista-style oat or soy milks. Unsweetened soy milk may produce a relatively stable foam, while almond milk can be less consistent. For a richer dairy-free topping, experiment with a suitable plant-based whipping cream. Always check that your vanilla syrup and other flavorings meet your dietary needs, and remember that texture will vary depending on the products used.
Add Chocolate for a Mocha Variation. To prepare chocolate cold foam, mix approximately ½ teaspoon of unsweetened cocoa powder with a little vanilla syrup until smooth, then incorporate it into the cold foam base before frothing. This helps prevent dry cocoa clumps from forming. Froth gently until the mixture becomes creamy and pourable. Serve over iced espresso, cold brew, or iced mocha for a dessert-inspired coffee topping. Avoid adding excessive cocoa powder because it can make the mixture grainy.
Create Pumpkin Spice Cold Foam. For a seasonal pumpkin spice variation, add approximately 1 teaspoon of smooth pumpkin purée and a small pinch of pumpkin pie spice to the liquid mixture before frothing. Mix thoroughly to distribute the pumpkin and spices, then aerate until creamy. Pumpkin purée can affect foam stability, so use a small quantity and adjust according to the finished texture. Pour over iced cold brew and finish with a light dusting of cinnamon for a comforting autumn-inspired drink.
Pour the Foam Gently. For an attractive layered iced coffee, prepare the chilled beverage before frothing the topping. Pour the freshly prepared cold foam slowly over the ice or the back of a spoon rather than dropping it forcefully into the glass. This encourages the foam to remain visible on the surface for a short period. Some natural blending will occur as the drink stands, which is completely normal. Serve immediately for the best layered appearance and freshest texture.
Prepare the Base Ahead of Time. You can combine the milk, heavy cream, vanilla syrup, and vanilla extract ahead of time without frothing. Transfer the mixture to a clean, airtight container and refrigerate at or below 40°F (4°C). For best quality, use within approximately 24–48 hours, provided the original ingredients remain safe to use. Shake or stir the mixture gently before frothing, as minor separation can occur during refrigeration. Always froth shortly before serving because cold foam loses volume as the trapped air bubbles gradually collapse.
Store Dairy Ingredients Safely. Cold foam containing milk and heavy cream is perishable and should not be left at room temperature for extended periods. Keep ingredients refrigerated until preparation and return unused dairy products to the refrigerator promptly. Follow the two-hour rule for perishable foods, reducing it to one hour when temperatures exceed 90°F (32°C). Avoid saving foam that has been sitting in an unrefrigerated drink for an extended period. Use clean utensils and containers whenever preparing or storing the unfrothed mixture.
Serve With Different Iced Drinks. Although vanilla sweet cream cold foam is particularly delicious over cold brew, it can also be served with iced lattes, iced americanos, iced espresso, and chilled mocha drinks. For a refreshing variation, try it over iced chai or iced matcha. Remember that the foam already contains a small amount of vanilla syrup, so taste your beverage before adding additional sweetener. Combining the creamy topping with a less-sweet coffee can help create a pleasant balance between rich coffee flavor and vanilla sweetness.
Avoid Freezing Finished Cold Foam. Finished cold foam is not ideal for freezing because its delicate bubble structure breaks down during freezing and thawing. The result is usually a separated liquid rather than a smooth, airy topping. For the best quality, prepare small batches as needed and enjoy the foam immediately after frothing. If you want to save time, refrigerate the unfrothed base in advance and aerate it just before serving.