Ingredients
Equipment
Method
- Step 1: Prepare the Oven and Cake Pans. Preheat your oven to 350°F (175°C). Lightly grease two 8-inch (20 cm) round cake pans, preferably at least 2 inches deep, and line their bottoms with parchment paper. Lightly grease the parchment and dust the sides with a small amount of cocoa powder or flour, tapping out any excess. Proper pan preparation helps the delicate chocolate sponge release cleanly after baking. Arrange an oven rack near the center of the oven and allow the oven to preheat fully while preparing the batter. Gather all your ingredients and bring the eggs and buttermilk to room temperature for easier mixing. Using two equal-size pans will help create even chocolate cake layers that are easier to stack with the pistachio-kataifi filling.
- Step 2: Combine the Dry Chocolate Cake Ingredients. In a large mixing bowl, sift together 220 g all-purpose flour, 65 g natural unsweetened cocoa powder, 1 1/2 teaspoons baking powder, 1 teaspoon baking soda, and 1/2 teaspoon fine salt. Add 275 g granulated sugar and whisk everything thoroughly until the mixture looks uniform and no large cocoa lumps remain. Sifting the cocoa powder helps distribute it evenly throughout the batter, while whisking the dry ingredients ensures the leavening agents are properly dispersed. Use natural cocoa powder for this formulation because its acidity contributes to the reaction with baking soda. Avoid packing flour into measuring cups or adding extra flour, since too much can make the cake dense or dry.
- Step 3: Mix the Wet Ingredients. In a separate medium bowl, add 2 large eggs, 240 ml buttermilk, 120 ml neutral vegetable oil, and 2 teaspoons vanilla extract. Whisk until the eggs are fully incorporated and the mixture looks relatively smooth. The vegetable oil helps produce a soft, moist chocolate sponge, while the buttermilk contributes acidity and tenderness. If you do not have buttermilk, combine 225 ml milk with 15 ml lemon juice or white vinegar and let the mixture stand for approximately 10 minutes before using. This homemade substitute may behave slightly differently from cultured buttermilk but works as a practical alternative. Make sure the ingredients are properly combined before adding them to the dry mixture.
- Step 4: Prepare the Chocolate Cake Batter. Pour the wet ingredients into the bowl containing the flour, cocoa powder, sugar, and leavening ingredients. Mix gently with a whisk or electric mixer on low speed until the ingredients are just combined. Gradually add 180 ml hot brewed coffee or hot water while stirring carefully. The hot liquid helps the cocoa disperse and contributes to the batter's deep chocolate flavor. Coffee can intensify the cocoa taste, but hot water is a suitable alternative if you prefer not to use coffee. The finished batter will be noticeably thinner than many traditional butter-based cake batters, which is normal for this recipe. Scrape the sides and bottom of the bowl to ensure everything is mixed evenly, but avoid prolonged mixing once the flour is fully incorporated.
- Step 5: Divide and Bake the Chocolate Cake Layers. Divide the prepared chocolate batter evenly between the two lined 8-inch cake pans. Gently tap each pan once or twice on the countertop to release unusually large trapped air bubbles without excessively disturbing the batter. Place the pans in the preheated oven and bake at 350°F (175°C) for approximately 28–35 minutes, or until a toothpick inserted near the center comes out with a few moist crumbs rather than wet batter. Baking time may vary according to your oven and the depth of the batter. Avoid repeatedly opening the oven door during the early baking stage because sudden temperature changes can affect the cake's rise. Once baked, remove the pans from the oven and place them on a heat-resistant surface to begin cooling.
- Step 6: Cool the Chocolate Sponge Completely. Allow the baked cake layers to cool in their pans for approximately 15 minutes before carefully running a thin knife around the edges and turning them onto a wire cooling rack. Remove the parchment paper and leave the sponges to cool completely, typically another 60–75 minutes depending on room temperature. This cooling stage is extremely important because warm cake layers can soften the pistachio filling, melt the chocolate ganache, and cause the assembled cake to slide. Once the sponges have cooled, inspect their surfaces and use a serrated knife or cake leveler to trim any pronounced dome if necessary. Keep the layers intact and handle them gently so they remain moist and tender. Prepare the pistachio filling and chocolate ganache during this cooling period to make the recipe more efficient.
- Step 7: Prepare and Chop the Kataifi Pastry. Measure 150 g raw kataifi pastry and separate any tightly packed strands using clean hands. If the pastry was purchased frozen, thaw it according to the package instructions before preparation. Transfer the kataifi to a cutting board and chop it into shorter pieces, approximately 1–2 inches long, so the strands are easier to toast evenly and incorporate into the pistachio filling. Do not use ordinary uncooked dried pasta as a substitute because its texture and cooking properties are different. The purpose of the kataifi is to create the signature delicate, crispy texture associated with Dubai chocolate desserts. Keep the prepared pastry away from unnecessary moisture and have a wide skillet ready for the next step.
- Step 8: Toast the Kataifi Until Golden and Crispy. Place a wide nonstick skillet over medium-low to medium heat and melt 20 g unsalted butter. Add the chopped kataifi pastry and stir frequently with a wooden spoon or silicone spatula, gently separating any clumps as the strands begin to toast. Continue cooking for approximately 8–12 minutes, or until the pastry is evenly golden brown, dry, and crispy. Actual cooking time depends on your pan size, heat level, and the moisture content of the pastry. Avoid using excessively high heat because the delicate strands can burn before becoming uniformly crisp. Once the kataifi reaches a beautiful golden color, remove it from the heat and transfer it to a plate or shallow tray. Spread it out and allow it to cool completely before combining it with pistachio cream.
- Step 9: Prepare the Creamy Pistachio-Kataifi Filling. Place 320 g sweetened pistachio cream in a medium mixing bowl. Add 15 g tahini if desired, along with a small pinch of salt if the filling tastes overly sweet. Stir until the mixture is smooth and evenly combined. Add the completely cooled toasted kataifi and gently fold it into the pistachio cream using a spatula until the crisp pastry strands are evenly coated. The finished filling should be thick, creamy, and slightly textured, with enough consistency to spread without flowing freely. Avoid adding water, milk, or other unnecessary liquids because extra moisture can make the kataifi soften more quickly. If the pistachio cream is unusually firm, let it soften gently at room temperature before mixing rather than adding large amounts of liquid. Prepare this mixture relatively close to assembly for the best crunchy texture.
- Step 10: Make the Smooth Chocolate Ganache. Finely chop 350 g semi-sweet or dark chocolate and place it in a heatproof bowl. Pour 250 ml heavy whipping cream into a small saucepan and heat gently over medium-low heat until the cream is steaming and just beginning to show small bubbles around the edges, without allowing it to boil vigorously. Pour the hot cream evenly over the chopped chocolate and allow the mixture to stand undisturbed for approximately 2–3 minutes. Starting from the center, stir slowly with a spatula until the chocolate melts completely and the mixture becomes smooth, glossy, and uniform. If small pieces of chocolate remain, warm the bowl very gently and stir until smooth, taking care not to overheat or introduce excess water. Allow the ganache to cool until it becomes thick and spreadable, usually about 20–35 minutes depending on room temperature. Stir occasionally and avoid using the ganache while it is hot or runny.
- Step 11: Prepare the Cake Layers for Assembly. Once both chocolate sponge layers are completely cooled, place the first layer on a sturdy cake board, cake stand, or serving plate. If necessary, level the top with a serrated knife so that the second layer can sit evenly. The sponge should be moist but stable enough to support the pistachio filling. Reserve approximately 120 g of the thickened chocolate ganache for creating a protective border around the filling, leaving the remainder for covering the cake. Transfer the reserved ganache into a piping bag fitted with a round tip or use a sturdy food-safe bag with a small corner removed. Keep the remaining ganache covered at a cool room temperature so it stays spreadable. Do not begin assembly until the filling, cake layers, and ganache have reached suitable temperatures and consistencies.
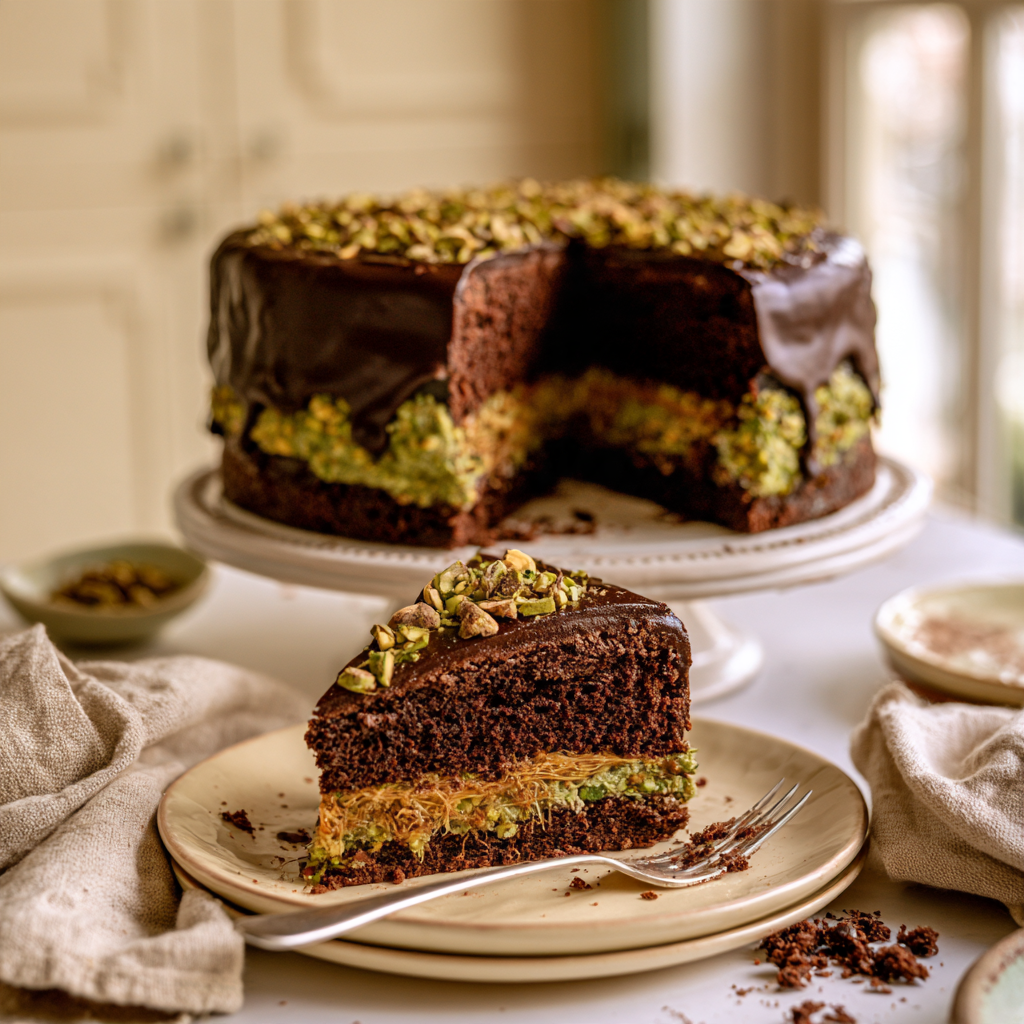
- Step 12: Add the Crunchy Pistachio Filling. Pipe a thick, continuous ring of cooled, spreadable chocolate ganache around the outer edge of the bottom sponge layer, making the border high enough to contain the pistachio filling. Spoon the prepared pistachio-kataifi mixture into the center of the ganache border and spread it into an even layer using an offset spatula. The filling should remain within the border rather than extending over the edges. If the filling appears too thick to spread comfortably, press and distribute it gently rather than adding water. Avoid excessive pressure that could damage the chocolate sponge underneath. Once the filling is evenly distributed, carefully position the second chocolate cake layer on top with its flatter surface facing upward. Press very gently to secure the layers without squeezing out the filling. Check that the cake is level before moving to the next stage.
- Step 13: Apply the Chocolate Ganache Coating. Using an offset spatula, spread a thin layer of the remaining cooled chocolate ganache over the top and sides of the assembled cake, filling any small gaps between the layers. This initial coating helps trap loose cake crumbs and creates a more even surface. Refrigerate the cake briefly if the coating seems too soft, then use the remaining ganache to cover the top and sides with a smooth or gently textured finish. The ganache should be spreadable rather than hot or excessively runny. For a simple homemade appearance, use the spatula to create soft swirls across the surface instead of attempting a perfectly polished bakery finish. Work carefully around the cake to avoid disturbing the pistachio filling. The result should be a rich, dark chocolate exterior with the hidden crunchy pistachio layer secured inside.
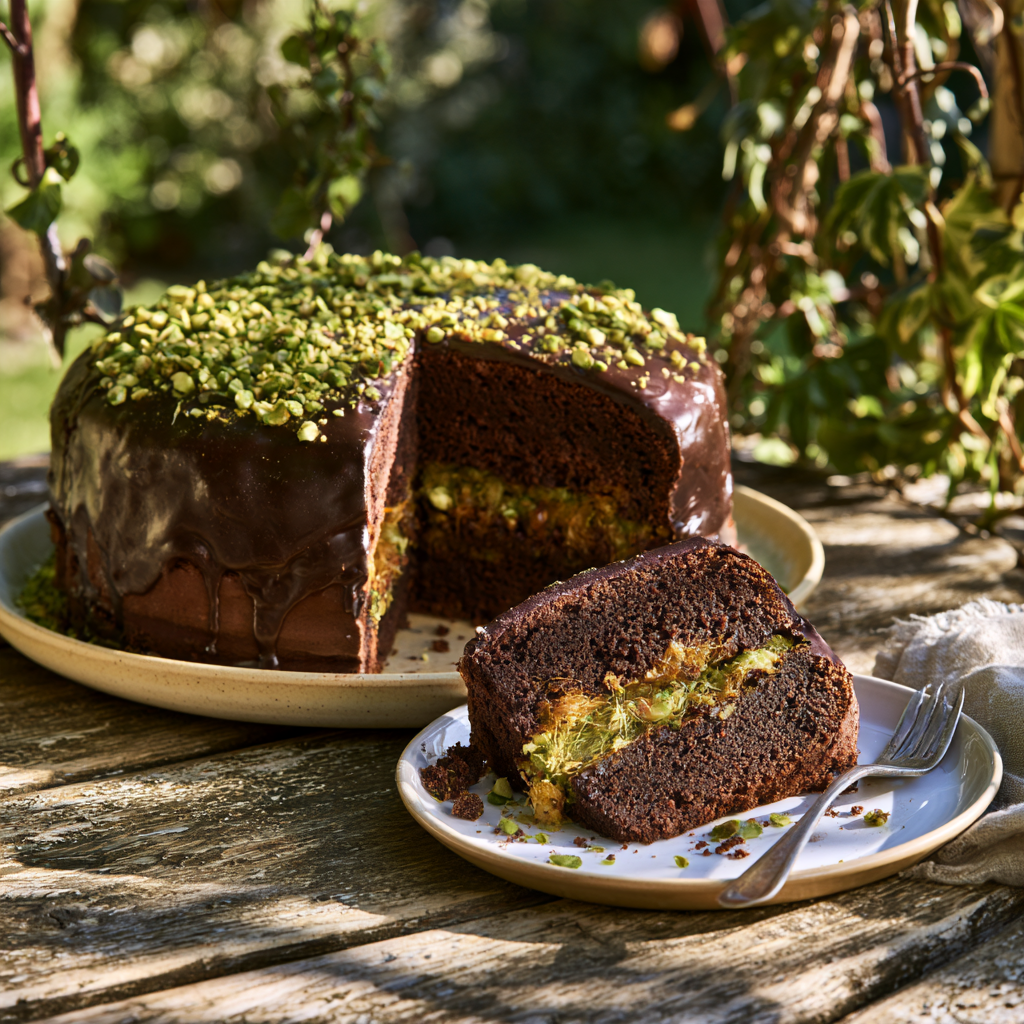
- Step 14: Decorate the Dubai Chocolate Cake. Once the ganache coating is in place, decorate the cake with approximately 20 g finely chopped unsalted pistachios. Sprinkle them lightly around the top edge or concentrate them in one section for a natural, homemade presentation. If desired, warm 1 tablespoon of sweetened pistachio cream just enough to make it easy to drizzle, then create a few simple lines or swirls across the top. For an additional crunchy detail, sprinkle a small amount of separately reserved, freshly toasted kataifi over the cake shortly before serving. Avoid adding too many decorations because the filling already provides a rich combination of chocolate, pistachio, and pastry. The aim is an attractive cake that clearly communicates its ingredients without becoming overly complicated or artificially styled.
- Step 15: Chill the Cake Before Slicing. Transfer the decorated Dubai chocolate cake to the refrigerator for approximately 30 minutes, or until the ganache has firmed enough for the layers to remain stable when sliced. Chilling helps the chocolate coating set and makes it easier to cut clean portions without shifting the pistachio filling. Avoid leaving the cake uncovered in the refrigerator for an extended period because the sponge may dry out and absorb refrigerator odors. Remember that kataifi gradually loses some of its crispness after being combined with a moist cake, so the filling is generally crunchiest when prepared and served reasonably close together. Before serving, allow the refrigerated cake to stand for approximately 15–20 minutes if room temperature and food safety conditions permit, so the chocolate ganache softens slightly and the flavors become more pronounced.
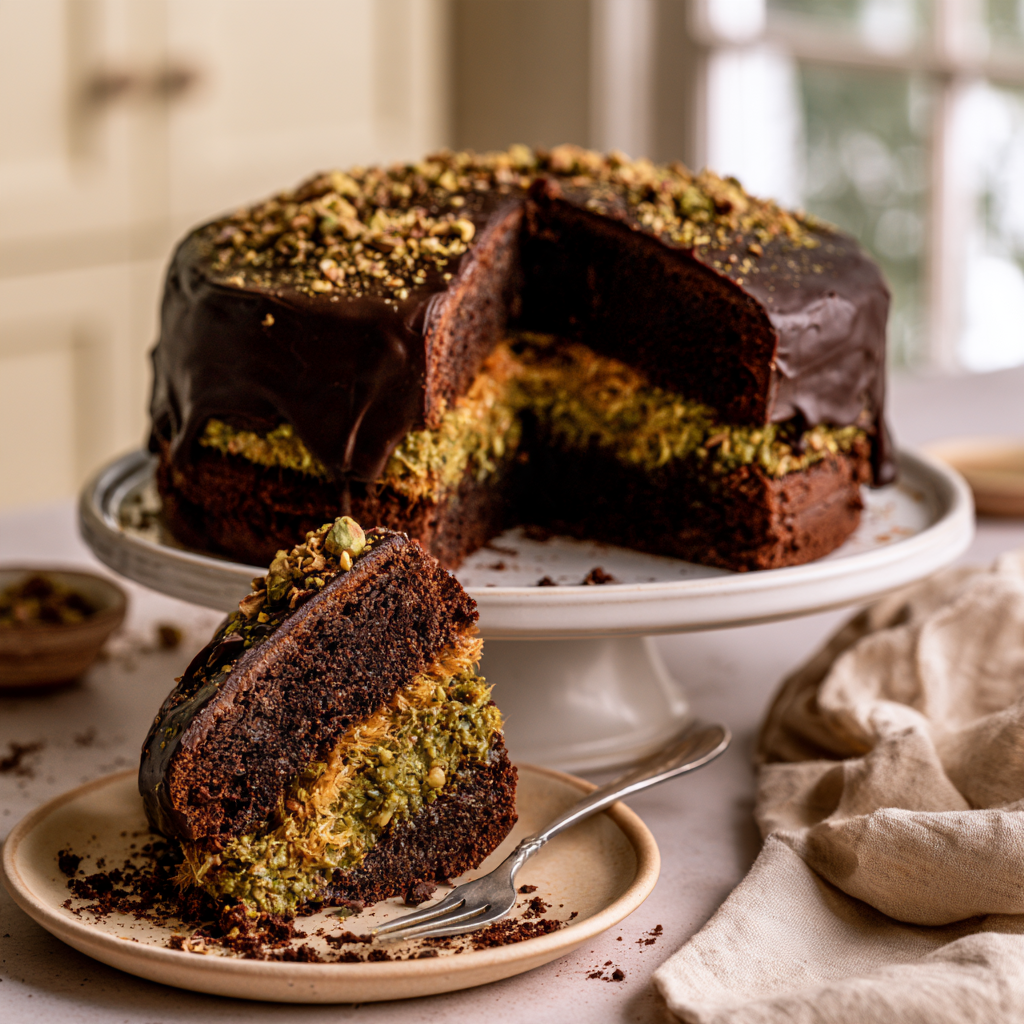
- Step 16: Slice, Serve, and Store the Dubai Chocolate Cake. Use a sharp knife to cut the finished cake into approximately 12 slices, wiping the blade clean between cuts for a neater presentation. Each portion should reveal two layers of moist chocolate sponge separated by a generous pistachio-kataifi filling, with a smooth chocolate ganache coating on the outside. Serve the cake with coffee, tea, or another preferred beverage to complement its rich chocolate flavor. Because the ganache contains fresh dairy, store leftover cake in a covered container in the refrigerator at 40°F (4°C) or below and aim to enjoy it within approximately 3–4 days, provided the ingredients were fresh and handled safely. Do not leave perishable cake at room temperature for more than two hours. Individual slices may be wrapped and frozen for approximately two months for best quality, although thawing may soften the crunchy kataifi filling. Thaw frozen portions in the refrigerator before serving.
Notes
For the most delicious Dubai Chocolate Cake Recipe, use good-quality cocoa powder, flavorful pistachio cream, and freshly toasted kataifi pastry. These three ingredients define the cake's rich chocolate flavor, nutty filling, and signature crunchy texture.
Use two 8-inch (20 cm) round cake pans for this recipe. Pans that are at least 2 inches deep provide adequate space for the batter to rise without overflowing.
Use natural unsweetened cocoa powder for the chocolate sponge. This formulation relies partly on its acidity to work with the baking soda. Dutch-process cocoa may require adjustments to the leavening ingredients.
Weigh your flour and cocoa powder using a digital kitchen scale. Excess flour can make the chocolate sponge heavy or dry, while accurate measurements help maintain a moist, tender texture.
Bring the eggs and buttermilk to room temperature before preparing the cake batter. This helps the ingredients mix more evenly and reduces the risk of an uneven batter.
The buttermilk contributes tenderness and helps the chocolate sponge develop its texture. If needed, use 225 ml milk mixed with 15 ml lemon juice or white vinegar as a practical substitute, allowing it to stand for 10 minutes before adding it to the batter.
Hot brewed coffee can intensify the chocolate flavor without necessarily creating a strong coffee taste. For a coffee-free variation, replace the coffee with an equal quantity of hot water.
The chocolate cake batter will be relatively thin after adding the hot liquid. This is normal for the recipe. Do not add extra flour merely to thicken the batter.
Avoid overmixing the batter after combining the wet and dry ingredients. Mix only until evenly incorporated to help maintain a tender sponge.
Begin checking the cake layers near 28 minutes of baking. A toothpick inserted near the center should come out with a few moist crumbs rather than wet batter. Avoid overbaking because dry sponge can make the assembled dessert less enjoyable.
Allow the chocolate cake layers to cool completely before assembling. Warm cake can soften the pistachio filling, melt the ganache, and cause the finished cake to slide.
For the best pistachio flavor, choose sweetened pistachio cream with a clearly stated pistachio content. A bright green color alone does not guarantee strong pistachio flavor or ingredient quality.
Sweetened pistachio cream and pure pistachio paste are not interchangeable in equal quantities. Pure paste is generally more concentrated and less sweet and may require additional adjustments.
Use genuine kataifi pastry for the traditional Dubai-style crunchy texture. Kataifi is made from thin pastry strands and may also be labeled kadayif in Turkish or Middle Eastern grocery stores.
If using frozen kataifi pastry, thaw it according to the package instructions before chopping and toasting. Avoid adding frozen clumps directly to the skillet because they may brown unevenly.
Chop the kataifi into shorter pieces before toasting. This makes it easier to brown evenly and distribute throughout the pistachio cream.
Toast the kataifi in a wide skillet with unsalted butter, stirring frequently, until it becomes uniformly golden brown and crisp. Avoid high heat because thin pastry strands can burn quickly.
Cool the toasted kataifi completely before mixing it with the pistachio cream. Warm pastry can change the filling's consistency and reduce its final crunch.
For the most satisfying crunchy filling, combine the toasted kataifi with pistachio cream relatively close to assembly. The pastry naturally softens over time after being mixed with creamy ingredients.
Avoid adding extra milk, water, or thin syrups to the pistachio-kataifi filling. Excess moisture can soften the pastry and make the cake difficult to assemble.
Tahini is optional but contributes a slightly earthy sesame flavor that complements pistachios. Add it gradually and remember that sesame is a major food allergen.
Use semi-sweet or moderately dark chocolate for the ganache to balance the sweetness of the pistachio cream. Chocolate containing approximately 55–65% cocoa generally provides a rich flavor without making the dessert excessively bitter.
Finely chop the chocolate before preparing the ganache so it melts smoothly when combined with the hot cream. Avoid overheating the mixture because excessive heat can affect its texture.
Allow the chocolate ganache to cool until thick and spreadable before using it. Hot or overly runny ganache can leak around the cake layers and soften the filling.
Reserve approximately 120 g of thickened chocolate ganache to pipe a sturdy border around the lower chocolate cake layer. This dam helps contain the generous pistachio-kataifi filling.
Use a light hand when spreading the pistachio filling. Excessive pressure can compress the chocolate sponge and damage its soft, tender texture.
If the chocolate cake layers have domed during baking, carefully level them with a serrated knife after cooling. Flat layers make the assembled cake more stable and easier to decorate.
For an attractive homemade presentation, finish the cake with smooth chocolate ganache, a few chopped pistachios, and a small amount of reserved crispy kataifi. Elaborate decorations are not necessary.
Refrigerate the assembled cake for approximately 30 minutes to help the ganache set before slicing. This makes the layers more stable and creates cleaner slices.
For the best serving texture, allow refrigerated cake to stand for approximately 15–20 minutes before serving, provided it remains within safe food-handling limits. The ganache will soften slightly and the chocolate flavor may become more noticeable.
If preparing the cake in advance, bake the sponge layers separately and keep them tightly wrapped. Prepare the kataifi filling closer to assembly to preserve as much crunch as possible.
The cake's crispy center will naturally soften during storage, especially after refrigeration. This is expected because moisture moves from the cake and filling into the toasted pastry over time.
Store Dubai chocolate cake containing heavy cream or other perishable components in the refrigerator at 40°F (4°C) or below. For best freshness, consume within approximately 3–4 days when safely prepared and stored.
To freeze the cake, wrap individual slices securely and place them in freezer-safe containers for approximately two months for best quality. Thaw in the refrigerator, recognizing that the kataifi may lose some crispness.
Dubai chocolate cake commonly contains wheat, milk, eggs, pistachios, and possibly sesame. Review ingredient labels carefully and inform guests about allergens before serving.
This dessert is rich and indulgent, and the nutritional properties of pistachios or cocoa do not automatically make it low in sugar, calories, or saturated fat. Serve portions appropriate to your preferences and dietary needs.
OoohDelish Dubai Chocolate Secret: The most important feature of an unforgettable Dubai Chocolate Cake Recipe is the balance between a moist chocolate sponge, smooth pistachio cream, and crispy golden kataifi. Toast the pastry thoroughly, keep the filling thick, use cooled cake layers, and assemble carefully so every slice delivers a beautiful contrast between soft, creamy, and crunchy textures.