Ingredients
Equipment
Method
- Step 1: Prepare Your Active Sourdough Starter. Before beginning your Same Day Sourdough Bread Recipe, make sure your sourdough starter is healthy, bubbly, and sufficiently active to leaven the dough without commercial yeast. Use 125 g of a recently fed starter at 100% hydration, meaning it has been maintained using equal weights of flour and water. Ideally, the starter should have risen noticeably, developed bubbles throughout its structure, and reached or approached its peak after feeding. A vigorous starter is essential for completing the bread within a single day because weak or sluggish cultures may require significantly longer fermentation. If your starter has been stored in the refrigerator, feed it as needed until it rises predictably and smells pleasantly fermented. Do not rely exclusively on the float test, which is not a dependable measure of starter readiness. Once the starter is active, gather and accurately weigh the flour, water, and salt, then prepare a clean mixing bowl and a suitable warm location for fermentation.
- Step 2: Combine the Sourdough Starter and Water. Pour 340 g of water into a large mixing bowl, reserving the remaining 10 g for incorporating the salt later. Add 125 g of active sourdough starter and stir gently with a dough whisk, spoon, or clean hands until the starter becomes reasonably dispersed throughout the water. It is not necessary to dissolve every small piece completely, but distributing the starter evenly helps fermentation begin throughout the dough. Use water at an appropriate temperature to encourage a finished dough temperature near 75–79°F (24–26°C), taking your flour and kitchen temperatures into account. Avoid using excessively hot water because it can harm the microorganisms responsible for natural fermentation. Once the mixture appears relatively uniform, proceed immediately to adding the bread flour.
- Step 3: Mix the Bread Flour Into the Starter Mixture. Add 500 g of bread flour to the bowl containing the water and sourdough starter. Mix thoroughly using a sturdy spoon, dough whisk, or your hands until all the flour is hydrated and no large dry pockets remain. The dough will initially appear rough, shaggy, and slightly sticky, which is completely normal for this style of artisan sourdough bread. Scrape the sides of the bowl to incorporate any remaining flour, but avoid adding additional flour simply because the dough feels tacky. You do not need to knead the mixture until smooth at this stage because resting and subsequent stretches and folds will help develop its gluten structure. Cover the bowl with a reusable cover or clean, damp kitchen towel and allow the dough to rest for approximately 20–30 minutes so the flour can absorb the water and the dough can become more cohesive.
- Step 4: Add the Salt and Remaining Water. After the initial resting period, sprinkle 10 g of fine sea salt evenly over the dough and add the reserved 10 g of water. Using lightly dampened fingers, gently pinch, squeeze, and fold the dough until the salt is completely incorporated and the mixture becomes reasonably uniform. The dough may temporarily feel slippery or slightly loose as the additional water is absorbed, but it should gradually become more cohesive with gentle mixing. Salt enhances the flavor of homemade sourdough bread and influences gluten strength and fermentation behavior, so accurate measurement is important. Once the salt has been distributed throughout the dough, cover the bowl again and let it rest for approximately 30 minutes before beginning the first stretch-and-fold set. During this period, natural fermentation continues as the starter's microorganisms begin producing the gases and flavor compounds that contribute to sourdough bread's characteristic structure.
- Step 5: Perform the First Stretch-and-Fold Set. Lightly wet your hands to prevent excessive sticking, then reach underneath one side of the dough and gently lift it upward until you feel resistance. Fold the stretched portion over the center, rotate the bowl approximately one-quarter turn, and repeat the movement from the remaining three sides to complete one full stretch-and-fold set. This gentle technique helps strengthen the gluten network without requiring intensive kneading and encourages the dough to become smoother, more elastic, and better able to retain fermentation gases. Avoid pulling so aggressively that the dough tears, and do not press down unnecessarily on developing air pockets. After completing the first set, cover the bowl and let the dough rest for approximately 30 minutes. The mixture may still appear slightly sticky and loose, but it should gradually begin developing a stronger, more organized structure with each successive folding session.
- Step 6: Complete Three Additional Stretch-and-Fold Sets. Repeat the same stretch-and-fold process three more times, spacing each set approximately 30 minutes apart, for a total of four sets during the early bulk fermentation period. During each set, gently lift and fold all four sides of the dough toward the center, allowing the mixture to rest covered between sessions. As gluten develops, you should notice the dough becoming increasingly smooth, elastic, and resistant to stretching. It may also begin holding its shape more effectively instead of spreading completely across the bottom of the bowl. These changes indicate that the gluten network is becoming stronger and better equipped to retain the carbon dioxide produced during natural fermentation. If the dough is already very strong and resists stretching, avoid forcing additional folds that could damage its structure. Once the final set is complete, cover the bowl and allow the dough to continue fermenting undisturbed until it reaches the appropriate stage of bulk fermentation.
- Step 7: Allow the Dough to Complete Bulk Fermentation. Keep the covered dough in a moderately warm, draft-free location, ideally maintaining a dough temperature of approximately 75–79°F (24–26°C), until bulk fermentation is complete. For this same-day method, the total bulk fermentation period may take approximately 4–6 hours or longer from the initial mixing, depending on starter activity, flour characteristics, and temperature. Because the dough has already been fermenting during the mixing and folding stages, do not restart the fermentation clock after the last fold. Look for an increase in volume of roughly 40–60% as a useful starting guideline for this formula and temperature range, along with visible bubbles, a gently rounded surface, and a soft wobble when the bowl is moved. The dough should feel lighter and more aerated than when first mixed. Avoid relying solely on elapsed time or waiting automatically for the dough to double because excessive fermentation can weaken its structure. If the dough remains dense and shows little activity, allow additional time before shaping.
- Step 8: Pre-Shape the Sourdough Dough Into a Loose Round. Once bulk fermentation is complete, gently transfer the dough onto a clean work surface using a dough scraper, taking care not to deflate it unnecessarily. Lightly dust the surface with bread flour if needed, but avoid using excessive flour because some friction is useful during shaping. Bring the outer edges of the dough toward the center to create a loose round, then turn it over so the smoother surface faces upward. Using your hands or bench scraper, gently draw the dough toward you to create a little surface tension without tearing the exterior. The goal is to organize the dough into a manageable shape while preserving the air pockets formed during fermentation. Cover the pre-shaped round with a clean towel and allow it to rest on the counter for approximately 15–20 minutes. This bench rest helps the gluten relax, making the dough easier to shape into a tighter, more attractive loaf.
- Step 9: Shape the Dough Into a Round Artisan Sourdough Loaf. After the bench rest, lightly flour the top of the dough and carefully turn it over so the floured surface faces downward. Gently stretch the dough into a rough rectangle, fold the left and right sides toward the center, then fold the top and bottom portions inward to form a compact package. Turn the dough seam-side down and cup your hands around it, gently pulling the loaf across the work surface to create tension across the outer surface. Rotate the loaf slightly and repeat until it forms a smooth, rounded boule that holds its shape without tearing. Proper shaping helps the dough maintain its structure during proofing and encourages better oven spring. Lightly dust a banneton or towel-lined bowl with rice flour, then carefully transfer the shaped dough into the basket with the seam facing upward. Cover the basket to prevent the surface from drying out while the dough completes its final rise.
- Step 10: Let the Shaped Dough Complete Its Final Proof. Allow the shaped sourdough loaf to rise at room temperature until it becomes slightly fuller, softer, and noticeably more aerated, typically approximately 1–2 hours in a moderately warm kitchen, although the exact timing may vary. For the example same-day baking schedule, plan for approximately 1 hour and 40 minutes of final proofing, adjusting according to the dough's actual behavior. The loaf should show gentle expansion and feel lighter than immediately after shaping. A lightly floured finger indentation that slowly springs back partway can be one useful sign of readiness, but the test should be considered alongside the dough's overall appearance, strength, and volume. Avoid allowing the loaf to overproof, as excessive fermentation can weaken the gluten network and cause the dough to spread when transferred to the oven. Begin preheating the Dutch oven during the final 40–45 minutes of proofing so the baking equipment is thoroughly heated when the loaf is ready.
- Step 11: Preheat the Oven and Prepare the Dutch Oven. Place a suitable Dutch oven with its lid inside the oven and preheat to 450°F (230°C) for approximately 40–45 minutes, following the manufacturer's maximum temperature recommendations. A thoroughly heated Dutch oven creates the intense initial baking environment needed for good oven spring, while its covered interior helps retain moisture released from the dough. This trapped steam delays crust formation during the early baking stage, allowing the bread to expand before its surface becomes firm. Check that the Dutch oven and lid knob are rated for the required temperature, and use sturdy oven mitts when handling the extremely hot equipment. If using parchment paper to transfer the dough, confirm that it is suitable for your baking temperature and keep any exposed edges away from heating elements. Once the oven is fully preheated and the dough has completed its final proof, prepare to score and bake the loaf promptly.
- Step 12: Score the Sourdough Bread for Controlled Oven Spring. Carefully turn the proofed dough out of its basket onto a sheet of oven-safe parchment paper so that the smooth, rounded side faces upward. Using a sharp bread lame or razor blade, make one confident curved or diagonal slash across the surface, approximately 1/4–1/2 inch (6–12 mm) deep. Scoring creates a controlled opening that allows the loaf to expand during the early stages of baking instead of bursting unpredictably through its crust. Avoid pressing heavily on the dough or making repeated hesitant cuts, as these can deflate the loaf or damage its delicate outer structure. Decorative scoring is optional, and a single clean slash is usually sufficient for a beautiful rustic appearance. Work carefully and efficiently to preserve the dough's shape, then prepare to transfer it into the preheated Dutch oven.
- Step 13: Bake the Sourdough Bread Covered for the First 20 Minutes. Carefully remove the preheated Dutch oven from the oven using heavy-duty oven mitts, lift off the lid, and lower the scored dough into the pot using the parchment paper as a transfer aid if appropriate. Immediately replace the lid and return the Dutch oven to the oven. Bake the sourdough bread at 450°F (230°C) for approximately 20 minutes with the lid on. During this stage, heat causes the dough to expand while moisture trapped beneath the lid creates a steamy environment that delays crust formation. This encourages oven spring and helps the loaf develop a well-rounded artisan shape. Avoid removing the lid repeatedly during this first baking period because doing so releases trapped moisture and heat. When the covered stage is complete, the loaf should have expanded significantly, although the crust may still appear relatively pale.
- Step 14: Remove the Lid and Bake Until Deeply Golden. After approximately 20 minutes of covered baking, carefully remove the Dutch oven lid while protecting your hands and face from escaping steam. Continue baking the sourdough uncovered at 450°F (230°C) for another 20–25 minutes, or until the crust becomes deeply golden brown and develops a firm, crisp exterior. During this stage, the surface of the loaf dries and browns, creating the toasted aroma and characteristic crust of artisan sourdough bread. If the crust begins darkening too quickly, reduce the oven temperature slightly during the final portion of baking. For an additional doneness check, insert an instant-read thermometer into the center of the loaf; fully baked sourdough commonly reaches approximately 205–210°F (96–99°C), although temperature should be evaluated together with crust color and overall appearance. Once the bread is thoroughly baked, carefully remove it from the Dutch oven and transfer it to a wire cooling rack.
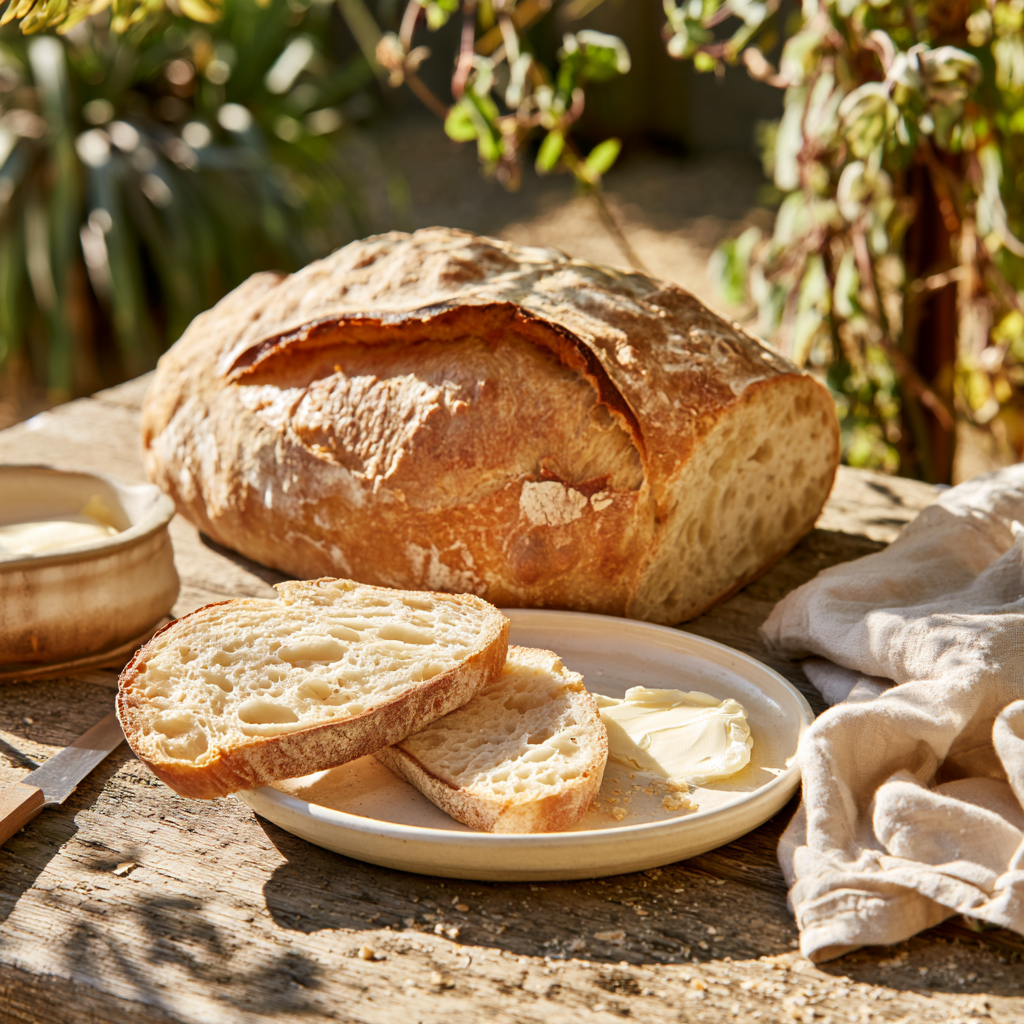
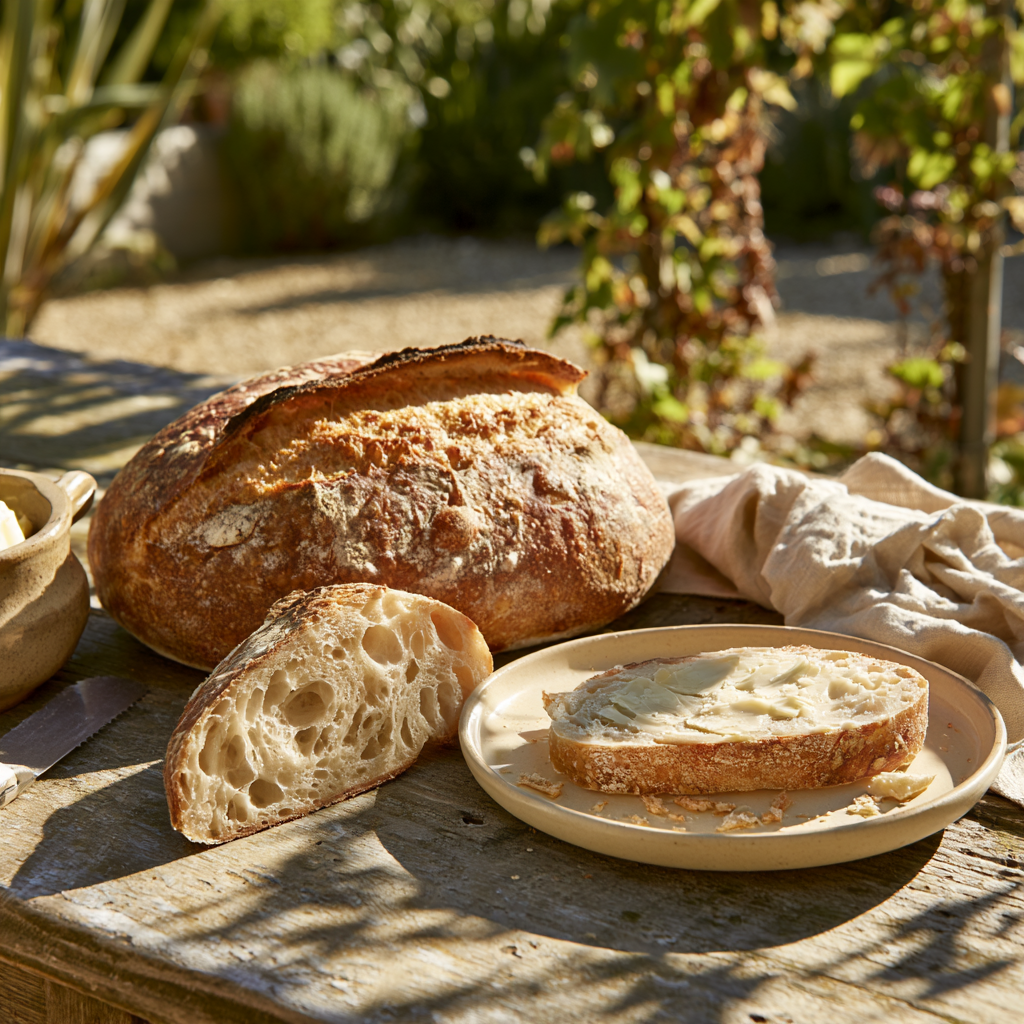
- Step 15: Allow the Sourdough Loaf to Cool Completely. Place the freshly baked sourdough bread on a wire cooling rack and allow it to rest for approximately 1–2 hours before slicing, with 1 hour and 30 minutes used in this recipe's example schedule. Although the golden crust and delicious aroma may make it tempting to cut immediately, the bread's interior continues setting as moisture redistributes during cooling. Slicing the loaf too early can compress the crumb and create a sticky or gummy texture even when the bread has been baked adequately. Leave the loaf uncovered while cooling so air can circulate around its exterior and help preserve its crisp crust. Once the bread is cool enough to cut cleanly, use a sharp serrated bread knife to slice it into approximately 12 portions. The finished loaf should reveal a soft, pleasantly chewy interior beneath a firm, beautifully browned crust.
- Step 16: Serve and Store Your Homemade Same Day Sourdough Bread. Enjoy your freshly baked Same Day Sourdough Bread as breakfast toast, a sandwich base, or a delicious accompaniment to homemade soups, stews, and savory meals. Its slightly tangy flavor and crispy crust pair beautifully with butter, olive oil, cheese, and a variety of spreads. To store leftover bread, allow it to cool completely, then keep it in a clean bread bag or suitable bread container at room temperature for short-term use. Avoid refrigerating ordinary bread unnecessarily because refrigeration can accelerate staling. For longer storage, slice the cooled loaf, place the portions in a freezer-safe bag, and freeze for approximately 2–3 months for the best quality. Individual slices can be toasted directly from frozen when needed. If the bread develops visible mold, discard the affected loaf rather than attempting to remove only the moldy section. Proper storage helps preserve freshness while making homemade sourdough convenient for everyday meals.
Notes
Use a strong, recently fed sourdough starter for this Same Day Sourdough Bread Recipe. The starter should be bubbly, noticeably expanded, and close to peak activity before mixing. A weak starter may extend the fermentation schedule considerably.
This recipe assumes a 100%-hydration sourdough starter, meaning it contains equal weights of flour and water. Using a starter with a different hydration changes the overall dough hydration and may affect handling.
A digital kitchen scale is strongly recommended. Weighing flour, water, starter, and salt provides significantly more consistent results than measuring flour by cups, which can vary depending on how the flour is packed.
For the best gluten development, use strong bread flour with sufficient protein. All-purpose flour can work in some sourdough recipes, but it may require hydration adjustments and can produce a different dough structure.
The total hydration of this dough is approximately 73.3% when the flour and water in the starter are included. The dough will feel tacky and moderately hydrated rather than firm like a low-hydration sandwich bread dough.
Start with 340 g water and reserve 10 g for incorporating the salt after the initial rest. This helps distribute the salt evenly without requiring intensive kneading.
A finished dough temperature around 75–79°F (24–26°C) is a useful starting point for this same-day method. Cooler dough may ferment more slowly, while warmer dough may require a shorter fermentation period.
Avoid using excessively hot water to accelerate fermentation. Very high water temperatures can damage the microorganisms in your starter and may negatively affect the dough's structure.
The float test is not a reliable standalone measure of starter readiness. Focus instead on predictable expansion after feeding, visible bubbles, and an appropriately fermented aroma.
Allow the mixed flour, water, and starter to rest for approximately 20–30 minutes before incorporating the salt. This gives the flour time to hydrate and helps the dough become more cohesive.
Perform approximately four stretch-and-fold sets during early bulk fermentation, spacing the sets about 30 minutes apart. Stop or modify the technique if the dough becomes exceptionally tight or begins tearing.
Keep your hands slightly damp during stretches and folds to reduce sticking. Avoid adding extra flour at every folding stage because doing so changes the recipe's hydration.
Bulk fermentation begins when the starter is mixed into the dough. The mixing, resting, and folding stages are included in this fermentation period, so do not restart the bulk fermentation clock after the final fold.
An approximate 40–60% rise during bulk fermentation can be a useful starting guideline for this recipe under moderate dough temperatures. The ideal endpoint varies with temperature, flour, and fermentation behavior.
Watch for a gently rounded surface, visible bubbles, increasing elasticity, and a soft wobble when moving the dough container. These signs are often more useful than following a strict fermentation timetable.
Do not automatically wait for the dough to double during bulk fermentation. Depending on the dough temperature and recipe, allowing excessive expansion can lead to overfermentation and weakened gluten.
If your dough remains dense and shows little fermentation activity, give it more time rather than shaping prematurely. Underfermented sourdough commonly produces a dense crumb and poor oven spring.
When pre-shaping, handle the dough gently and preserve as much of its developed gas as practical. Excessive pressing can deflate the dough and negatively affect the finished crumb.
Allow approximately 15–20 minutes of bench rest between pre-shaping and final shaping. This gives the gluten time to relax, making it easier to create a smooth, evenly tensioned loaf.
Use gentle surface tension during final shaping. The dough should hold a rounded shape without its outer surface tearing or becoming excessively tight.
Rice flour is useful for dusting bannetons because it tends to resist sticking better than ordinary wheat flour. Apply a light, even coating before placing the shaped dough in the proofing basket.
Place the shaped loaf seam-side up in the proofing basket. When turned out for scoring, the smoother side should face upward and the seam should rest underneath.
Final proofing may take approximately 1–2 hours under favorable conditions, but starter strength and dough temperature determine the actual duration. Avoid baking solely because the timer has finished.
During final proofing, look for gradual expansion and a softer, more aerated feel. A gentle indentation that slowly springs back can be a useful sign, although this test is not perfectly reliable for all doughs.
Preheat your Dutch oven for approximately 40–45 minutes at 450°F (230°C), making sure the pot, lid, and knob are rated for this temperature. Always follow the manufacturer's safety instructions.
A preheated Dutch oven retains steam released by the dough during the first stage of baking. This helps delay crust formation and encourages oven spring.
A single clean score approximately 1/4–1/2 inch (6–12 mm) deep is sufficient for a beginner-friendly rustic sourdough loaf. Use a sharp bread lame or razor blade and avoid repeatedly dragging the blade across the dough.
Bake the loaf covered for approximately 20 minutes at 450°F (230°C), then remove the lid and continue baking uncovered for another 20–25 minutes until the crust is deeply golden.
The internal temperature of fully baked sourdough commonly reaches approximately 205–210°F (96–99°C). Use this reading together with crust color and overall appearance rather than relying on temperature alone.
If the bottom crust burns, try positioning the Dutch oven on a higher oven rack or placing an empty baking sheet on a lower rack to reduce direct heat from below.
Allow the bread to cool for approximately 1–2 hours before slicing. Cutting immediately after baking can compress the still-setting crumb and create an unpleasant gummy texture.
A mildly tangy flavor is normal for same-day sourdough. Shorter fermentation schedules can produce a less pronounced sour flavor than some long-fermented methods, although the actual taste depends on the starter and fermentation conditions.
For a more nutritious variation, replace approximately 20–30% of the white bread flour with whole wheat flour. Whole wheat increases the whole-grain content but may require adjustments to hydration and fermentation.
This recipe requires no commercial yeast or added sugar. The active sourdough starter provides natural leavening, and fermentation contributes much of the bread's characteristic flavor.
Traditional wheat-based sourdough bread is not gluten-free. Natural fermentation does not reliably eliminate gluten, so this recipe is unsuitable for people with celiac disease.
Same-day sourdough bread is not automatically low in carbohydrates or low in glycemic impact. Nutritional values depend on the flour, portion size, and complete meal.
Store completely cooled sourdough in a suitable bread container at room temperature for short-term use. Avoid prolonged exposure to moisture, which can encourage mold growth.
For longer storage, slice the loaf after cooling and freeze individual portions in a freezer-safe bag. For the best quality, use frozen bread within approximately 2–3 months.
To refresh leftover sourdough, lightly toast individual slices. Toasting helps restore some surface crispness and makes day-old bread especially delicious for breakfast or sandwiches.
If the bread develops visible mold, discard the loaf rather than trimming away only the affected section. Mold can spread beyond the visible surface in porous foods such as bread.
Serve homemade sourdough with olive oil, cheese, savory spreads, sandwiches, or comforting soups. Its crusty exterior and soft interior make it an excellent everyday bread.
OoohDelish Artisan Baking Secret: A successful same-day sourdough loaf depends on a vigorous starter, properly managed dough temperature, gentle gluten development, and careful observation. Let the dough tell you when fermentation is complete, bake in a thoroughly preheated Dutch oven, and allow the loaf to cool before slicing for the best crust and crumb.