Ingredients
Equipment
Method
- Step 1: Prepare the Active Sourdough Starter. Before beginning your Sourdough Focaccia Recipe, make sure your sourdough starter is healthy, bubbly, and capable of rising reliably after feeding. For this recipe, use 100 g of active starter at 100% hydration, meaning equal weights of flour and water. Ideally, use the starter when it has expanded significantly and is near its usual peak of activity, with numerous bubbles visible throughout. A weak, recently refrigerated, or severely underfed starter may require one or more refreshments before baking. Do not rely exclusively on the float test, as some perfectly active starters may sink. Use visible expansion, bubbles, and your starter's usual rising behavior as the most useful signs of readiness. Once the starter is active, weigh all the remaining ingredients with a digital kitchen scale and prepare a large mixing bowl.
- Step 2: Mix the Flour, Water, and Sourdough Starter. Add 500 g of bread flour, 400 g of room-temperature water, and 100 g of active sourdough starter to a large mixing bowl. Use a dough scraper, wooden spoon, or sturdy spatula to combine the ingredients until no pockets of dry flour remain. The mixture will be sticky, shaggy, and relatively wet, which is normal for a high-hydration focaccia dough. Scrape down the sides of the bowl to make sure all the flour has been incorporated, then cover the bowl and let the dough rest for approximately 20–30 minutes. This initial rest allows the flour to absorb moisture and helps the gluten network begin developing without vigorous kneading. The dough may still look rough at this stage, but it should gradually become easier to handle during the subsequent folds.
- Step 3: Add the Sea Salt and Olive Oil. After the initial rest, sprinkle 11 g of fine sea salt over the dough and drizzle in 25 g of extra-virgin olive oil. With lightly wet hands, gently squeeze, pinch, and fold the dough until the salt and oil are incorporated throughout. At first, the dough may feel slippery and seem to separate as the oil coats the surface, but continue folding gently until it becomes cohesive again. Scrape down the bowl and gather the dough into a loose mound. Avoid adding extra flour to correct its stickiness, since the relatively high hydration is intentional and contributes to the finished focaccia's tender, airy texture. Cover the bowl and allow the dough to rest for approximately 20–30 minutes before beginning the first stretch-and-fold set.
- Step 4: Perform the First Stretch-and-Fold Set. With clean, lightly wet hands, reach under one edge of the rested dough, lift it slowly until it stretches without tearing, and fold it over the center. Turn the bowl approximately one-quarter turn and repeat the movement, continuing around the bowl until you have completed four gentle folds. The dough may initially feel loose and sticky, but the folds help strengthen the gluten network without requiring traditional countertop kneading. Avoid pulling so forcefully that the dough tears, and don't try to create a tight, dry ball. After completing the first set, cover the bowl and let the dough rest for approximately 30 minutes at room temperature. This resting period allows the gluten to relax while fermentation continues, making the next set of folds more effective.
- Step 5: Complete the Remaining Stretch-and-Folds. Repeat the stretch-and-fold process two or three additional times, allowing approximately 30 minutes between sets. During each set, lift a section of dough, stretch it gently, and fold it over itself, working around the bowl until all sides have been folded. Over time, you should notice that the dough becomes smoother, more elastic, and better able to hold its shape, although it will still feel soft and somewhat sticky. If the dough becomes resistant to stretching, let it rest rather than forcing it. Small bubbles may begin forming beneath the surface as the sourdough starter becomes more active. After the final set, gather the dough gently into the center of the bowl, cover it, and leave it to continue its bulk fermentation undisturbed.
- Step 6: Allow the Dough to Complete Bulk Fermentation. Leave the covered dough at a comfortable room temperature, ideally around 73–77°F (23–25°C), until it becomes noticeably expanded, aerated, and bubbly. For an active starter, the total bulk fermentation may take approximately 4–7 hours from the initial mixing, including the time spent resting and folding, although actual timing can vary substantially. Look for an increase in volume of roughly 50–75%, bubbles along the sides and surface, and a slightly domed, soft appearance. The dough should look alive and elastic rather than remaining dense and motionless. Do not rely only on the clock, since a cool kitchen may require additional hours and a warmer kitchen may accelerate fermentation. Avoid allowing the dough to become excessively acidic, runny, or collapsed, as these can be signs of over-fermentation.
- Step 7: Prepare the Baking Pan With Olive Oil. Once the dough has completed bulk fermentation, prepare a 9 × 13-inch (23 × 33 cm) metal baking pan by spreading 25 g of extra-virgin olive oil evenly across the bottom and into the corners. A metal pan is helpful for creating a beautifully golden, lightly crisp underside. If your pan is particularly prone to sticking, use a suitable nonstick pan or line it with parchment paper before adding the oil, ensuring that the paper lies flat. Gently loosen the fermented dough from the sides of the mixing bowl using a flexible scraper or lightly oiled fingers. Try to avoid squeezing or aggressively deflating the dough, as preserving its fermentation bubbles contributes to the airy crumb that makes homemade sourdough focaccia so appealing.
- Step 8: Transfer the Dough and Begin the Final Proof. Carefully tip the fermented dough into the prepared olive oil-coated pan and gently turn it once so that its surface receives a light coating of oil. Using oiled fingertips, encourage the dough toward the corners without pulling aggressively or tearing it. If the dough springs back and resists stretching, cover it and allow it to rest for 15–20 minutes before continuing. Once it has relaxed, gently spread it into a reasonably even layer across the pan. Cover the pan without allowing the cover to press directly against the dough and leave it at room temperature to complete the final proof. This second rising period commonly takes approximately 2–4 hours, depending on dough temperature and starter activity. The dough should become puffy, bubbly, and slightly jiggly, with visible signs of aeration before baking.
- Step 9: Preheat the Oven and Prepare the Rosemary Topping. When the dough is approaching the end of its final proof, position an oven rack in the middle to lower-middle section of the oven and preheat it to 425°F (220°C) for approximately 25–30 minutes, allowing the oven and baking environment to become thoroughly hot. Meanwhile, roughly chop 2 tablespoons of fresh rosemary leaves and measure 30 g of extra-virgin olive oil for the surface. Keep approximately ½ teaspoon of flaky sea salt ready for finishing. The focaccia should look visibly expanded, soft, and aerated before you add the topping. If it still appears dense or tight, give it additional time to proof rather than dimpling and baking prematurely. A properly proofed dough is one of the most important factors in achieving a beautifully fluffy, open interior.
- Step 10: Create the Signature Focaccia Dimples. Drizzle the measured 30 g of extra-virgin olive oil evenly over the risen dough, allowing some of it to gather naturally across the surface. Lightly coat your fingertips with the oil, then press them gently but decisively into the dough to create deep, evenly spaced dimples across the entire pan. Your fingertips can reach close to the bottom of the pan, but avoid repeatedly flattening or aggressively squeezing out all the air bubbles. Scatter the chopped fresh rosemary over the dough and sprinkle the flaky sea salt evenly across the surface. A little oil should settle into the dimples, creating flavorful pockets that help develop the focaccia's characteristic golden finish. Once topped, transfer the pan to the preheated oven promptly rather than allowing the dough to sit for an extended period.
- Step 11: Bake Until Golden, Crispy, and Fully Cooked. Place the baking pan on the prepared oven rack and bake at 425°F (220°C) for approximately 25–30 minutes, or until the focaccia develops a deep golden surface, the edges become attractively crisp, and the underside is thoroughly browned. Begin checking near the end of the expected baking window because oven performance and pan material can influence the result. If the top browns much faster than the bottom, move the pan to a lower rack for the final few minutes, watching carefully to prevent burning. A carefully inserted instant-read thermometer may show an internal bread temperature around 200–210°F (93–99°C), although appearance, structure, and a properly baked underside are also useful indicators. The finished loaf should look risen and golden rather than pale, wet, or doughy in the center.
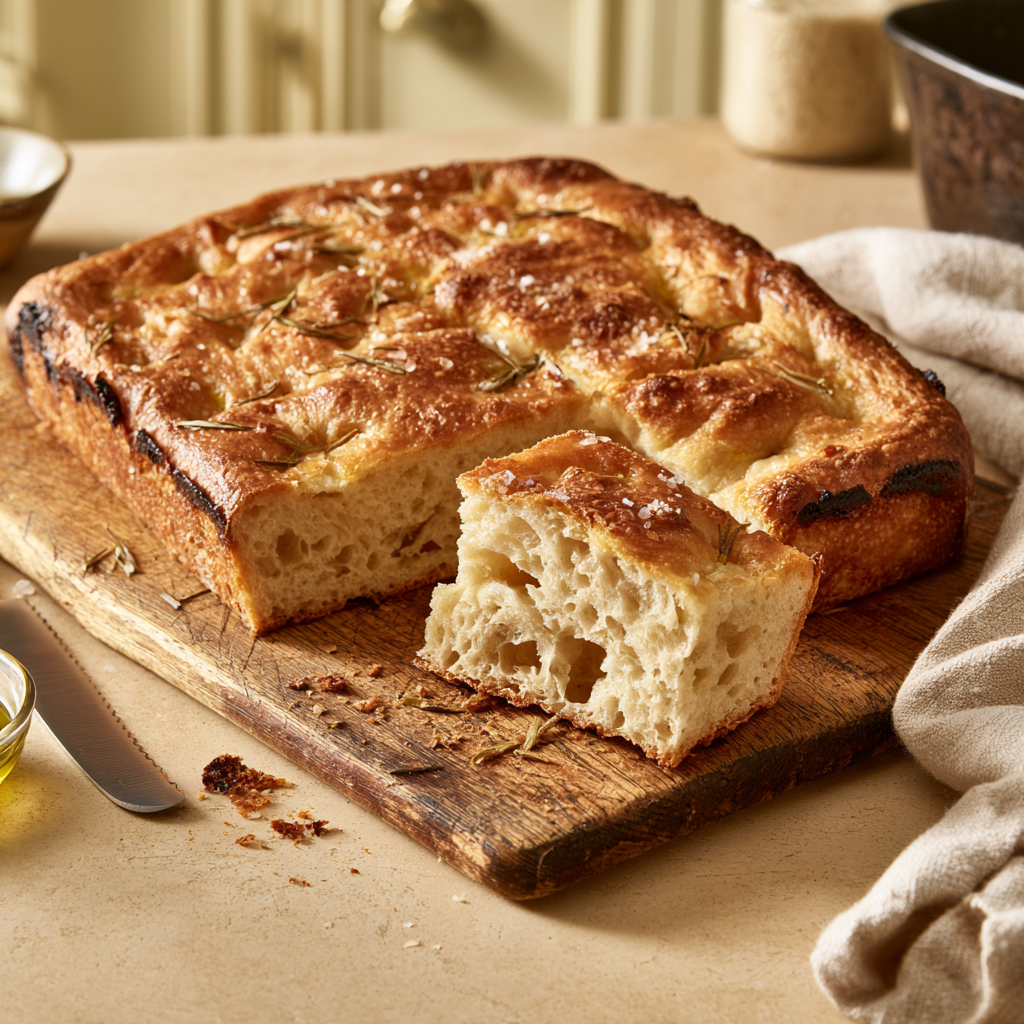
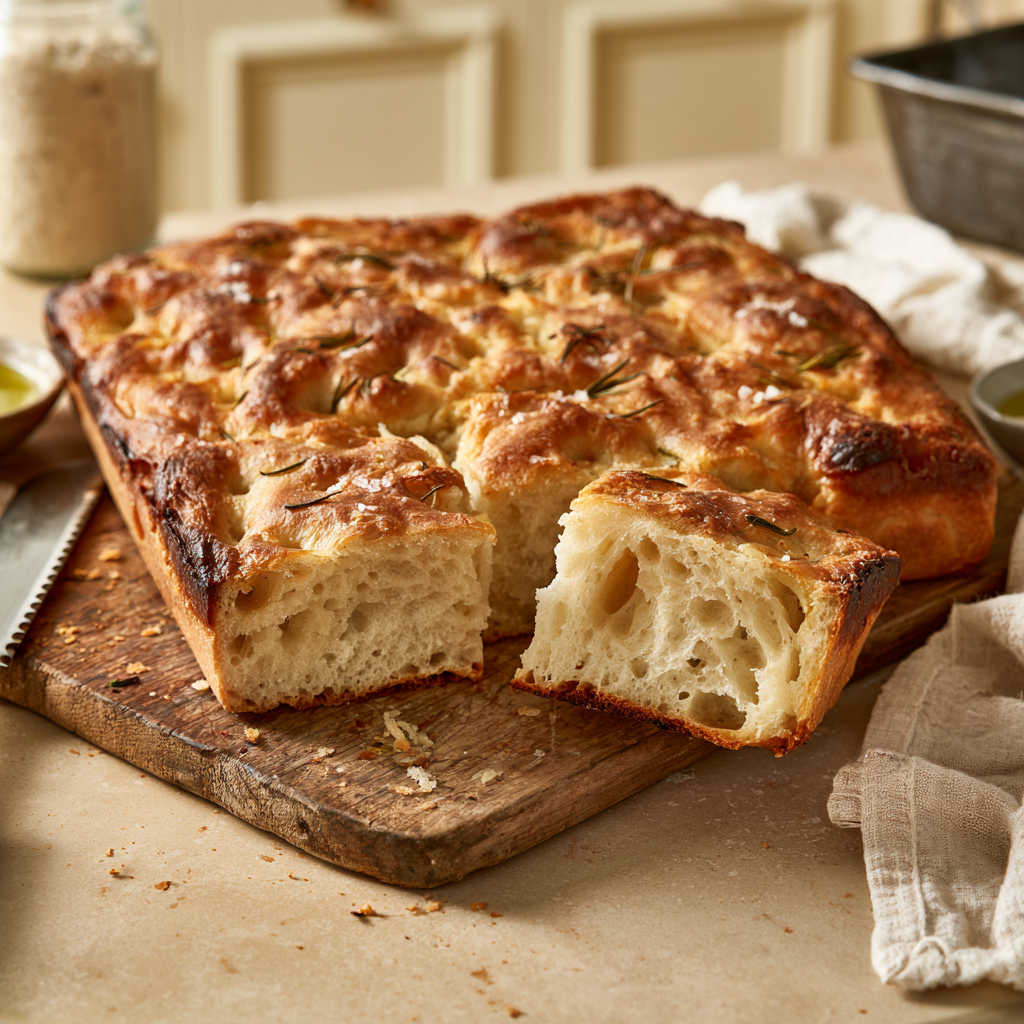
- Step 12: Cool, Slice, and Serve the Sourdough Focaccia. Remove the baked Sourdough Focaccia Recipe from the oven and let it rest in the pan for approximately 5 minutes. Carefully loosen the edges with a spatula, then transfer the bread to a wire cooling rack so steam does not soften the beautifully crisp underside. Allow it to cool for approximately 15–20 minutes before slicing, giving the soft interior time to set. Use a serrated bread knife to cut the focaccia into 12 generous squares or rectangular portions. Serve slightly warm with soups, salads, roasted vegetables, pasta, or grilled chicken, or split the pieces horizontally to prepare flavorful sandwiches. The finished bread should have a golden, lightly crunchy crust, a tender and airy interior, fragrant rosemary, and the rich taste of extra-virgin olive oil.
Notes
1. Use a Strong, Active Sourdough Starter
2. Measure Ingredients by Weight for Consistent Results
3. Understand High-Hydration Focaccia Dough
4. Develop Gluten With Gentle Stretch-and-Folds
5. Follow the Dough Rather Than a Fixed Fermentation Clock
6. Use a Metal Baking Pan for a Golden Bottom Crust
7. Choose Good-Quality Extra-Virgin Olive Oil
8. Create Deep Dimples Without Deflating the Dough
9. Try an Overnight Sourdough Focaccia Schedule
10. Add Rosemary, Sea Salt, and Other Toppings Carefully
11. Avoid Underproofing and Overproofing
12. Bake Until Both the Top and Bottom Are Golden
13. Let the Focaccia Cool on a Wire Rack
14. Store and Freeze Leftover Sourdough Focaccia Properly
15. Use Sourdough Focaccia for Sandwiches and Family Meals
16. Avoid the Most Common Sourdough Focaccia Mistakes
A healthy sourdough starter is essential for a naturally leavened focaccia that rises properly without commercial yeast. Feed your starter using your normal feeding ratio and allow it to become visibly bubbly and expanded before measuring the 100 g required for the dough. A starter used near its usual peak generally performs more predictably than one that has been left unfed for an extended period. If your starter has been refrigerated for several days, refresh it until it shows reliable activity. A weak starter may result in slow fermentation, a dense crumb, and little oven spring. Look for consistent expansion rather than relying exclusively on the float test.
For the most reliable Sourdough Focaccia Recipe, measure your flour, water, sourdough starter, salt, and olive oil with a digital kitchen scale. Flour can vary significantly when measured by volume, especially when scooped directly from a bag or compressed into a measuring cup. Even relatively small differences in flour or water can affect the texture of high-hydration dough. This recipe uses 500 g of bread flour, 400 g of water, and 100 g of starter at 100% hydration, giving approximately 82% total hydration. Maintain those proportions during your first attempt, then experiment once you understand how the dough should feel.
This recipe uses relatively high hydration, which means the dough will feel softer and stickier than conventional sandwich bread dough. That texture is intentional because it helps produce the tender crumb and open structure associated with homemade sourdough focaccia. Resist the temptation to add large quantities of flour when the dough initially looks shaggy or clings to your hands. Instead, allow it to rest and develop strength through gentle stretch-and-folds. Wet or lightly oiled hands make handling easier. If you are new to wet dough, begin with the specified hydration rather than increasing it to chase extremely large air bubbles.
Traditional kneading is not essential for this Sourdough Focaccia Recipe because gluten strength can be developed with repeated short folding sessions. During the early fermentation stage, lift one side of the dough, stretch it until you feel resistance, and fold it over the center. Repeat around the bowl and let the dough rest before the next set. Approximately three or four sets are usually sufficient for this formulation, although flour strength and dough behavior vary. The dough should gradually become smoother, more elastic, and better able to hold its shape. Avoid stretching aggressively enough to tear it, since gentle handling supports good dough structure.
Sourdough fermentation changes with room temperature, starter strength, starter quantity, and flour characteristics, so the listed times are only estimates. At approximately 73–77°F (23–25°C), this recipe may require around 4–7 hours of total bulk fermentation followed by roughly 2–4 hours of final proofing. Cooler kitchens can require considerably longer, while warm kitchens accelerate fermentation. Instead of relying only on time, look for a dough that has visibly expanded, developed bubbles, and become soft and aerated. Excessive fermentation can weaken the dough and cause it to collapse, while insufficient fermentation can create heavy, dense focaccia.
A metal baking pan is particularly effective for producing the crisp, golden underside that makes focaccia so satisfying. Spread the measured 25 g of olive oil evenly across the bottom and sides of a 9 × 13-inch pan before transferring the dough. During baking, the oil helps the bottom crust brown while preventing sticking. Dark metal pans may brown the underside more quickly than light-colored pans, so monitor the bread near the end of baking. Glass and thick ceramic dishes can also work with recipe-specific adjustments, but they may produce a different crust texture. Avoid using a pan that is too small, as an excessively thick loaf may require additional baking.
Olive oil is one of the defining ingredients in homemade sourdough focaccia, contributing flavor, tenderness, and a wonderfully crisp crust. Use an extra-virgin olive oil that you enjoy tasting, since its flavor remains noticeable in the finished bread. This recipe divides 80 g of oil between the dough, baking pan, and surface, allowing each portion to serve a particular purpose. The oil mixed into the dough contributes richness, the oil in the pan encourages browning, and the surface oil settles into the dimples. You can choose a mild oil for a delicate flavor or a more robust variety for a distinctive Mediterranean character.
The famous focaccia dimples are both attractive and functional, helping olive oil, salt, and herbs settle into the dough. Before dimpling, make sure the final proof has produced a puffy, bubbly texture. Drizzle olive oil over the surface and coat your fingertips lightly, then press downward in evenly spaced positions. Reach deeply enough to create visible depressions, but avoid kneading, crushing, or repeatedly flattening the dough. Some large bubbles may move or release during this process, which is normal. Gentle handling helps preserve enough fermentation gas to produce a light, tender interior when the bread expands in the oven.
For an overnight variation, complete the initial mixing and stretch-and-folds, then allow the dough to begin fermenting at room temperature before refrigerating it in a covered, food-safe container. Refrigeration slows fermentation but does not stop it completely, so avoid treating a long cold rest as an unlimited holding period. The following day, transfer the dough into the prepared olive oil-coated pan if necessary, allow it to become puffy and bubbly, then dimple and bake. The time required after refrigeration varies substantially depending on how much the dough fermented before chilling. For the most predictable first bake, use the room-temperature method provided in the main instructions.
Fresh rosemary and flaky sea salt create a classic Italian-inspired focaccia flavor, but the same dough can accommodate many delicious variations. Try halved cherry tomatoes, pitted olives, caramelized onions, or small pieces of safely prepared roasted garlic. Use toppings moderately so they do not weigh down the dough or trap excessive moisture on the surface. Pat watery ingredients dry and distribute them evenly between the dimples. If you add salted olives or cheese, reduce the amount of flaky sea salt to keep the flavor balanced. Delicate herbs can be lightly coated with olive oil to reduce scorching during baking.
Underproofed sourdough focaccia often bakes into a dense loaf with relatively few air pockets because the dough has not produced and retained enough fermentation gas. Overproofed focaccia may become overly slack, excessively acidic, or difficult to handle because its structure has weakened. During the final proof, look for visible bubbles, noticeable expansion, and a soft, slightly jiggly surface. The dough should feel airy rather than tight or collapsed. If it springs back aggressively when gently stretched, allow more resting time. If it has already lost structure and spread into a very thin, runny layer, it may have fermented too far.
The top of sourdough focaccia can appear beautifully browned before the underside is fully cooked, especially when using a thick baking dish. For this recipe, bake at 425°F (220°C) in a thoroughly preheated oven and begin checking after approximately 25 minutes. Carefully lift one edge with a spatula to examine the underside; it should be golden rather than pale or wet. If the top is browning too quickly, reposition the pan appropriately or shield the surface briefly while the bottom finishes baking. Avoid removing the loaf before the center is set, as underbaked focaccia can have a gummy interior.
Once the focaccia has finished baking, leave it in the pan for approximately five minutes, then transfer it to a wire rack. This prevents steam from becoming trapped beneath the loaf and softening its crisp bottom crust. Although freshly baked focaccia smells irresistible, allowing another 15–20 minutes of cooling gives the soft crumb time to settle before slicing. Cutting it immediately can compress the interior or make it appear slightly gummy. Use a serrated knife to cut clean squares or rectangular pieces, and serve while still pleasantly warm for the best contrast between crispy edges and tender bread.
Plain sourdough focaccia is best enjoyed fresh, but leftover bread can be stored after cooling completely. For short-term storage, wrap the focaccia or place it in an airtight container at room temperature for approximately one to two days in suitable conditions. For longer storage, cut it into portions, wrap securely, and freeze for approximately two to three months for best quality. Reheat frozen or thawed portions in a preheated oven until warmed through and lightly crisp. Avoid refrigerating plain bread unnecessarily because refrigeration can accelerate staling. However, focaccia containing perishable toppings or fillings must be refrigerated promptly and handled according to food-safety guidance.
This homemade sourdough focaccia is exceptionally versatile because its airy interior and firm golden crust work well with many meals. Cut the loaf into generous squares for serving alongside vegetable soup, pasta, roasted chicken, grilled fish, or fresh salads. For sandwiches, slice each piece horizontally and fill it with grilled vegetables, fresh tomatoes, cheese, or cooked chicken. A plain rosemary focaccia can also be cut into smaller strips and served with olive oil or a savory dip. If preparing sandwiches in advance, avoid adding excessively wet fillings too early, since they can soften the crumb and make the bread soggy.
The most common mistakes include using an inactive starter, measuring ingredients inaccurately, adding excessive flour to sticky dough, rushing fermentation, handling the risen dough too aggressively, and baking in an insufficiently preheated oven. Begin with a starter that rises reliably, follow the ingredient weights, and strengthen the dough with gentle folding sessions. Watch for visible expansion and bubbles rather than relying exclusively on a fixed timetable. Coat the pan properly with olive oil, allow the final proof to complete, and press the dimples carefully. Bake until the top and underside are fully golden, then cool briefly on a wire rack. These steps help create a flavorful, airy loaf with crisp olive oil-rich edges.