Ingredients
Equipment
Method
- Step 1: Prepare the Ingredients and Baking Equipment. Gather all ingredients and baking equipment before beginning so the cookie-making process is organized and efficient. Allow the unsalted butter to soften to a cool room temperature, ideally around 65–68°F (18–20°C), so it yields gently when pressed but does not appear melted or greasy. Bring the eggs to room temperature to help them incorporate evenly into the butter mixture. Measure 313 g of all-purpose flour with a digital kitchen scale for the most consistent results, and prepare your baking sheets with parchment paper. Keep the oven switched off for now, as the dough will need approximately 30 minutes of refrigeration before baking. Have a large mixing bowl, medium bowl, electric mixer, rubber spatula, and cookie scoop ready.
- Step 2: Combine the Dry Ingredients. In a medium mixing bowl, add 2½ cups (313 g) of all-purpose flour, 1 teaspoon of baking soda, and ½ teaspoon of fine salt. Whisk thoroughly for approximately 30 seconds until the baking soda and salt are evenly distributed throughout the flour. This helps the cookies rise and brown consistently without leaving concentrated pockets of leavening ingredients. For the best texture, avoid packing flour into measuring cups. If you do not have a kitchen scale, gently spoon the flour into each measuring cup and level it with the straight edge of a knife. Set the dry ingredient mixture aside while preparing the butter and sugar base.
- Step 3: Cream the Unsalted Butter and Sugars. Place 1 cup (226 g) of softened unsalted butter into a large mixing bowl, then add ¾ cup (150 g) of packed light brown sugar and ½ cup (100 g) of granulated sugar. Using an electric hand mixer or stand mixer fitted with the paddle attachment, beat the mixture on medium speed for approximately 2–3 minutes until it becomes creamy, slightly lighter in color, and fluffy. Stop the mixer once or twice to scrape down the sides and bottom of the bowl with a rubber spatula, ensuring that all ingredients are incorporated evenly. Brown sugar contributes moisture and a subtle caramel-like flavor, while granulated sugar encourages gentle spreading and golden edges. Proper creaming supports a tender cookie structure, but avoid excessively whipping the mixture, which may introduce too much air.
- Step 4: Add the Eggs and Vanilla Extract. Crack 2 large room-temperature eggs into the creamed butter and sugar mixture, adding them one at a time while mixing on low to medium speed. Allow the first egg to incorporate before adding the second, then pour in 2 teaspoons of pure vanilla extract. Continue mixing briefly until the mixture looks smooth and reasonably uniform, stopping occasionally to scrape the sides and bottom of the bowl. The eggs provide moisture, richness, and binding properties, helping the finished cookies maintain enough structure for dipping into milk. Vanilla extract enhances the warm, sweet aroma and complements the chocolate chips. Avoid beating longer than necessary once the eggs are incorporated, since excessive mixing can affect the final cookie texture.
- Step 5: Incorporate the Dry Ingredients. Add the prepared flour mixture to the wet ingredients in two or three additions, mixing on the lowest speed after each addition until most of the flour has disappeared. Stop the mixer before the dough is completely uniform, then use a rubber spatula to gently fold in any remaining streaks of flour. The finished cookie dough should be soft, thick, and slightly tacky without appearing runny or excessively sticky. Avoid overmixing after adding the flour because prolonged mixing can encourage gluten development and produce a tougher cookie rather than the desired tender, chewy texture. If the dough seems unusually soft, check that the butter was not overly warm and that the ingredients were measured correctly before adding extra flour.
- Step 6: Fold in the Semi-Sweet Chocolate Chips. Add 1¾ cups (298 g) of semi-sweet chocolate chips to the prepared cookie dough and use a rubber spatula to fold them in gently until evenly distributed. Scrape along the bottom and sides of the bowl so that no chocolate chips remain concentrated in one section of the dough. Semi-sweet chocolate chips provide rich cocoa flavor while balancing the sweetness of the brown and granulated sugars. If desired, reserve the optional ¼ cup (43 g) of additional chocolate chips for pressing into the tops of the dough balls before baking. These extra chips create an attractive bakery-style appearance with visible chocolate pieces on the surface of each finished cookie.
- Step 7: Portion and Shape the Cookie Dough. Using a cookie scoop or digital kitchen scale, divide the dough into approximately 24 evenly sized portions, aiming for about 50–52 g per cookie when using the base recipe. Gently roll the portions into rounded dough balls without compacting them too tightly, then place them on a parchment-lined tray. If using the optional additional chocolate chips, lightly press a few pieces onto the tops of the dough balls so they remain visible after baking. Avoid flattening the dough excessively because a rounded shape encourages slightly thicker cookies that are better suited to dunking into milk. Consistent portion sizes help all the cookies bake at approximately the same rate and develop a similar texture.
- Step 8: Chill the Dough to Control Spreading. Cover the portioned cookie dough loosely with plastic wrap or place it in a covered container, then refrigerate for at least 30 minutes. Chilling firms the butter and allows the flour additional time to absorb moisture, helping the cookies maintain a more substantial shape during baking. This is especially useful for chocolate chip cookies intended for dipping into milk because cookies that spread excessively may become too thin and fragile. If the kitchen is particularly warm or the dough feels very soft, extend the chilling period to approximately 45–60 minutes. While the dough chills, prepare the baking area and ensure that the baking sheets are completely cool before placing dough onto them.
- Step 9: Preheat the Oven and Arrange the Cookies. Near the end of the chilling period, preheat the oven to 350°F (175°C), using the conventional baking setting, and position a rack in the center. Line a light-colored baking sheet with parchment paper if necessary, then arrange the chilled cookie dough balls approximately 2–3 inches (5–7.5 cm) apart to allow for spreading. Bake one sheet at a time on the middle rack whenever practical for more consistent heat distribution. Keep any remaining cookie dough refrigerated until it is ready to bake. Avoid placing chilled dough onto a hot baking sheet because the butter may begin melting before the cookies enter the oven, increasing spreading and affecting the finished texture.
- Step 10: Bake Until the Edges Are Golden and the Centers Are Soft. Place the baking sheet in the preheated oven and bake for approximately 10–12 minutes, beginning to check around 10 minutes. The cookies are ready when the edges appear set and lightly golden while the centers look just set and remain slightly soft. The tops should no longer look like wet raw dough, but they do not need to become deeply browned. Because the cookies continue setting as they cool, removing them at this stage helps preserve their tender, chewy centers. Baking time depends on portion size, oven accuracy, and baking sheet material, so use the appearance of the cookies as your primary guide. Avoid overbaking, since excessively dry cookies may lose the soft texture that makes them so enjoyable with milk.
- Step 11: Cool the Cookies Before Serving. Carefully remove the baking sheet from the oven and allow the cookies to rest on it for approximately 5 minutes so their centers can firm up sufficiently for handling. Use a thin spatula to transfer them to a wire cooling rack, then let them cool for another 5–10 minutes if you plan to serve them slightly warm. This short cooling period is important for milk dipping because freshly baked cookies can be fragile and may break apart before their structure has stabilized. The finished cookies should have gently golden edges, soft and chewy centers, and deliciously chocolate-studded surfaces. If baking multiple batches, allow the baking sheet to cool before placing the next round of chilled dough onto it.
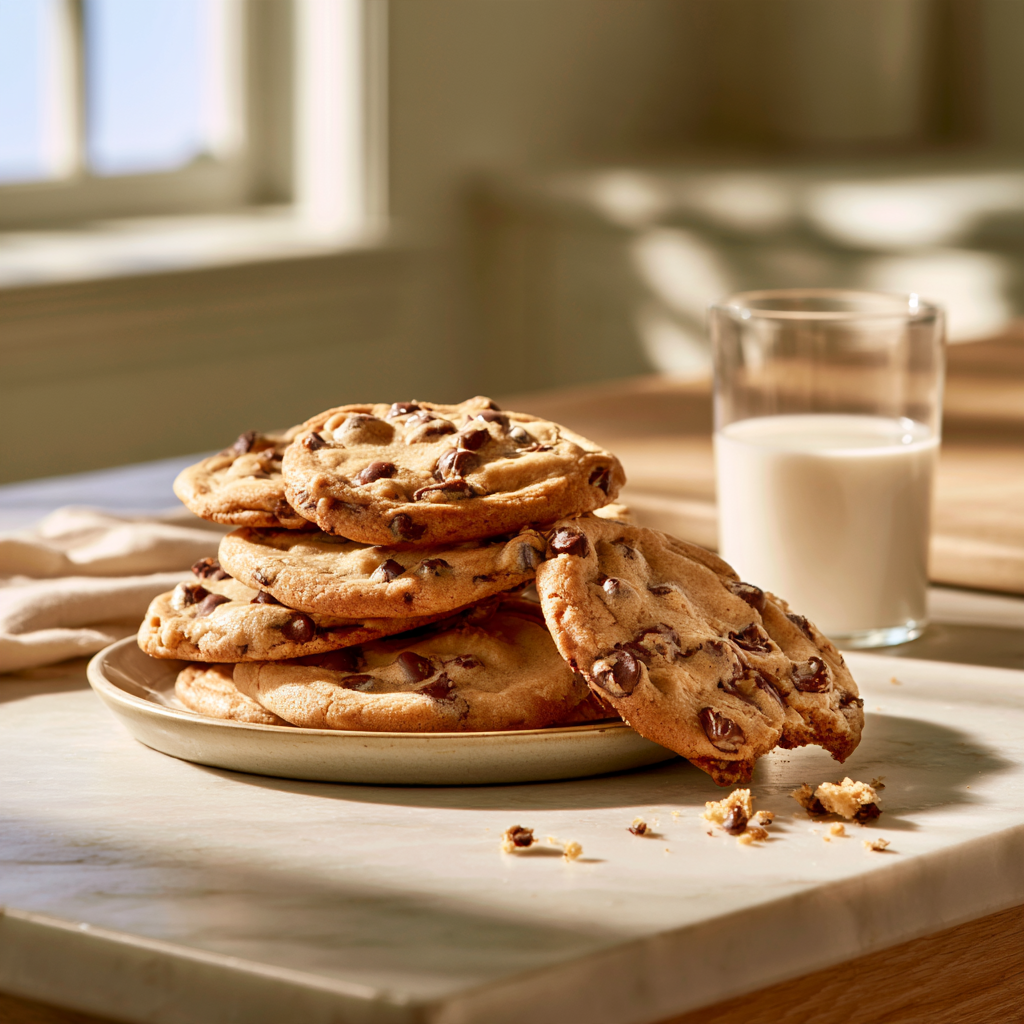
- Step 12: Serve the Chocolate Chip Cookies With Cold Milk. Pour approximately ½ cup (120 ml) of cold whole milk, lactose-free milk, or your preferred unsweetened plant-based beverage into a serving glass for each cookie portion. Arrange the slightly warm or completely cooled chocolate chip cookies on a plate alongside the milk, allowing the rich chocolate aroma and buttery flavor to complement the refreshing beverage. For a classic milk-and-cookies experience, gently dip one end of a cookie into the milk for approximately 1–3 seconds, adjusting the time depending on its thickness and your preferred softness. Remove the cookie before it becomes excessively saturated, then enjoy the contrast of creamy milk, soft cookie dough, and semi-sweet chocolate. Serve immediately for the freshest texture and refrigerate any unused milk promptly.
- Step 13: Store Leftover Cookies and Dough Properly. Once the chocolate chip cookies have cooled completely, transfer any leftovers to a clean, airtight container and store them at room temperature in a cool, dry location for approximately 4–5 days for best quality. To preserve their soft centers, avoid leaving the cookies uncovered for extended periods. For longer storage, freeze fully cooled cookies in a freezer-safe container for approximately 2–3 months, separating layers with parchment paper if necessary. Unbaked cookie dough balls can also be frozen individually on a tray before transferring them to an airtight freezer bag; they can generally be baked from frozen with a few additional minutes of baking time. Store the milk separately in the refrigerator and never leave it at room temperature for more than two hours, or one hour in temperatures above 90°F (32°C).
Notes
1. Use Properly Softened Unsalted Butter
2. Combine Brown Sugar and Granulated Sugar
3. Measure Flour Accurately
4. Chill the Cookie Dough Before Baking
5. Choose Semi-Sweet Chocolate Chips
6. Avoid Overbaking
7. Master the Perfect Milk Dunk
8. Experiment With Different Milk Varieties
9. Make Mini Chocolate Chip Cookies for Parties
10. Make the Cookie Dough Ahead
11. Store Baked Cookies Correctly
12. Create Chocolate Chip Cookie Ice Cream Sandwiches
For soft, bakery-style chocolate chip cookies, use unsalted butter that has been softened to approximately 65–68°F (18–20°C). The butter should be cool, pliable, and easy to cream with sugar without looking melted or greasy. Properly softened butter helps the dough mix evenly and contributes to the cookies' rich flavor and tender texture. If your butter becomes too warm, refrigerate it briefly before mixing rather than adding extra flour to compensate.
Using both light brown sugar and granulated sugar helps create the classic combination of chewy centers and lightly golden edges. Brown sugar adds moisture and subtle caramel-like notes, while granulated sugar influences spreading, sweetness, and crispness. Avoid replacing all the brown sugar with white sugar unless you intentionally want a different texture. Maintaining the proportions in the recipe gives you a dependable starting point for soft chocolate chip cookies that hold together during milk dipping.
For the most consistent chocolate chip cookies, measure 313 g of all-purpose flour using a digital kitchen scale. Too much flour can produce dry, thick, or crumbly cookies, while insufficient flour can lead to excessive spreading. If measuring by volume, spoon the flour into the measuring cup and level the surface without packing it down. Accurate flour measurements help produce cookies with enough structure for a quick dip into milk while maintaining pleasantly soft centers.
Chilling portioned chocolate chip cookie dough for at least 30 minutes helps firm the butter and control spreading during baking. For thicker cookies, particularly in a warm kitchen, refrigerate the dough for approximately 45–60 minutes. Keep the dough covered to prevent it from drying out or absorbing refrigerator odors. This step is especially useful when preparing chocolate chip cookies for milk dunking because very thin, delicate cookies are more likely to break after absorbing liquid.
Semi-sweet chocolate chips create a delicious balance between rich cocoa flavor and the sweetness of buttery cookie dough. For a more intense chocolate experience, replace part of the semi-sweet chocolate with chopped dark chocolate. Milk chocolate chips create a sweeter variation, while mini chocolate chips distribute more evenly throughout the cookies. For an attractive bakery-style appearance, press a few additional chocolate chips onto the tops of the portioned dough before baking.
To achieve soft centers and lightly golden edges, remove the cookies from the oven when their edges look set and the centers are just baked. Do not wait for the entire cookie to become deeply golden. The cookies continue firming on the hot baking sheet after removal from the oven. Allow them to rest for approximately five minutes before transferring them to a cooling rack. Overbaking can make the cookies dry, hard, and less enjoyable when served with milk.
For the classic chocolate chip cookies milk experience, serve slightly warm or completely cooled cookies with chilled milk. Dip approximately half the cookie into the milk for one to three seconds, adjusting the duration according to cookie thickness and your preferred texture. Thinner cookies soften quickly, while thicker cookies may tolerate a slightly longer dip. Avoid soaking the cookie until it becomes completely saturated, since excessive moisture can cause it to crumble into the glass.
Whole milk creates the traditional rich and creamy cookies-and-milk experience, but other beverages can be equally enjoyable. Lactose-free milk offers a familiar alternative for people with lactose intolerance, while unsweetened oat milk provides a mild cereal-like sweetness. Almond milk contributes a subtle nutty flavor, and unsweetened soy milk offers another creamy option. If preparing cookies for guests with allergies, check the ingredients of both the cookies and the milk alternative before serving.
For birthday parties, dessert tables, or family gatherings, portion the dough into smaller balls weighing approximately 20–25 g each. Arrange them on a parchment-lined baking sheet and begin checking for doneness around 7–8 minutes, since smaller cookies bake more quickly. Serve them alongside small glasses of cold milk for convenient individual portions. Miniature cookies are particularly suitable for short milk dips and create an attractive presentation when arranged on a dessert board.
Chocolate chip cookie dough can be prepared ahead and refrigerated in a covered container for up to approximately 48 hours before baking. For longer storage, portion the dough into individual balls, freeze them on a tray until firm, and transfer them to an airtight freezer-safe container. Use frozen dough within approximately two to three months for best quality. Many frozen dough portions can be baked directly from frozen with a slightly longer baking time, making fresh cookies convenient for unexpected guests or weekend treats.
Allow baked chocolate chip cookies to cool completely before transferring them to an airtight container. Store plain cookies at room temperature in a cool, dry location for approximately four to five days for best quality. For longer storage, freeze the cookies in a freezer-safe container for up to two to three months. When ready to serve, thaw them at room temperature or warm them briefly before pairing with a fresh glass of cold milk. Always store milk separately in the refrigerator.
For a delicious dessert variation, allow the chocolate chip cookies to cool completely, then place a small scoop of vanilla ice cream between two cookies of similar size. Press gently to create a sandwich without breaking the cookies, then wrap and freeze briefly until the ice cream firms up. Serve immediately or store the sandwiches in a freezer-safe container. This variation transforms the classic milk-and-cookies flavor combination into a creamy frozen dessert perfect for warm weather and celebrations.