Ingredients
Equipment
Method
- Step 1: Choose the Best Cottage Cheese. Begin your Cottage Cheese Chocolate Mousse Recipe by selecting 450 g of mild, creamy cottage cheese, preferably a 2% milk-fat variety that offers a good balance of richness and protein. Check the package to ensure the cottage cheese is fresh, properly refrigerated, and within its labeled storage period. Both small-curd and large-curd cottage cheese can work, but a very dry variety may be more difficult to blend into a silky mousse, while a particularly watery variety may create a thinner dessert. If excess whey has visibly separated, stir the contents gently and drain a little free liquid if necessary before weighing the cottage cheese. Transfer the measured cheese to a clean blender or food processor and prepare your cocoa powder, maple syrup, and nonalcoholic vanilla flavoring. Starting with a good-quality cottage cheese is important because its flavor, moisture, and salt content directly influence the final dessert.
- Step 2: Blend the Cottage Cheese Until Completely Smooth. Place the 450 g of cottage cheese in a high-speed blender or food processor, secure the lid, and blend until the mixture begins to look smooth and creamy, generally for approximately 60–90 seconds depending on your appliance. Stop the machine as needed, scrape down the sides with a silicone spatula, and blend again so that any visible curds are fully incorporated. The mixture should gradually change from a lumpy white cheese into a uniform, thick dairy cream. Avoid adding milk or water at this stage unless your blender genuinely cannot process the mixture, since extra liquid can make the finished mousse too thin. If necessary, add only 1 teaspoon of milk at a time, keeping in mind that additional liquid changes the final consistency and nutrition. The smoother the cottage cheese becomes before adding the cocoa, the more velvety your chocolate mousse will feel when served.
- Step 3: Add the Unsweetened Cocoa Powder. Once the cottage cheese looks smooth, add 20 g (approximately ¼ cup) of unsweetened cocoa powder to the blender. Natural cocoa powder produces a slightly brighter, more acidic chocolate flavor, while Dutch-process cocoa tends to create a darker, smoother-tasting dessert. Both are suitable because this recipe does not require baking or chemical leavening. Distribute the cocoa over the cottage cheese rather than dumping it into one compact pile, which can make mixing more difficult. If your cocoa powder contains firm lumps, sift it into the blender first to prevent dry pockets. Secure the lid and pulse briefly until the cocoa begins to combine with the dairy base. The mixture will gradually change to a rich chocolate-brown color, although some dry powder may remain on the sides until the next blending stage.
- Step 4: Sweeten With Maple Syrup and Add Vanilla. Pour 40 g (approximately 2 tablespoons) of pure maple syrup into the blender, followed by 1 teaspoon of nonalcoholic vanilla flavoring. The maple syrup balances the natural bitterness of cocoa and the mild tanginess of cottage cheese, while vanilla rounds out the flavor and gives the mixture a more familiar chocolate-dessert aroma. If you prefer honey, substitute approximately the same weight and adjust according to taste, remembering that honey can have a more distinctive flavor. Avoid adding large amounts of extra sweetener before tasting, since the balance depends on the cocoa powder and cottage cheese used. Secure the blender lid and prepare to process the mixture until all the ingredients are fully incorporated. No melted chocolate, eggs, or heavy whipping cream are required for this easy no-bake dessert.
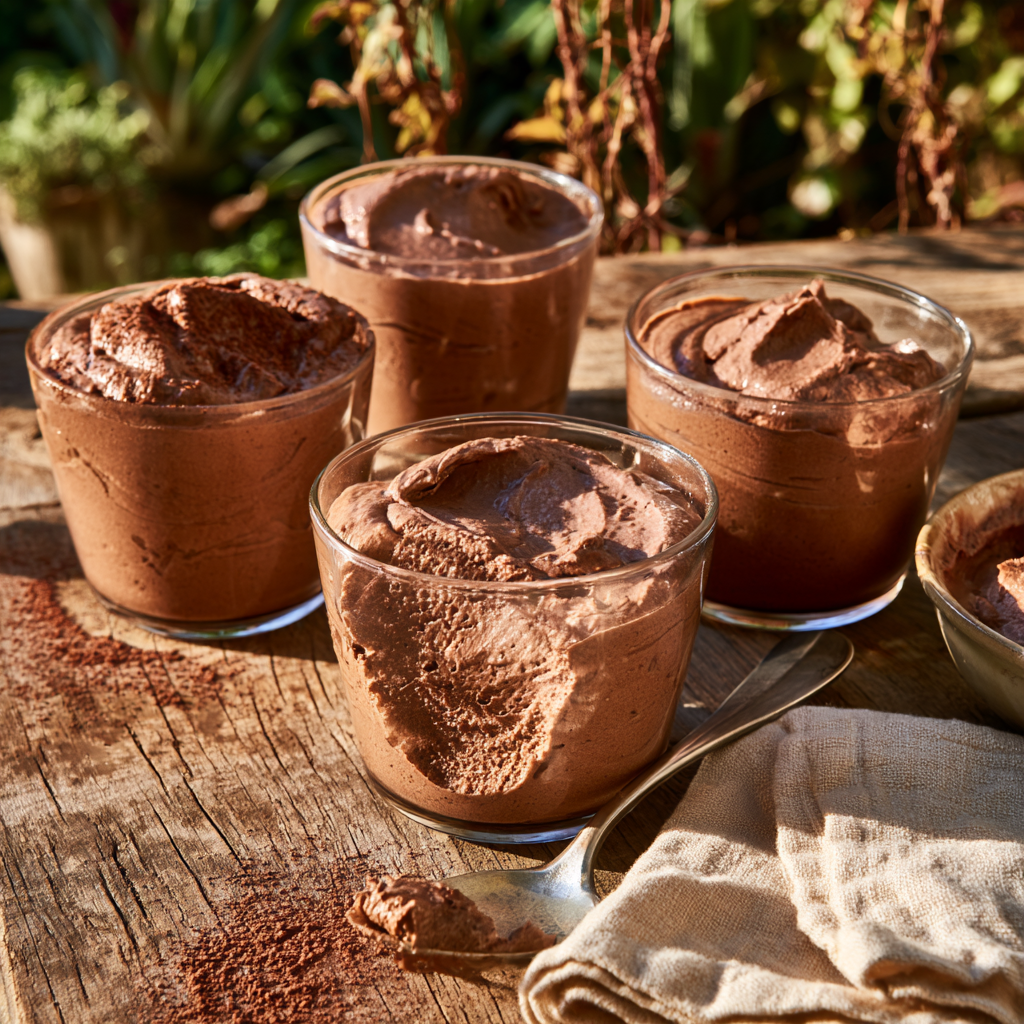
- Step 5: Blend Into a Silky Chocolate Mousse. Blend the cottage cheese, cocoa powder, maple syrup, and vanilla on medium to high speed for approximately 60–90 seconds, stopping once or twice to scrape down the sides and bottom of the container. Continue until the chocolate mixture is evenly colored, completely blended, and free from visible cottage cheese curds or dry cocoa pockets. The finished consistency should be thick, smooth, creamy, and spoonable, resembling a rich chocolate pudding or dense mousse rather than an aerated French mousse. If the mixture appears grainy, blend longer before trying to adjust its ingredients. If it is too thick for your blender to circulate, stop and scrape the sides, adding no more than a teaspoon of milk at a time only if absolutely necessary. Avoid excessive dilution because it can cause the mousse to become runny instead of rich and velvety.
- Step 6: Taste and Adjust the Chocolate Flavor. Using a clean tasting spoon, sample a small amount of the blended chocolate mousse and assess the balance between chocolate intensity, sweetness, and the mild dairy tang of the cottage cheese. If the cocoa flavor seems too bitter, add a small additional amount of maple syrup or honey, such as 1 teaspoon, and blend briefly until incorporated. If the mousse tastes too sweet or lacks chocolate depth, add approximately ½ teaspoon of unsweetened cocoa powder and blend again. Because cottage cheese often already contains salt, taste before adding any extra salt. For a subtle mocha variation, a very small pinch of instant coffee powder can be blended into the mixture, but it is not necessary for the classic recipe. Stop adjusting once the mousse tastes pleasantly chocolaty, with enough sweetness to balance the cocoa without masking its natural richness.
- Step 7: Check the Texture Before Portioning. Before transferring the mousse to serving containers, check its consistency by lifting a spoonful and allowing it to fall back into the blender. It should be thick enough to coat the spoon and form a soft mound before slowly settling, while remaining smooth rather than stiff or chalky. If visible curds remain, blend for another 20–30 seconds and scrape the container again. If the mixture is slightly softer than expected, remember that refrigeration may help it firm somewhat, although chilling cannot completely correct excessive liquid. If the mousse has become too thick after an unexpected amount of cocoa, you can blend in a very small quantity of cottage cheese to loosen the texture without diluting the chocolate flavor excessively. The goal is a creamy, spoonable dessert rather than a pourable chocolate sauce or a firmly set custard.
- Step 8: Divide the Mousse Into Individual Dessert Cups. Using a silicone spatula or spoon, transfer the finished chocolate mixture into four clean serving glasses, ramekins, or small dessert jars, dividing it as evenly as possible so each portion contains approximately one-quarter of the recipe. Scrape the blender carefully to avoid leaving a substantial quantity of mousse behind. Smooth the surface of each serving with the back of a spoon or create gentle swirls for a simple homemade presentation. If you want more decorative results, you may place the mixture into a piping bag and pipe it into the glasses, although this is entirely optional. Leave a little space at the top for raspberries, sliced strawberries, nuts, or chocolate shavings. Cover the servings with appropriate food-safe lids or reusable covers before refrigeration to protect the dessert from absorbing refrigerator odors.
- Step 9: Refrigerate Until Pleasantly Chilled. Place the covered dessert cups in the refrigerator at 40°F (4°C) or below for approximately 30–60 minutes before serving. This chilling period allows the mousse to become pleasantly cold and may help it develop a slightly firmer, more cohesive consistency. The exact texture depends on the moisture content and fat level of the cottage cheese as well as the amount of cocoa and sweetener used. Some batches will remain soft and pudding-like, while others become relatively thick and hold spoon marks easily. Do not expect the mixture to become as light and airy as traditional whipped French chocolate mousse, since this recipe relies on blending rather than folding aerated cream or egg whites. Keep the mousse covered while chilling and avoid leaving it at room temperature for extended periods because it contains fresh dairy.
- Step 10: Add Optional Toppings and Serve. When ready to serve, remove the chilled Cottage Cheese Chocolate Mousse Recipe from the refrigerator and uncover the individual dessert cups. Enjoy the mousse plain or finish each portion with a few fresh raspberries, thin strawberry slices, a light dusting of cocoa powder, or a small sprinkling of dark chocolate shavings. For a crunchy contrast, add a little finely chopped almond or walnut, ensuring that anyone with a nut allergy receives a suitable alternative. Keep garnishes modest so the creamy chocolate mousse remains the main attraction, and remember that added toppings change the calorie and nutrition values. Serve immediately using small dessert spoons so the mousse remains cold and smooth. This no-bake chocolate dessert works beautifully for family dinners, afternoon treats, meal preparation, and simple gatherings where you want an attractive presentation without complicated baking.
- Step 11: Store Leftover Chocolate Mousse Safely. If you are not serving every portion immediately, return the covered cottage cheese chocolate mousse to the refrigerator promptly and store it at 40°F (4°C) or below. For best quality, enjoy the mousse within approximately 3–4 days, provided the cottage cheese was fresh and correctly stored when the dessert was prepared. If the cottage cheese was already close to the end of its safe storage period, consume the dessert sooner rather than assuming preparation resets its shelf life. Avoid leaving the mousse at room temperature for more than 2 hours, or more than 1 hour when ambient temperatures exceed 90°F (32°C). Add berries, nuts, and other delicate toppings immediately before eating when possible, as fruit juices can collect on the surface and nuts may lose their crunch. Discard the mousse if it develops visible mold, unusual odors, or other signs of spoilage.
Notes
Choose Creamy, Mild Cottage Cheese. The cottage cheese you use has a major influence on the taste and texture of your Cottage Cheese Chocolate Mousse Recipe. Choose a fresh, mild cottage cheese that blends easily without excessive free liquid. A 2% milk-fat variety offers a practical balance of protein and creaminess, while full-fat cottage cheese generally produces a richer texture. Fat-free varieties can also work, but some become slightly thinner or more tangy after blending. Both small- and large-curd cottage cheese are suitable when processed thoroughly. Compare brands if possible, since cottage cheese varies in salt content, moisture, and acidity. A particularly salty or sour variety may leave an aftertaste even when combined with cocoa and sweetener.
Blend the Cottage Cheese Before Adding Other Ingredients. For the smoothest homemade chocolate mousse, begin by blending the cottage cheese alone until the visible curds disappear. This makes it easier to judge whether the dairy base has reached the desired consistency before cocoa powder darkens the mixture. Stop the blender as needed, scrape down the sides and base with a silicone spatula, and continue processing until the mixture looks uniformly creamy. Depending on the appliance, this may take a minute or two. If small curds remain after the chocolate ingredients are added, the mousse can feel grainy, so take the time to develop a smooth base. A high-speed blender is especially helpful, although a good food processor can also produce excellent results.
Use Unsweetened Cocoa Powder for Rich Chocolate Flavor. Unsweetened cocoa powder gives this Cottage Cheese Chocolate Mousse Recipe its characteristic chocolate flavor without requiring melted chocolate or heavy cream. Both natural and Dutch-process cocoa powder work because the recipe does not involve baking. Natural cocoa often has a slightly sharper, more acidic flavor, while Dutch-process cocoa can taste smoother and produce a darker appearance. Avoid substituting sweetened hot chocolate drink powder, since it typically contains substantial sugar and may have different proportions of cocoa. Begin with the specified 20 g of cocoa and adjust gradually only after tasting. Adding too much cocoa can make the dessert excessively bitter or chalky rather than pleasantly rich.
Add Maple Syrup or Honey Gradually. The amount of sweetener needed depends on the cottage cheese and cocoa powder you choose. Begin with the recipe's 40 g of pure maple syrup and blend until fully incorporated, then taste before adding more. If you prefer honey, use approximately the same weight as a starting point, but remember that honey has its own distinct flavor and sweetness. Both maple syrup and honey contribute added sugars and calories, so they should be measured rather than poured freely. If you're trying to make a less sweet dessert, reduce the sweetener gradually and allow the cocoa and vanilla to provide more of the flavor. Using a mild cottage cheese can also make it easier to achieve a pleasant balance without excessive sweetener.
Use Nonalcoholic Vanilla to Round Out the Flavor. A small amount of vanilla flavoring helps soften the sharpness of cocoa and complement the natural dairy flavor of cottage cheese. Use approximately 1 teaspoon of nonalcoholic vanilla flavoring for this four-serving recipe, adjusting according to the strength of the product. Vanilla is especially useful when making chocolate mousse with unsweetened cocoa because it adds a warm, dessert-like aroma without requiring additional chocolate. Avoid overpowering the mixture with large amounts of flavoring. Cottage cheese can already contain substantial sodium, so taste before adding any optional pinch of salt. For a mocha-style variation, a very small amount of instant coffee powder can also deepen the chocolate flavor.
Avoid Adding Too Much Milk or Water. A common mistake when making cottage cheese chocolate mousse is adding too much liquid because the blender appears to struggle initially. Extra water or milk can quickly turn a thick, creamy dessert into a runny chocolate sauce. Before adding liquid, stop the blender, scrape down its sides, and reposition the mixture around the blades. If the appliance genuinely requires additional moisture, add only 1 teaspoon of milk at a time and blend again. Using a smaller blender cup or food processor may be more effective for modest recipe quantities. The finished mousse should coat a spoon thickly and hold soft swirls, even though it will not be as airy as a traditional whipped chocolate mousse.
Chill the Mousse Before Serving. Although this easy Cottage Cheese Chocolate Mousse Recipe can be eaten immediately after blending, refrigerating it for approximately 30–60 minutes usually improves the serving experience. Chilling allows the mousse to become pleasantly cold and may help the ingredients form a slightly thicker, more cohesive consistency. Divide the mixture into individual dessert glasses before refrigeration so it is ready to serve without additional handling. Cover the containers and store them at 40°F (4°C) or below. Remember that chilling cannot completely correct excessive liquid or improperly blended curds, so aim for the desired texture during preparation. A chilled dessert also provides a refreshing contrast to toppings such as fresh berries and chopped nuts.
Understand the Difference From Traditional French Mousse. This cottage cheese version is inspired by chocolate mousse but does not use the same aeration technique as classic French mousse. Traditional recipes often depend on whipped cream or egg whites to create a light, foamy texture. Blended cottage cheese instead produces a creamy, pudding-like dessert that may be denser and more substantial. That is not a flaw; it is part of the recipe's character. For the best results, focus on creating a smooth consistency and balanced chocolate flavor rather than trying to reproduce an extremely airy whipped mousse. If you describe the dessert as velvety, rich, and mousse-inspired, readers will have a more accurate idea of what to expect.
Use Fresh Berries for a Beautiful Finish. Raspberries and strawberries pair especially well with cottage cheese chocolate mousse because their refreshing acidity contrasts with the rich cocoa flavor. Add a few fresh raspberries or thin strawberry slices to each chilled dessert cup immediately before serving. The bright red fruit creates an attractive contrast against the dark chocolate mixture while providing a little fiber and vitamin C. Wash and dry berries gently before using them, since excess moisture can collect on the mousse surface. Avoid mixing large quantities of watery fruit into the mousse unless you're intentionally developing a different recipe. Keeping the berries on top preserves the thick, smooth chocolate texture and produces a simple, appealing presentation.
Try a Chocolate Peanut Butter Variation. For a richer variation, blend approximately 1 tablespoon of smooth peanut butter into the entire mousse mixture after the cottage cheese, cocoa, maple syrup, and vanilla have been combined. The peanut butter adds a nutty taste and may produce a thicker texture, depending on the product used. Taste after blending because peanut butter can change how the chocolate and sweetness are perceived. You can also swirl a small amount over the top of each individual serving rather than incorporating it into the entire batch. Remember that peanut butter increases calories and fat and introduces peanuts as an allergen. For the basic high-protein chocolate mousse, no nut butter is necessary.
Make a Delicious Mocha Chocolate Mousse. If you enjoy the combination of coffee and chocolate, transform this recipe into a mocha-inspired dessert by adding approximately ¼ teaspoon of instant coffee or espresso powder to the cocoa mixture. Start with a very small amount because coffee can easily become overpowering, especially in a recipe containing only a few ingredients. Blend thoroughly, taste, and add a little more only if you want a stronger coffee flavor. Dry instant coffee powder is preferable to adding a large quantity of brewed coffee because excess liquid may thin the mousse. Remember that coffee can contribute caffeine, so omit it when preparing the dessert for anyone who prefers to avoid caffeine.
Adjust the Recipe for a Less Sweet Dessert. If you prefer a more intense dark chocolate flavor, reduce the maple syrup or honey gradually rather than removing all sweetness immediately. Unsweetened cocoa can taste strongly bitter, and cottage cheese may contribute tanginess, so a modest amount of sweetness helps create balance. Begin with slightly less than the stated 40 g of maple syrup, blend, and taste before deciding whether to add the remaining amount. A few fresh strawberries or raspberries can add natural sweetness when serving. For specific low-sugar or carbohydrate-controlled diets, calculate the total carbohydrates using the actual product labels and any sweetener substitutes. Honey and maple syrup should never be described as sugar-free ingredients.
Prepare Individual Servings for Meal Prep. This no-bake cottage cheese chocolate mousse is easy to portion into four small covered dessert cups immediately after blending. Individual servings make it convenient to enjoy a consistent amount and help preserve freshness because the entire batch does not need to be repeatedly opened. Use clean glasses or food-safe jars, smooth the mousse surface, and refrigerate promptly. Keep the containers at 40°F (4°C) or below, and generally plan to enjoy the dessert within approximately 3–4 days when the ingredients were fresh and properly handled. Leave fresh berries, nuts, and chocolate shavings off until serving if you want to preserve their flavor, texture, and appearance.
Store the Fresh Dairy Dessert Safely. Since cottage cheese chocolate mousse is prepared from fresh dairy without cooking, hygiene and refrigeration are essential. Use clean blender parts, utensils, and containers, and begin with cottage cheese that has been handled and stored safely. Refrigerate the finished mousse promptly at or below 40°F (4°C). Do not leave it at room temperature for longer than 2 hours, or longer than 1 hour when the surrounding temperature exceeds 90°F (32°C). A practical refrigerated storage window is approximately 3–4 days, but the dessert should be consumed sooner if the cottage cheese was already nearing the end of its safe storage period. Discard the mousse if it develops visible mold, unexpected odors, or other signs of spoilage.
Freeze Only If You Accept a Texture Change. Cottage cheese chocolate mousse can be frozen in airtight, freezer-safe portions, but the smooth texture may change because dairy mixtures can separate as ice crystals form and melt. For best eating quality, aim to consume frozen portions within approximately one to two months. If you prefer a chilled mousse rather than a frozen dessert, thaw it overnight in the refrigerator and stir or blend briefly if some separation occurs. The original silky consistency may not return completely. You can also experiment with enjoying a portion while still slightly frozen, giving it a firmer, ice-cream-like eating experience. Never thaw dairy-based mousse for extended periods at room temperature.
Avoid the Most Common Cottage Cheese Mousse Mistakes. The most common mistakes include using cottage cheese with an unpleasantly strong salty or sour flavor, failing to blend out the curds, adding excessive milk or water, using sweetened drinking-chocolate powder, and adding too much cocoa before tasting. For the best Cottage Cheese Chocolate Mousse Recipe, choose a mild, creamy cottage cheese, measure ingredients accurately, blend the dairy base thoroughly, and add cocoa and maple syrup in balanced proportions. Taste before making adjustments, then chill the finished mousse in covered individual portions. Add fresh berries, nuts, or chocolate shavings just before serving. Remember that this recipe creates a thick, creamy mousse-inspired dessert rather than an extremely airy traditional French mousse.