

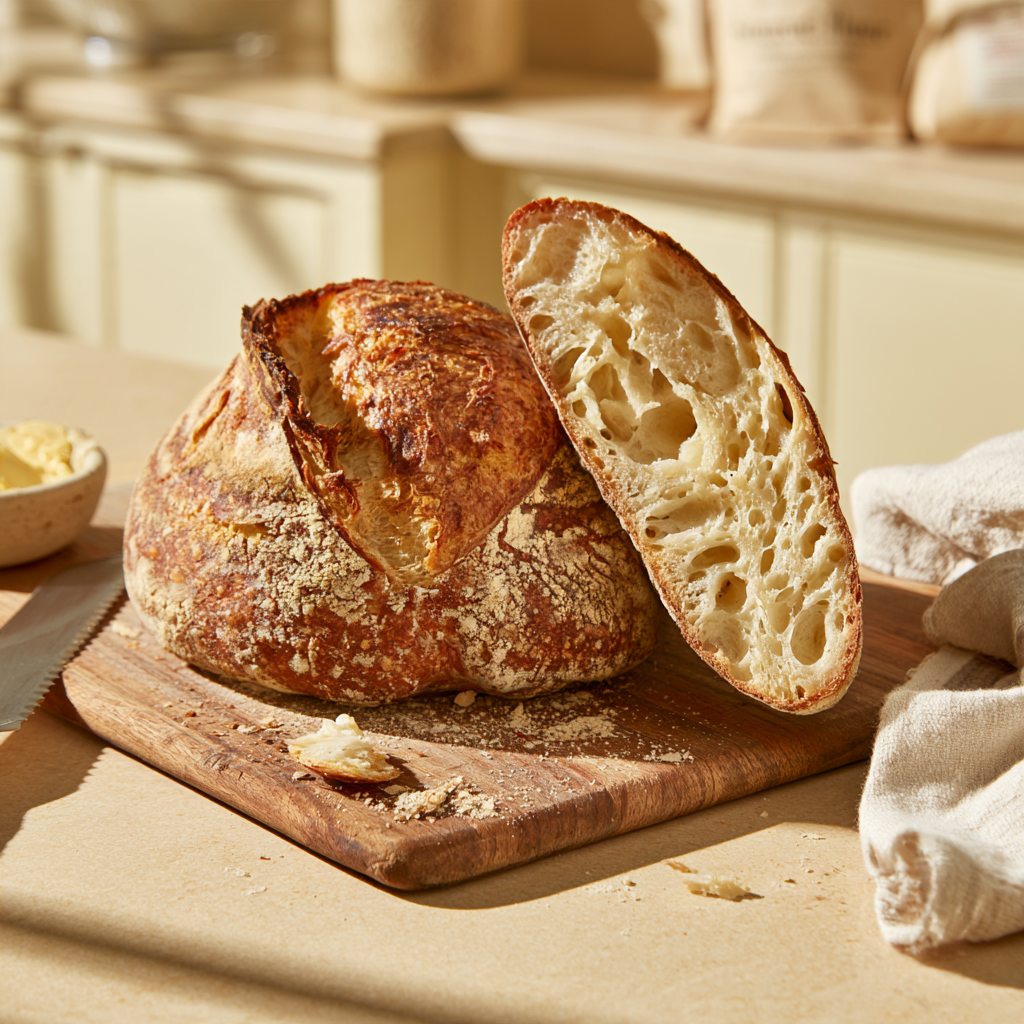
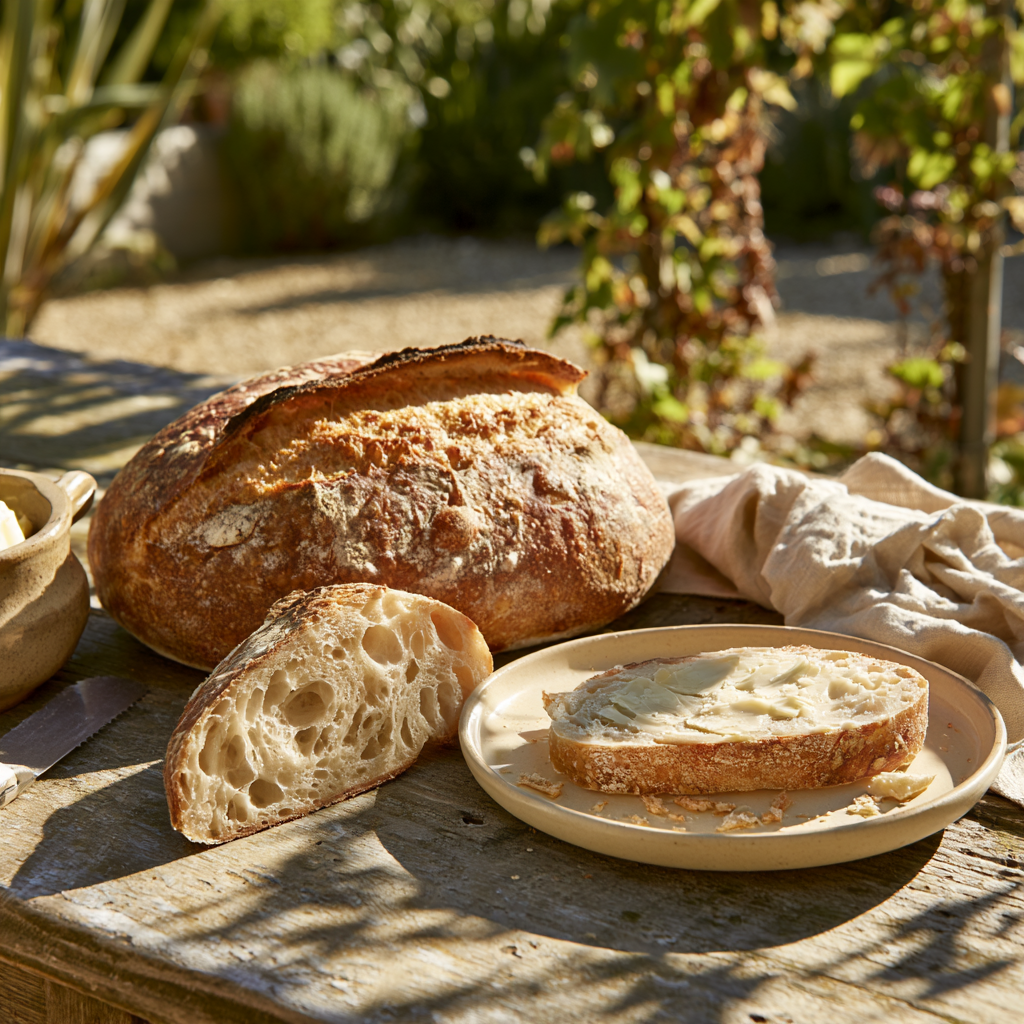
There’s something truly special about pulling a freshly baked loaf of homemade sourdough bread from the oven. The beautifully golden crust, the gentle crackling sound as the bread begins to cool, and the irresistible aroma of warm flour and natural fermentation can make your entire kitchen feel like a traditional artisan bakery. But what if you could enjoy all that wonderful sourdough flavor without waiting until the following day? That’s exactly what makes this Same Day Sourdough Bread Recipe so appealing! With a lively sourdough starter, a few simple ingredients, and the right fermentation conditions, you can prepare a delicious artisan-style loaf in the morning and have freshly baked sourdough bread ready by the evening. No complicated overnight schedule, no unnecessary shortcuts, and no commercial yeast required.
If you’ve ever wanted to bake sourdough bread but felt intimidated by recipes that stretch over two or three days, this easy same day sourdough bread recipe offers a more convenient approach. Traditional sourdough baking often involves long fermentation periods and an overnight rest in the refrigerator, which can develop deeper flavors and make scheduling easier. However, overnight fermentation isn’t essential for every loaf. When your sourdough starter is strong, active, and ready to use, the dough can ferment at a warmer room temperature, allowing you to complete mixing, stretching and folding, bulk fermentation, shaping, final proofing, and baking within the same day. The result is a flavorful homemade bread with a satisfying crust, a soft, pleasantly chewy interior, and the distinctive character that makes naturally fermented sourdough so enjoyable.
What makes same day sourdough bread especially interesting is that it doesn’t rely on artificial shortcuts to imitate traditional sourdough. Instead, it uses the natural activity of a healthy starter to help the dough rise. A sourdough starter is a living mixture of flour and water containing wild yeasts and lactic acid bacteria. These microorganisms work together during fermentation, producing gases that help the dough expand while creating organic acids and other flavor compounds that contribute to sourdough’s characteristic aroma and taste. The key to baking sourdough in a single day is starting with a starter that is already active, bubbly, and near its peak rather than one that has been sitting unfed in the refrigerator. A sluggish starter may require additional feedings before it can reliably leaven bread, and simply increasing the room temperature cannot fully compensate for a starter that isn’t ready.
The beauty of this quiThere’s something truly special about pulling a freshly baked loaf of homemade sourdough bread from the oven. The beautifully golden crust, the gentle crackling sound as the bread begins to cool, and the irresistible aroma of warm flour and natural fermentation can make your entire kitchen feel like a traditional artisan bakery. But what if you could enjoy all that wonderful sourdough flavor without waiting until the following day? That’s exactly what makes this Same Day Sourdough Bread Recipe so appealing! With a lively sourdough starter, a few simple ingredients, and the right fermentation conditions, you can prepare a delicious artisan-style loaf in the morning and have freshly baked sourdough bread ready by the evening. No complicated overnight schedule, no unnecessary shortcuts, and no commercial yeast required.
Same Day Sourdough Bread Recipe
Equipment
- Digital kitchen scale
- Large mixing bowl
- Dough whisk or sturdy mixing spoon
- Bench scraper or dough scraper
- Banneton proofing basket or medium bowl lined with a clean kitchen towel
- Dutch oven with oven-safe lid (approximately 5–6 quarts)
- Sharp bread lame or razor blade
- Oven-safe parchment paper (rated for the baking temperature)
- Clean kitchen towel or reusable bowl cover
- Wire cooling rack
- Instant-read digital thermometer
- Oven mitts
- Serrated bread knife
- Optional: Dough thermometer
- Optional: Rice flour for dusting the proofing basket
Ingredients
- 500 g approximately 4 cups bread flour, preferably unbleached
- 350 g 350 ml water, divided into 340 g and 10 g
- 125 g active sourdough starter at 100% hydration, recently fed and near peak activity
- 10 g fine sea salt
Instructions
- Step 1: Prepare Your Active Sourdough Starter. Before beginning your Same Day Sourdough Bread Recipe, make sure your sourdough starter is healthy, bubbly, and sufficiently active to leaven the dough without commercial yeast. Use 125 g of a recently fed starter at 100% hydration, meaning it has been maintained using equal weights of flour and water. Ideally, the starter should have risen noticeably, developed bubbles throughout its structure, and reached or approached its peak after feeding. A vigorous starter is essential for completing the bread within a single day because weak or sluggish cultures may require significantly longer fermentation. If your starter has been stored in the refrigerator, feed it as needed until it rises predictably and smells pleasantly fermented. Do not rely exclusively on the float test, which is not a dependable measure of starter readiness. Once the starter is active, gather and accurately weigh the flour, water, and salt, then prepare a clean mixing bowl and a suitable warm location for fermentation.
- Step 2: Combine the Sourdough Starter and Water. Pour 340 g of water into a large mixing bowl, reserving the remaining 10 g for incorporating the salt later. Add 125 g of active sourdough starter and stir gently with a dough whisk, spoon, or clean hands until the starter becomes reasonably dispersed throughout the water. It is not necessary to dissolve every small piece completely, but distributing the starter evenly helps fermentation begin throughout the dough. Use water at an appropriate temperature to encourage a finished dough temperature near 75–79°F (24–26°C), taking your flour and kitchen temperatures into account. Avoid using excessively hot water because it can harm the microorganisms responsible for natural fermentation. Once the mixture appears relatively uniform, proceed immediately to adding the bread flour.
- Step 3: Mix the Bread Flour Into the Starter Mixture. Add 500 g of bread flour to the bowl containing the water and sourdough starter. Mix thoroughly using a sturdy spoon, dough whisk, or your hands until all the flour is hydrated and no large dry pockets remain. The dough will initially appear rough, shaggy, and slightly sticky, which is completely normal for this style of artisan sourdough bread. Scrape the sides of the bowl to incorporate any remaining flour, but avoid adding additional flour simply because the dough feels tacky. You do not need to knead the mixture until smooth at this stage because resting and subsequent stretches and folds will help develop its gluten structure. Cover the bowl with a reusable cover or clean, damp kitchen towel and allow the dough to rest for approximately 20–30 minutes so the flour can absorb the water and the dough can become more cohesive.
- Step 4: Add the Salt and Remaining Water. After the initial resting period, sprinkle 10 g of fine sea salt evenly over the dough and add the reserved 10 g of water. Using lightly dampened fingers, gently pinch, squeeze, and fold the dough until the salt is completely incorporated and the mixture becomes reasonably uniform. The dough may temporarily feel slippery or slightly loose as the additional water is absorbed, but it should gradually become more cohesive with gentle mixing. Salt enhances the flavor of homemade sourdough bread and influences gluten strength and fermentation behavior, so accurate measurement is important. Once the salt has been distributed throughout the dough, cover the bowl again and let it rest for approximately 30 minutes before beginning the first stretch-and-fold set. During this period, natural fermentation continues as the starter’s microorganisms begin producing the gases and flavor compounds that contribute to sourdough bread’s characteristic structure.
- Step 5: Perform the First Stretch-and-Fold Set. Lightly wet your hands to prevent excessive sticking, then reach underneath one side of the dough and gently lift it upward until you feel resistance. Fold the stretched portion over the center, rotate the bowl approximately one-quarter turn, and repeat the movement from the remaining three sides to complete one full stretch-and-fold set. This gentle technique helps strengthen the gluten network without requiring intensive kneading and encourages the dough to become smoother, more elastic, and better able to retain fermentation gases. Avoid pulling so aggressively that the dough tears, and do not press down unnecessarily on developing air pockets. After completing the first set, cover the bowl and let the dough rest for approximately 30 minutes. The mixture may still appear slightly sticky and loose, but it should gradually begin developing a stronger, more organized structure with each successive folding session.
- Step 6: Complete Three Additional Stretch-and-Fold Sets. Repeat the same stretch-and-fold process three more times, spacing each set approximately 30 minutes apart, for a total of four sets during the early bulk fermentation period. During each set, gently lift and fold all four sides of the dough toward the center, allowing the mixture to rest covered between sessions. As gluten develops, you should notice the dough becoming increasingly smooth, elastic, and resistant to stretching. It may also begin holding its shape more effectively instead of spreading completely across the bottom of the bowl. These changes indicate that the gluten network is becoming stronger and better equipped to retain the carbon dioxide produced during natural fermentation. If the dough is already very strong and resists stretching, avoid forcing additional folds that could damage its structure. Once the final set is complete, cover the bowl and allow the dough to continue fermenting undisturbed until it reaches the appropriate stage of bulk fermentation.
- Step 7: Allow the Dough to Complete Bulk Fermentation. Keep the covered dough in a moderately warm, draft-free location, ideally maintaining a dough temperature of approximately 75–79°F (24–26°C), until bulk fermentation is complete. For this same-day method, the total bulk fermentation period may take approximately 4–6 hours or longer from the initial mixing, depending on starter activity, flour characteristics, and temperature. Because the dough has already been fermenting during the mixing and folding stages, do not restart the fermentation clock after the last fold. Look for an increase in volume of roughly 40–60% as a useful starting guideline for this formula and temperature range, along with visible bubbles, a gently rounded surface, and a soft wobble when the bowl is moved. The dough should feel lighter and more aerated than when first mixed. Avoid relying solely on elapsed time or waiting automatically for the dough to double because excessive fermentation can weaken its structure. If the dough remains dense and shows little activity, allow additional time before shaping.
- Step 8: Pre-Shape the Sourdough Dough Into a Loose Round. Once bulk fermentation is complete, gently transfer the dough onto a clean work surface using a dough scraper, taking care not to deflate it unnecessarily. Lightly dust the surface with bread flour if needed, but avoid using excessive flour because some friction is useful during shaping. Bring the outer edges of the dough toward the center to create a loose round, then turn it over so the smoother surface faces upward. Using your hands or bench scraper, gently draw the dough toward you to create a little surface tension without tearing the exterior. The goal is to organize the dough into a manageable shape while preserving the air pockets formed during fermentation. Cover the pre-shaped round with a clean towel and allow it to rest on the counter for approximately 15–20 minutes. This bench rest helps the gluten relax, making the dough easier to shape into a tighter, more attractive loaf.
- Step 9: Shape the Dough Into a Round Artisan Sourdough Loaf. After the bench rest, lightly flour the top of the dough and carefully turn it over so the floured surface faces downward. Gently stretch the dough into a rough rectangle, fold the left and right sides toward the center, then fold the top and bottom portions inward to form a compact package. Turn the dough seam-side down and cup your hands around it, gently pulling the loaf across the work surface to create tension across the outer surface. Rotate the loaf slightly and repeat until it forms a smooth, rounded boule that holds its shape without tearing. Proper shaping helps the dough maintain its structure during proofing and encourages better oven spring. Lightly dust a banneton or towel-lined bowl with rice flour, then carefully transfer the shaped dough into the basket with the seam facing upward. Cover the basket to prevent the surface from drying out while the dough completes its final rise.
- Step 10: Let the Shaped Dough Complete Its Final Proof. Allow the shaped sourdough loaf to rise at room temperature until it becomes slightly fuller, softer, and noticeably more aerated, typically approximately 1–2 hours in a moderately warm kitchen, although the exact timing may vary. For the example same-day baking schedule, plan for approximately 1 hour and 40 minutes of final proofing, adjusting according to the dough’s actual behavior. The loaf should show gentle expansion and feel lighter than immediately after shaping. A lightly floured finger indentation that slowly springs back partway can be one useful sign of readiness, but the test should be considered alongside the dough’s overall appearance, strength, and volume. Avoid allowing the loaf to overproof, as excessive fermentation can weaken the gluten network and cause the dough to spread when transferred to the oven. Begin preheating the Dutch oven during the final 40–45 minutes of proofing so the baking equipment is thoroughly heated when the loaf is ready.
- Step 11: Preheat the Oven and Prepare the Dutch Oven. Place a suitable Dutch oven with its lid inside the oven and preheat to 450°F (230°C) for approximately 40–45 minutes, following the manufacturer’s maximum temperature recommendations. A thoroughly heated Dutch oven creates the intense initial baking environment needed for good oven spring, while its covered interior helps retain moisture released from the dough. This trapped steam delays crust formation during the early baking stage, allowing the bread to expand before its surface becomes firm. Check that the Dutch oven and lid knob are rated for the required temperature, and use sturdy oven mitts when handling the extremely hot equipment. If using parchment paper to transfer the dough, confirm that it is suitable for your baking temperature and keep any exposed edges away from heating elements. Once the oven is fully preheated and the dough has completed its final proof, prepare to score and bake the loaf promptly.
- Step 12: Score the Sourdough Bread for Controlled Oven Spring. Carefully turn the proofed dough out of its basket onto a sheet of oven-safe parchment paper so that the smooth, rounded side faces upward. Using a sharp bread lame or razor blade, make one confident curved or diagonal slash across the surface, approximately 1/4–1/2 inch (6–12 mm) deep. Scoring creates a controlled opening that allows the loaf to expand during the early stages of baking instead of bursting unpredictably through its crust. Avoid pressing heavily on the dough or making repeated hesitant cuts, as these can deflate the loaf or damage its delicate outer structure. Decorative scoring is optional, and a single clean slash is usually sufficient for a beautiful rustic appearance. Work carefully and efficiently to preserve the dough’s shape, then prepare to transfer it into the preheated Dutch oven.
- Step 13: Bake the Sourdough Bread Covered for the First 20 Minutes. Carefully remove the preheated Dutch oven from the oven using heavy-duty oven mitts, lift off the lid, and lower the scored dough into the pot using the parchment paper as a transfer aid if appropriate. Immediately replace the lid and return the Dutch oven to the oven. Bake the sourdough bread at 450°F (230°C) for approximately 20 minutes with the lid on. During this stage, heat causes the dough to expand while moisture trapped beneath the lid creates a steamy environment that delays crust formation. This encourages oven spring and helps the loaf develop a well-rounded artisan shape. Avoid removing the lid repeatedly during this first baking period because doing so releases trapped moisture and heat. When the covered stage is complete, the loaf should have expanded significantly, although the crust may still appear relatively pale.
- Step 14: Remove the Lid and Bake Until Deeply Golden. After approximately 20 minutes of covered baking, carefully remove the Dutch oven lid while protecting your hands and face from escaping steam. Continue baking the sourdough uncovered at 450°F (230°C) for another 20–25 minutes, or until the crust becomes deeply golden brown and develops a firm, crisp exterior. During this stage, the surface of the loaf dries and browns, creating the toasted aroma and characteristic crust of artisan sourdough bread. If the crust begins darkening too quickly, reduce the oven temperature slightly during the final portion of baking. For an additional doneness check, insert an instant-read thermometer into the center of the loaf; fully baked sourdough commonly reaches approximately 205–210°F (96–99°C), although temperature should be evaluated together with crust color and overall appearance. Once the bread is thoroughly baked, carefully remove it from the Dutch oven and transfer it to a wire cooling rack.
- Step 15: Allow the Sourdough Loaf to Cool Completely. Place the freshly baked sourdough bread on a wire cooling rack and allow it to rest for approximately 1–2 hours before slicing, with 1 hour and 30 minutes used in this recipe’s example schedule. Although the golden crust and delicious aroma may make it tempting to cut immediately, the bread’s interior continues setting as moisture redistributes during cooling. Slicing the loaf too early can compress the crumb and create a sticky or gummy texture even when the bread has been baked adequately. Leave the loaf uncovered while cooling so air can circulate around its exterior and help preserve its crisp crust. Once the bread is cool enough to cut cleanly, use a sharp serrated bread knife to slice it into approximately 12 portions. The finished loaf should reveal a soft, pleasantly chewy interior beneath a firm, beautifully browned crust.
- Step 16: Serve and Store Your Homemade Same Day Sourdough Bread. Enjoy your freshly baked Same Day Sourdough Bread as breakfast toast, a sandwich base, or a delicious accompaniment to homemade soups, stews, and savory meals. Its slightly tangy flavor and crispy crust pair beautifully with butter, olive oil, cheese, and a variety of spreads. To store leftover bread, allow it to cool completely, then keep it in a clean bread bag or suitable bread container at room temperature for short-term use. Avoid refrigerating ordinary bread unnecessarily because refrigeration can accelerate staling. For longer storage, slice the cooled loaf, place the portions in a freezer-safe bag, and freeze for approximately 2–3 months for the best quality. Individual slices can be toasted directly from frozen when needed. If the bread develops visible mold, discard the affected loaf rather than attempting to remove only the moldy section. Proper storage helps preserve freshness while making homemade sourdough convenient for everyday meals.
Notes
- Origins of Same Day Sourdough Bread Recipe: From Ancient Fermentation to Modern Artisan Baking
- The Ancient Origins of Bread: More Than 14,000 Years of History
- Ancient Egypt and the Development of Leavened Bread
- How Sourdough Starters Became the Heart of Traditional Bread-Making
- Sourdough Traditions Across Europe
- The California Gold Rush and the American Sourdough Tradition
- The Arrival of Commercial Yeast and the Changing Bread-Making Process
- The Modern Artisan Bread Revival
- How the Same Day Sourdough Bread Method Developed
- Why Temperature Became So Important in Modern Sourdough Baking
- Health Benefits of Same Day Sourdough Bread Recipe: Nutrition, Natural Fermentation & Healthier Homemade Bread
- 1. Natural Fermentation Changes the Structure of Bread
- 2. Sourdough Fermentation May Improve Mineral Availability
- 3. Whole Wheat Sourdough Can Provide More Dietary Fiber
- 4. Some Sourdough Breads May Be Easier to Digest
- 6. Homemade Sourdough Makes It Easier to Control Ingredients
- 7. Sourdough Bread Supplies Carbohydrates for Energy
- 8. Sourdough Fermentation Contributes Flavor Without Requiring Added Sugar
- 9. Whole-Grain Sourdough Can Contribute Vitamins and Minerals
- 10. Homemade Bread Can Support Balanced Meals and Portion Awareness
- How to Make Sourdough Bread: Easy Step-by-Step Same Day Method
- Ingredients You'll Need for Same Day Sourdough Bread
- Step 1: Make Sure Your Sourdough Starter Is Active
- Step 2: Mix the Sourdough Starter, Water, and Flour
- Step 3: Add the Salt and Finish Mixing
- Step 4: Perform the First Stretch and Fold
- Step 5: Allow the Dough to Complete Bulk Fermentation
- Step 6: Pre-Shape the Sourdough Loaf
- Step 7: Shape the Dough Into a Round Artisan Loaf
- Step 8: Let the Bread Rise During the Final Proof
- Step 9: Preheat the Oven and Dutch Oven
- Step 10: Score the Sourdough Bread
- Step 11: Bake the Same Day Sourdough Bread Until Golden and Crusty
- Ingredients You'll Need for Same Day Sourdough Bread
Origins of Same Day Sourdough Bread Recipe: From Ancient Fermentation to Modern Artisan Baking
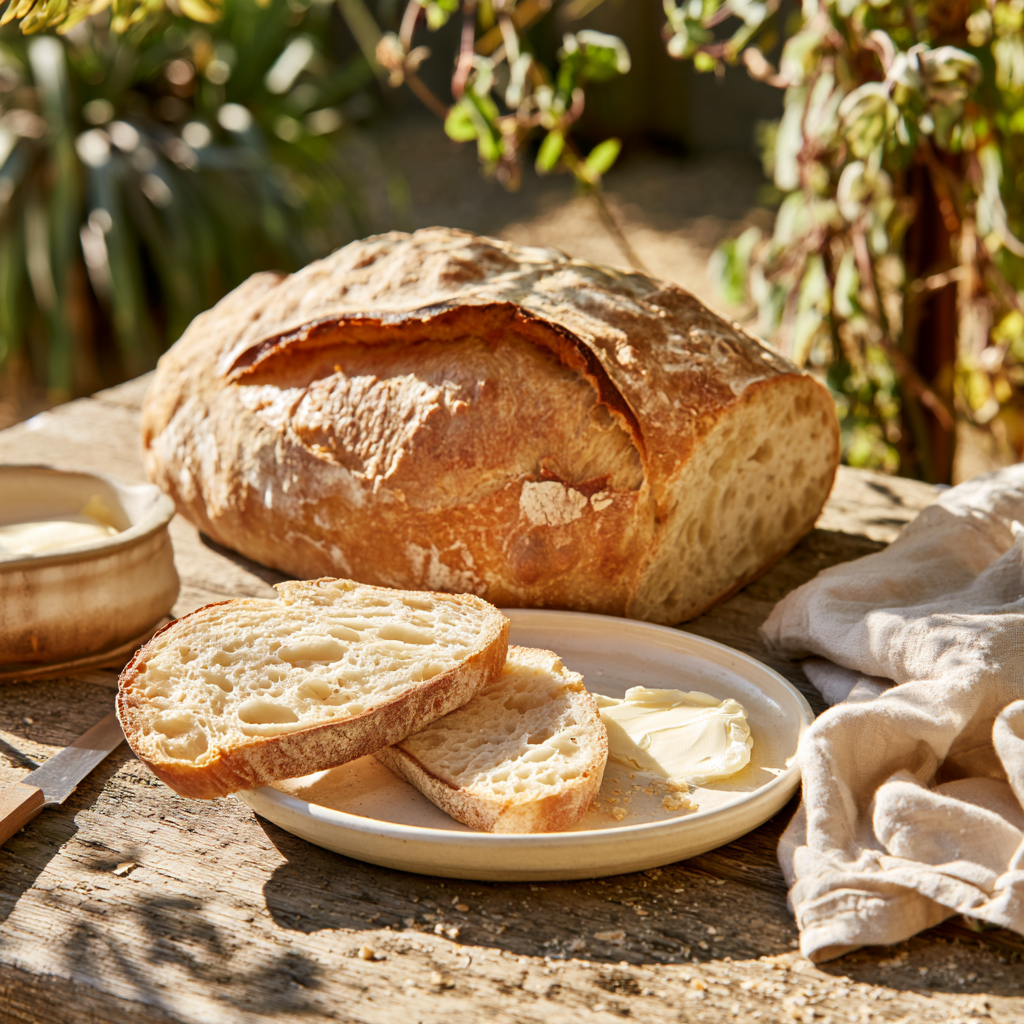
The history of the Same Day Sourdough Bread Recipe is a fascinating journey through thousands of years of bread-making traditions, ancient civilizations, naturally fermented dough, and the modern revival of homemade artisan baking. Although the idea of preparing a beautiful sourdough loaf in a single day may sound like a recent kitchen innovation, the natural fermentation process behind this bread is one of the oldest methods of leavening dough known to humanity.
Long before coOrigins of Same Day Sourdough Bread Recipe: From Ancient Fermentation to Modern Artisan Baking
mmercial yeast, electric mixers, modern refrigerators, or temperature-controlled ovens became part of everyday kitchens, bakers were already using fermented flour-and-water mixtures to make bread rise. These early methods relied on microorganisms naturally present in the ingredients and surrounding environment, creating bread with distinctive flavors and textures.
What makes same day sourdough bread particularly interesting is that it combines this ancient fermentation principle with a more convenient modern baking schedule. Instead of relying on an overnight refrigerator proof, bakers use a vigorous sourdough starter, favorable dough temperatures, and careful fermentation management to prepare and bake their bread within the same day.
However, same-day sourdough wasn’t invented by one particular baker, in one country, or during one historical period. It is better understood as a modern scheduling approach to traditional sourdough fermentation, influenced by centuries of bread-making knowledge and today’s growing interest in homemade food.
The Ancient Origins of Bread: More Than 14,000 Years of History
The history of bread begins long before the development of the sourdough loaves familiar to modern home bakers.
One of the most remarkable discoveries in bread-making history came from archaeological research at Shubayqa 1, a prehistoric site in northeastern Jordan.
In a scientific study published in 2018, researchers documented charred remains of bread-like products dating back approximately 14,400 years.
These remains were associated with Natufian hunter-gatherer communities that lived thousands of years before agriculture became widespread in the region.
The researchers identified evidence that early people were processing wild cereal grains and other plant ingredients to create flat, bread-like foods.
This discovery demonstrated that people were preparing bread-like products even before the domestication of wheat and the development of established farming communities.
However, there is an important historical distinction: the recovered bread remains were most consistent with unleavened flatbread, not the airy, fermented sourdough loaves baked today.
The discovery therefore represents an early milestone in the history of bread rather than direct evidence of sourdough fermentation.
As agriculture developed and cultivated grains became more widely available, people gained greater opportunities to experiment with flour, water, storage, and fermentation.
These developments eventually contributed to the evolution of leavened bread.
The fundamental combination of grain and water remained central, but the discovery and control of fermentation would transform bread-making dramatically.
Ancient Egypt and the Development of Leavened Bread
Ancient Egypt occupies an important place in the documented history of leavened bread.
Bread was a staple of Egyptian food culture, and archaeological evidence shows that Egyptians produced a wide variety of breads using grains such as emmer wheat and barley.
Unlike simple unleavened flatbreads, many Egyptian breads were prepared using fermentation and developed a lighter, more aerated structure.
The exact moment when humans first discovered natural leavening remains uncertain.
One commonly repeated explanation suggests that flour-and-water dough was accidentally left standing long enough to ferment, allowing naturally occurring yeasts to produce gas and make the dough expand.
Although this is a plausible way fermentation could have been discovered, it should be regarded as a traditional explanation rather than a documented historical event.
What is clear is that ancient bakers eventually learned to use fermented dough as a practical method for preparing bread.
They could preserve a portion of fermented mixture and incorporate it into new dough, allowing the fermentation process to continue from one batch to another.
This practice became an important foundation of sourdough baking.
The Egyptians also developed sophisticated bread-making techniques, producing loaves in different shapes and using a variety of baking vessels and ovens.
Bread played a role not only in everyday meals but also in religious offerings, social life, and economic activities.
The similarities between ancient fermented dough and modern sourdough demonstrate how remarkably durable the basic principles of bread-making have been.
Even today, the essential ingredients of a traditional sourdough loaf remain flour, water, and salt, together with an active fermented starter.
How Sourdough Starters Became the Heart of Traditional Bread-Making
The defining feature of sourdough bread is the use of a naturally fermented starter.
A sourdough starter is a maintained mixture of flour and water containing yeasts and lactic acid bacteria.
These microorganisms establish a fermentation environment in which the yeasts help produce the gas that makes dough rise, while the bacteria contribute acids and aromatic compounds.
The result is a leavening system that can produce bread with complex flavor, a distinctive aroma, and a satisfying texture.
Before commercial baker’s yeast became widely available, fermented dough was an important method of leavening bread in many parts of the world.
Bakers could save part of an active dough or maintain a separate fermented mixture to begin the next batch.
By regularly feeding this mixture with fresh flour and water, they encouraged the microorganisms to remain active.
Over time, this became an established baking practice.
A maintained starter could be used repeatedly, making it a valuable resource for households and bakeries.
Because the microorganisms in a starter depend on the flour, feeding practices, temperature, and surrounding conditions, different starters can develop different characteristics.
This helps explain why sourdough bread has never had one universal flavor or texture.
Some starters produce relatively mild breads, while others contribute more pronounced acidity.
The same basic fermentation principles can also be used in different bread shapes, flour combinations, and preparation schedules.
Modern same day sourdough bread continues this traditional approach by using an active starter to leaven dough naturally, rather than depending on an overnight rest or packaged commercial yeast.
Sourdough Traditions Across Europe
As bread-making practices developed across Europe, fermented dough became part of numerous regional baking traditions.
Different communities adapted their recipes to local grain varieties, climate conditions, available ovens, and cultural preferences.
Rye-based sourdough became particularly important in parts of northern and central Europe, where rye was well suited to certain agricultural conditions.
In countries such as Germany, sourdough fermentation remains closely associated with traditional rye breads.
Rye behaves differently from wheat during bread-making because it relies less on the same gluten structure that supports the shape of many wheat loaves.
The acidity produced during sourdough fermentation can play an important role in the baking properties of rye dough.
Wheat-based sourdough traditions also developed throughout Europe.
Depending on the region, bakers produced round country loaves, long breads, dark whole-grain varieties, and lighter wheat breads.
In French baking, fermented pre-doughs and naturally leavened breads contributed to the development of distinctive artisan bread traditions.
One important concept was the use of previously fermented dough to encourage the fermentation of a new batch.
These methods provided continuity between baking sessions and allowed bakers to manage flavor and dough development.
If you enjoy learning how European bread traditions influence modern home baking, our Homemade Paris Baguettes Recipe explores another classic bread style known for its slender shape, golden crust, and light interior.
Although baguettes commonly use commercial yeast and sourdough bread relies on natural starter fermentation, both illustrate how European baking techniques evolved around flour quality, fermentation, shaping, and oven heat.
The California Gold Rush and the American Sourdough Tradition
One of the most recognizable chapters in American sourdough history developed during the nineteenth-century California Gold Rush.
When gold was discovered in California in 1848, thousands of people traveled west hoping to build new lives and fortunes.
Among the many supplies needed by miners and settlers, bread was an essential food.
Commercial yeast wasn’t always easy to obtain or preserve in remote locations, so maintaining fermented bread starters offered a practical alternative.
Prospectors could keep a starter alive by feeding it regularly with flour and water.
Stories from the period describe miners protecting their sourdough starters from cold conditions, sometimes keeping the containers close to their bodies to maintain warmth.
These accounts helped establish the image of sourdough as a symbol of resourcefulness and survival in frontier life.
San Francisco became particularly famous for its sourdough bread during this period.
In 1849, Boudin Bakery was established in the city, becoming closely associated with San Francisco’s sourdough tradition.
Over time, San Francisco sourdough developed a reputation for its characteristic tangy flavor and chewy texture.
The word sourdough also became associated with experienced prospectors and long-time residents of northern frontier regions.
However, San Francisco did not invent sourdough bread.
The city became famous for a particular regional tradition within a much older history of naturally fermented bread.
Another interesting detail is that microorganisms historically associated with San Francisco sourdough have also been found elsewhere.
The distinctive character of a sourdough loaf depends on more than geographic location alone.
Starter maintenance, flour selection, fermentation temperatures, hydration, and baking techniques all influence the final bread.
This historical period demonstrates how a centuries-old bread-making method adapted to a new environment and became part of American food culture.
The Arrival of Commercial Yeast and the Changing Bread-Making Process
During the nineteenth and twentieth centuries, changes in yeast production and industrial baking transformed how bread was made.
Commercial baker’s yeast became increasingly accessible, giving bakers a more standardized leavening option.
Unlike sourdough starters, which contain communities of yeasts and lactic acid bacteria, commercial baker’s yeast products are generally based on selected strains of Saccharomyces cerevisiae.
These products offered greater predictability and convenience for many bread recipes.
Bakers could produce loaves without maintaining a separate sourdough starter or depending on the specific behavior of a naturally fermented culture.
As industrial baking expanded, commercial yeast became central to many mass-produced breads.
Mixing machinery, standardized flour, controlled temperatures, and improved oven technology also contributed to more consistent production.
These developments did not eliminate sourdough baking, but they reduced its necessity in some settings.
Naturally fermented breads continued to be made in traditional bakeries and households, particularly in regions where sourdough was an established part of the local food culture.
Over time, sourdough increasingly became associated with traditional craftsmanship, artisan baking, and distinctive flavors.
This contrast between modern convenience and traditional fermentation eventually helped inspire renewed interest in homemade sourdough.
The Modern Artisan Bread Revival
By the late twentieth century, artisan bread gained renewed attention among professional bakers and food enthusiasts.
Consumers became increasingly interested in breads that emphasized traditional methods, flavorful crusts, carefully managed fermentation, and recognizable ingredients.
Independent bakeries helped popularize rustic country loaves, naturally leavened breads, and techniques that highlighted the relationship between fermentation and flavor.
Home bakers also began experimenting with methods previously associated with professional bread production.
Instructional baking books, specialized websites, cooking communities, and video tutorials made artisan techniques more accessible.
Terms such as bulk fermentation, hydration, stretch and fold, levain, and final proof became more familiar outside professional bakeries.
At the same time, home bakers began adapting traditional techniques to fit modern schedules.
Instead of always following extended fermentation methods, they experimented with adjusting starter quantity, dough temperature, and proofing conditions.
These adjustments made it possible to prepare certain naturally leavened breads without requiring an overnight refrigerator rest.
The same-day sourdough approach developed within this broader movement toward making traditional bread-making more practical for everyday home kitchens.
How the Same Day Sourdough Bread Method Developed
Although no single documented invention marks the beginning of the modern Same Day Sourdough Bread Recipe, its underlying technique is a straightforward adaptation of traditional sourdough fermentation.
A conventional sourdough schedule might involve mixing the dough, allowing it to ferment at room temperature, shaping it, and then refrigerating the shaped loaf overnight.
Cold refrigeration slows fermentation, helps bakers organize their schedules, and can influence the flavor and handling characteristics of the dough.
However, refrigeration is not required for every sourdough recipe.
If a baker begins with a sufficiently active starter and manages the dough temperature carefully, fermentation can progress steadily enough for the bread to be shaped, proofed, and baked on the same day.
The process still follows the fundamental principles of natural fermentation.
The difference lies in how the baker schedules and controls each stage.
A same-day method generally emphasizes three important factors:
- A vigorous sourdough starter: A healthy, well-fed culture provides the fermentation activity needed to help the dough rise within a shorter schedule.
- Favorable dough temperatures: A moderately warm environment supports fermentation, while excessive heat can negatively affect dough behavior.
- Careful observation: The baker monitors dough expansion, bubbles, texture, and strength rather than relying on a fixed number of hours.
The goal is not to remove fermentation from the process.
Instead, it is to complete the necessary fermentation within a shorter, more convenient timeframe.
In practice, a same day sourdough bread recipe without commercial yeast might take approximately 8–12 hours from mixing to baking under favorable conditions, although some doughs require longer.
A starter that isn’t ready, a cool kitchen, or an unsuitable dough formula can extend the timeline considerably.
This is why same-day sourdough is best understood as a flexible baking method rather than a guaranteed rapid recipe.
Why Temperature Became So Important in Modern Sourdough Baking
One of the most significant developments in modern home sourdough baking has been a greater understanding of fermentation temperature.
Temperature influences the activity of the microorganisms in a starter and the dough.
In a cooler environment, fermentation usually progresses more slowly.
In a moderately warmer environment, yeast and bacterial activity generally increase, allowing the dough to develop more quickly.
Many artisan sourdough methods work successfully with dough temperatures around 24–26°C (75–79°F), although the appropriate range depends on the recipe and fermentation goals.
This knowledge allows home bakers to manage their schedules more effectively.
For example, using appropriately warm mixing water can help bring the dough closer to a desired starting temperature.
Allowing the dough to rest in a draft-free environment can also encourage steadier fermentation.
However, simply placing the dough somewhere extremely hot is not a reliable shortcut.
Excessive warmth can accelerate fermentation beyond the dough’s ability to maintain structure and may cause unfavorable changes in texture.
Same-day sourdough therefore depends on controlled fermentation rather than uncontrolled speed.
The ability to observe and manage these conditions is one reason modern home bakers can prepare naturally leavened bread within a single day more predictably than someone relying entirely on guesswork.
Health Benefits of Same Day Sourdough Bread Recipe: Nutrition, Natural Fermentation & Healthier Homemade Bread
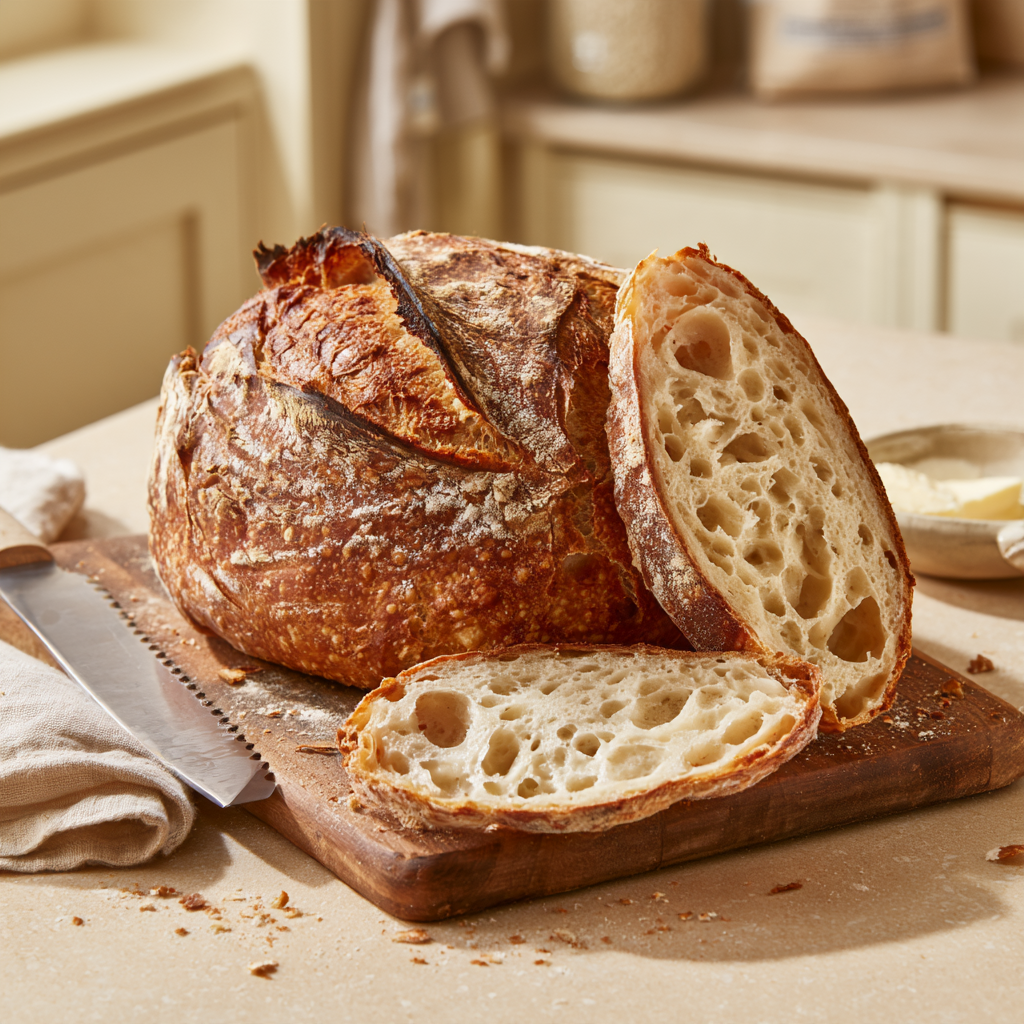
There’s something wonderfully satisfying about slicing into a freshly baked loaf of Same Day Sourdough Bread, revealing its golden, crackling crust and soft, chewy interior. Beyond its irresistible homemade flavor and rustic appearance, sourdough bread has attracted considerable attention for its natural fermentation process and potential nutritional advantages. But is same day sourdough bread healthier than regular bread, and does a shorter fermentation provide the same benefits as traditional overnight sourdough?
The answer depends on several important factors, including the type of flour, the strength of your sourdough starter, the fermentation time, and the ingredients used. Traditional sourdough relies on naturally occurring yeasts and lactic acid bacteria to ferment dough, producing organic acids and changing some of the compounds naturally present in flour. These changes can influence flavor, texture, mineral availability, and the composition of certain carbohydrates.
However, same day sourdough bread is not automatically healthier than overnight sourdough or conventional yeast bread. Some nutritional effects of fermentation depend on how long the dough ferments, and a shorter same-day schedule may not produce the same changes observed in bread fermented for considerably longer periods.
The good news is that homemade sourdough offers plenty of opportunities to make thoughtful nutritional choices. Using whole wheat flour, controlling the amount of salt, preparing bread without unnecessary added sugar, and serving it alongside fiber-rich vegetables and protein sources can help make this delicious artisan-style loaf part of a balanced eating pattern.
Let’s explore the nutritional characteristics and potential health benefits of homemade same day sourdough bread, including what science tells us about fermentation, digestion, blood sugar, and whole grains.
1. Natural Fermentation Changes the Structure of Bread
One of the most distinctive features of a Same Day Sourdough Bread Recipe is its natural fermentation process.
Unlike conventional bread prepared exclusively with commercial baker’s yeast, traditional sourdough uses a starter containing naturally occurring yeasts and lactic acid bacteria.
These microorganisms interact with the flour and water as the dough ferments.
Yeasts produce carbon dioxide, helping the dough expand and develop its familiar airy structure. Lactic acid bacteria produce organic acids and contribute to the complex aromas associated with sourdough.
During this process, naturally occurring enzymes and microbial activity can also modify certain carbohydrates and proteins in the dough.
These changes influence the bread’s texture, flavor, acidity, and some nutritional properties.
For a same-day recipe, the fermentation process takes place over a shorter schedule than methods using an extended overnight rest.
A vigorous starter and suitable dough temperature can allow the bread to rise successfully within one day, but the amount of biochemical change will depend on the specific fermentation conditions.
The important point is that same-day sourdough still undergoes genuine natural fermentation.
However, the word sourdough alone does not guarantee a particular nutritional benefit.
The duration and conditions of fermentation matter just as much as the type of starter.
2. Sourdough Fermentation May Improve Mineral Availability
One of the more promising nutritional effects of sourdough fermentation involves a naturally occurring compound called phytic acid.
Phytic acid, or phytate, is found in grains, seeds, legumes, and other plant foods.
It can bind to certain minerals, including iron, zinc, magnesium, and calcium, reducing how much of those minerals becomes available for absorption during digestion.
This doesn’t mean phytic acid is inherently harmful. It is a normal component of plant foods and has also been investigated for potentially beneficial biological properties.
However, reducing phytate under suitable conditions may improve mineral bioaccessibility.
During sourdough fermentation, the acidity of the dough and the activity of phytate-degrading enzymes can contribute to the breakdown of some phytic acid.
This effect may be particularly relevant in whole-grain breads because the outer portions of the grain contain both valuable minerals and relatively high phytate concentrations.
For example, whole wheat flour naturally provides magnesium, iron, zinc, phosphorus, and other nutrients.
When fermented under appropriate conditions, some of those minerals may become more accessible during digestion.
However, improved mineral bioaccessibility does not automatically mean the body absorbs substantially more minerals from every sourdough loaf.
Actual absorption depends on the complete meal, individual nutritional status, and the specific bread formulation.
Same-day sourdough may experience some phytate breakdown, but its shorter fermentation means the effect shouldn’t be assumed to equal that of a long-fermented loaf.
For home bakers interested in improving the nutritional quality of bread, combining whole grains with a properly developed sourdough fermentation is a reasonable approach.
3. Whole Wheat Sourdough Can Provide More Dietary Fiber
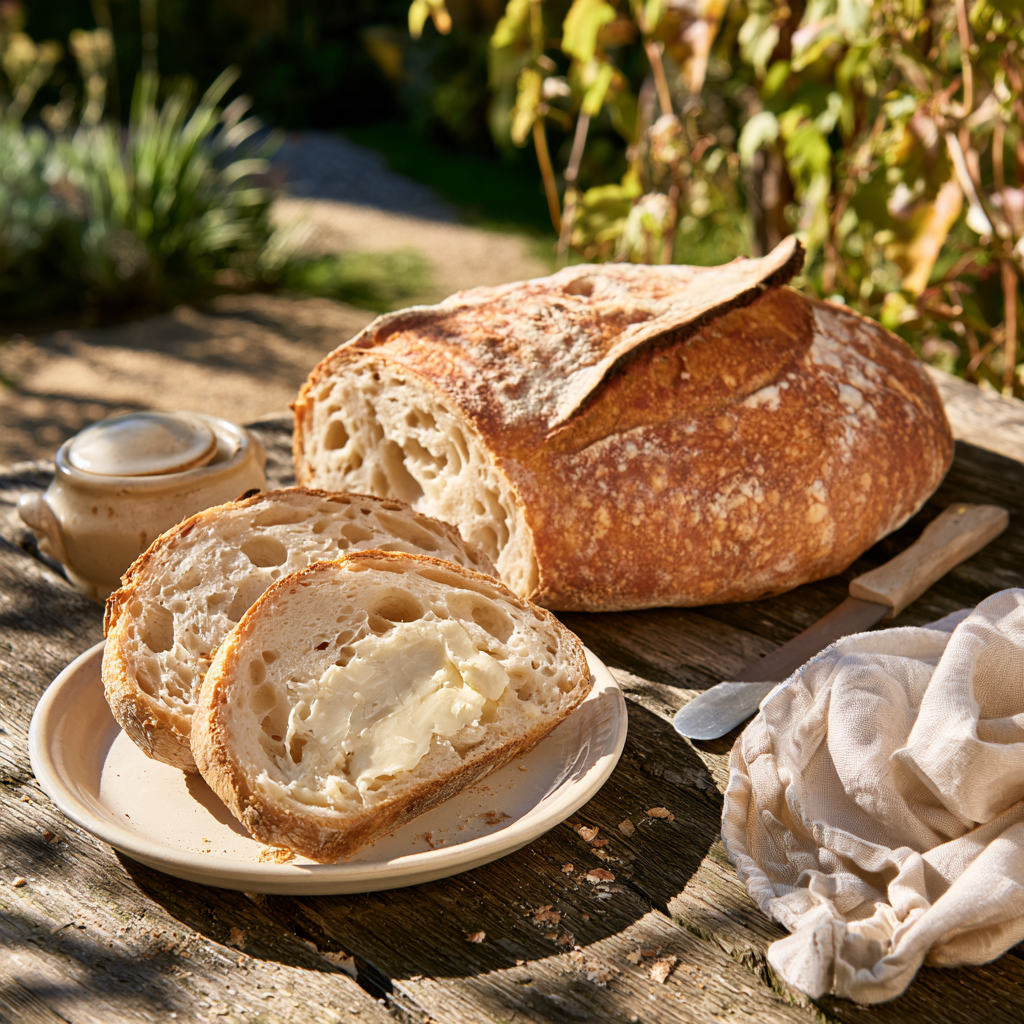
The type of flour used in your homemade same day sourdough bread has a major influence on its nutritional value.
Many artisan-style sourdough loaves are prepared primarily with refined white bread flour.
This flour can create excellent gluten development, impressive oven spring, and a tender, chewy crumb.
However, refined flour generally contains less dietary fiber than whole wheat flour because significant portions of the grain’s bran and germ have been removed.
Whole wheat flour retains these parts of the grain, providing additional fiber, minerals, and naturally occurring plant compounds.
Dietary fiber helps support normal digestive function and contributes to a balanced eating pattern.
Whole-grain foods are also associated with several long-term health benefits when consumed regularly as part of an overall nutritious diet.
For a more fiber-rich sourdough loaf, consider replacing approximately 20–30% of the white bread flour with whole wheat flour.
This introduces whole-grain nutrients while retaining much of the elasticity and structure of a traditional white sourdough.
However, whole wheat flour absorbs water differently and may influence fermentation speed, dough handling, and final loaf volume.
A recipe developed specifically for a mixed-flour sourdough is the most reliable option.
If you enjoy experimenting with different bread ingredients, our Easy & Quick Squaw Bread Recipe offers another homemade bread style featuring a combination of grains and a richer flavor profile.
The key lesson is that whole-grain content generally contributes more directly to the fiber value of bread than the sourdough label itself.
4. Some Sourdough Breads May Be Easier to Digest
Many people associate sourdough with improved digestibility, and there are scientific reasons why fermentation may influence how bread is tolerated.
During sourdough fermentation, microorganisms and enzymes can modify some carbohydrates and proteins found in flour.
One important group of carbohydrates is known as FODMAPs, which includes certain fermentable sugars and short-chain carbohydrates.
Wheat contains fructans, a type of FODMAP that can contribute to digestive symptoms in some people, particularly those with irritable bowel syndrome (IBS).
Under suitable fermentation conditions, sourdough microorganisms can break down some of these fructans.
This may make certain traditionally fermented breads easier to tolerate for some individuals.
However, the effect varies considerably.
A bread’s FODMAP content depends on its flour, starter culture, fermentation duration, and serving size.
This distinction is especially important for same day sourdough.
Many breads studied or identified as lower in FODMAPs have undergone extended fermentation. A same-day loaf that ferments for a shorter period cannot automatically be considered low-FODMAP.
Likewise, feeling less bloated after eating one type of bread doesn’t establish that the bread has a particular nutritional composition.
People managing IBS or following a medically recommended low-FODMAP diet should use appropriately tested foods and consider guidance from a qualified dietitian.
For everyone else, naturally fermented sourdough can simply be an enjoyable bread option with distinctive flavor and texture.
5. Sourdough May Affect Blood Sugar Differently, but Results Vary
Another frequently discussed potential benefit of sourdough involves its effect on blood glucose after eating.
Bread contains starch, which is broken down into glucose during digestion.
Researchers have investigated whether the organic acids and structural changes produced by sourdough fermentation influence how quickly starch is digested and absorbed.
Some individual studies have reported smaller post-meal blood glucose responses after certain sourdough breads compared with specific conventional breads.
However, findings have not been consistent across all studies.
Different flour types, fermentation methods, bread structures, portion sizes, and study populations make direct comparisons difficult.
Recent systematic reviews have concluded that the evidence isn’t strong enough to claim that sourdough consistently produces better blood glucose control than comparable yeast-fermented bread.
This means same day sourdough bread should not automatically be described as low-glycemic, diabetic-friendly, or capable of preventing blood sugar spikes.
The shorter fermentation time makes broad claims even less appropriate because some studies involve breads that undergo substantially longer fermentation.
If blood sugar management is important to you, focus on the total carbohydrate content, portion size, whole-grain content, and accompanying foods.
For example, eating sourdough alongside protein-rich foods, vegetables, and healthy fats creates a more balanced meal than eating several slices of bread by themselves.
For people with diabetes, carbohydrate planning and individualized medical guidance remain important regardless of whether the bread is sourdough or commercially leavened.
6. Homemade Sourdough Makes It Easier to Control Ingredients
One of the clearest advantages of making Same Day Sourdough Bread at home is knowing exactly what goes into your loaf.
A traditional sourdough recipe can be made with just four basic components:
- Flour
- Water
- Salt
- Active sourdough starter
The starter itself is generally maintained with flour and water.
This simple ingredient list makes it possible to prepare flavorful homemade bread without requiring added sugar, butter, milk, or other optional ingredients.
However, the absence of these additions doesn’t automatically make sourdough nutritionally superior to every commercially prepared bread.
Many packaged breads also have straightforward ingredient lists, while others contain added sugar, fats, or additional flavorings.
The useful advantage of homemade baking is control.
You can choose the flour, measure the salt, decide whether to include whole grains, and adjust the loaf according to your dietary preferences.
For example, if you prefer a bread without added sugar, a traditional sourdough formulation offers that option naturally.
You can also select ingredients according to your taste, although changes to flour or hydration should be made thoughtfully to maintain good dough structure.
Our Homemade Paris Baguettes Recipe offers another example of how familiar baking ingredients can create crusty, flavorful bread.
Both baguettes and sourdough demonstrate that carefully measured ingredients and good baking technique are often more important than lengthy ingredient lists.
7. Sourdough Bread Supplies Carbohydrates for Energy
Although sourdough is often discussed in connection with fermentation and digestive health, its primary nutritional contribution is still carbohydrates.
Flour contains starch, an important dietary source of energy.
During digestion, starch is broken down into smaller carbohydrates that the body can absorb and use.
The brain, muscles, and other tissues rely on energy supplied by food, including carbohydrates.
For active individuals, bread can be a practical component of meals and snacks.
For example, a slice of sourdough toast served with a protein-rich topping and fruit can provide carbohydrates alongside additional nutrients.
The nutritional profile of the bread depends primarily on its flour, recipe, and portion size.
White sourdough generally supplies more refined starch and less fiber than whole wheat sourdough.
Whole-grain varieties can provide carbohydrates together with fiber, magnesium, and other nutrients.
However, sourdough fermentation does not remove most of the starch or make bread carbohydrate-free.
Even a long-fermented sourdough loaf remains a carbohydrate-rich food.
For a balanced diet, consider how the bread fits into the complete meal instead of evaluating it solely by its fermentation method.
8. Sourdough Fermentation Contributes Flavor Without Requiring Added Sugar
One enjoyable characteristic of naturally fermented same day sourdough bread is its distinctive flavor.
During fermentation, sourdough microorganisms produce organic acids and aroma compounds that influence the bread’s taste.
These compounds create the slightly tangy, complex flavor that distinguishes sourdough from many conventional loaves.
Because fermentation contributes so much character, a basic loaf can taste delicious without adding sugar or sweetened flavorings.
The flavor may be milder in same-day sourdough than in loaves that undergo extended cold fermentation, but a well-developed dough can still produce a pleasantly complex aroma.
This makes sourdough versatile for both savory and sweet toppings.
You can enjoy it lightly toasted with olive oil, serve it alongside soup, or use it as the foundation for sandwiches.
The crust also develops rich toasted aromas during baking, contributing additional flavor.
While flavor itself isn’t a medical benefit, making satisfying bread with simple ingredients and no required added sugar is a practical advantage of homemade sourdough baking.
9. Whole-Grain Sourdough Can Contribute Vitamins and Minerals
Whole-grain sourdough can provide a combination of carbohydrates, dietary fiber, plant protein, vitamins, and minerals.
Whole wheat flour naturally contains nutrients such as magnesium, phosphorus, manganese, zinc, iron, and several B vitamins.
These nutrients play different roles throughout the body.
Magnesium contributes to normal muscle and nerve function, while iron helps transport oxygen in the blood.
Zinc supports normal immune function and wound healing.
B vitamins participate in normal energy metabolism and other essential processes.
However, the amount of these nutrients in a serving of sourdough depends on the flour used and the size of the slice.
A loaf prepared almost entirely with white bread flour will generally provide less fiber and some whole-grain nutrients than one containing substantial whole wheat flour.
Enriched white flour may still contribute iron and certain B vitamins, depending on the product.
For the best nutritional variety, experiment with a mixture of strong white bread flour and whole wheat flour.
This can help preserve the pleasant texture of artisan sourdough while introducing additional whole-grain components.
Remember that sourdough should complement other nutritious foods rather than replace vegetables, fruits, legumes, and other important dietary sources of vitamins and minerals.
10. Homemade Bread Can Support Balanced Meals and Portion Awareness
Another practical advantage of baking same day sourdough bread from scratch is the ability to decide how your loaf is sliced, stored, and served.
A large artisan loaf can be divided into thin or thick slices depending on the intended meal.
For breakfast, one or two appropriately sized slices may be served with eggs, cheese, fruit, or another preferred protein source.
For lunch, sourdough can become the foundation of a sandwich with vegetables and lean protein.
At dinner, a smaller slice may be enjoyed alongside a hearty soup or vegetable-based meal.
For a comforting pairing, serve freshly baked sourdough with our Pureed Vegetable Soup Recipe. The smooth texture of the soup contrasts beautifully with the bread’s crisp golden crust, creating a satisfying combination of flavors and textures.
The nutritional value of the complete meal depends on all the foods included.
For example, adding vegetables, legumes, and appropriate protein sources can provide nutrients not present in substantial quantities in plain white sourdough.
Portion awareness also matters.
Even though the bread is naturally fermented, eating large amounts can still contribute substantial calories and carbohydrates.
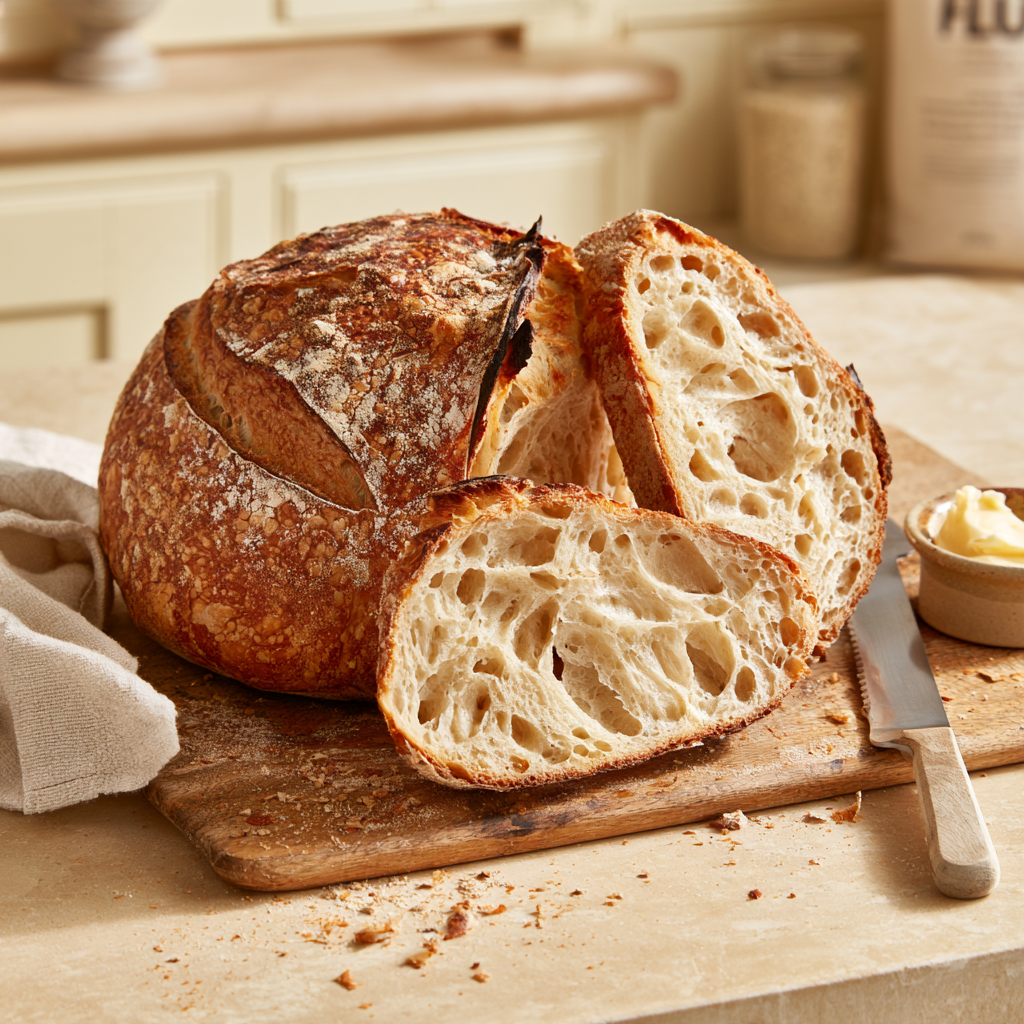
How to Make Sourdough Bread: Easy Step-by-Step Same Day Method
Making homemade sourdough bread might seem complicated at first, especially when you see recipes involving multiple days of fermentation, complicated folding techniques, and overnight refrigeration. Fortunately, this Same Day Sourdough Bread Recipe simplifies the process without sacrificing the wonderful flavor, golden crust, and soft, chewy texture that make artisan sourdough so special.
The secret to successfully baking sourdough bread in a single day is starting with a strong, active sourdough starter, maintaining a suitable dough temperature, and understanding when the dough is ready for the next stage. Rather than depending entirely on a strict schedule, you’ll learn to recognize important changes in the dough, from its initial sticky texture to the airy, elastic structure that develops during fermentation.
Unlike ordinary bread recipes that rely on commercial yeast, this method uses natural fermentation. The dough rises through the activity of wild yeasts and lactic acid bacteria present in your starter. With a little preparation and patience, you can mix your dough in the morning, shape it in the afternoon, and bake a beautiful loaf before the day is over.
Ingredients You’ll Need for Same Day Sourdough Bread
One of the best things about this recipe is its simplicity. You only need four basic ingredients to create a delicious, crusty homemade loaf.
| Ingredient | Quantity | Purpose |
|---|---|---|
| Bread flour | 500 g (approximately 4 cups, depending on measuring method) | Provides gluten structure and helps create a chewy, airy crumb |
| Water | 350 g (350 ml), divided | Hydrates the flour and supports gluten development |
| Active sourdough starter | 125 g (approximately 1/2 cup), at 100% hydration | Naturally leavens the dough and contributes fermented flavor |
| Fine sea salt | 10 g (approximately 1 3/4 teaspoons, depending on salt type) | Enhances flavor and strengthens dough structure |
Recipe yield: One medium-large artisan sourdough loaf.
This formula assumes your starter contains equal weights of flour and water, commonly called a 100% hydration starter.
Using a digital kitchen scale is strongly recommended because flour measurements can vary considerably when using cups. Accurate measurements help you maintain the proper relationship between water, flour, starter, and salt, making the dough easier to handle and the results more consistent.
For a slightly nuttier flavor, you can experiment with replacing 50–100 g of the bread flour with whole wheat flour. However, whole wheat absorbs water differently, so the dough may require minor adjustments.
Step 1: Make Sure Your Sourdough Starter Is Active
The most important step in making same day sourdough bread without commercial yeast happens before you mix the dough: preparing your sourdough starter.
A healthy starter contains active microorganisms that produce the gas needed to make bread rise. If the starter is weak or insufficiently fermented, the dough may take much longer than expected to develop.
Your starter should show clear signs of activity before you use it. Ideally, it should have risen noticeably after feeding, contain bubbles throughout the mixture, and have a pleasant fermented aroma.
Many healthy starters double in volume after feeding, although the exact amount of expansion depends on the flour, hydration, temperature, and container.
The best time to use the starter is generally when it is near its peak activity, before it begins collapsing significantly.
If you keep your sourdough starter in the refrigerator, plan ahead and give it enough time and feedings to become reliably active.
For a morning baking schedule, you may need to feed your starter the previous evening or early in the morning, depending on its usual fermentation speed.
OoohDelish Tip: Don’t rely exclusively on the floating starter test. A starter that floats isn’t necessarily ready, and a healthy starter may sometimes sink. Its growth, bubbles, aroma, and predictable rising behavior are more useful indicators.
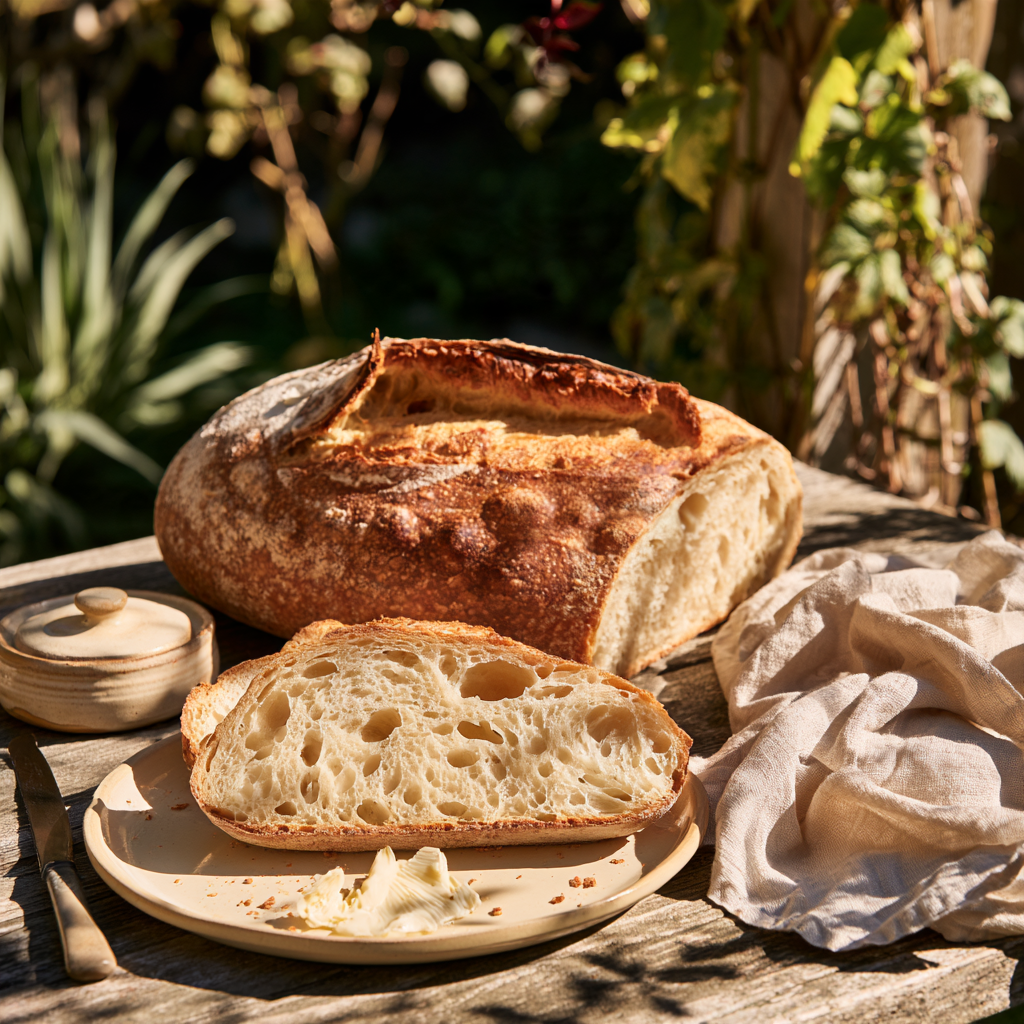
Step 2: Mix the Sourdough Starter, Water, and Flour
Once your starter is ready, begin preparing the dough.
Pour 340 g of the water into a large mixing bowl, reserving the remaining 10 g for incorporating the salt later.
Add the 125 g of active sourdough starter and stir until it becomes reasonably dispersed throughout the water.
It doesn’t need to dissolve completely, but breaking it into smaller pieces makes mixing easier.
Next, add the 500 g of bread flour and mix using a sturdy spoon, dough whisk, or your hands.
Continue mixing until no large pockets of dry flour remain.
At this stage, the dough will look rough, shaggy, and slightly sticky.
This is completely normal.
You don’t need to knead it until perfectly smooth because the gluten structure will develop during the resting and folding stages.
Cover the bowl with a lid, reusable cover, or damp kitchen towel and allow the dough to rest for approximately 20–30 minutes.
This initial rest gives the flour time to absorb the water and allows the dough to begin developing a more cohesive texture.
Step 3: Add the Salt and Finish Mixing
After the initial rest, add 10 g of fine sea salt to the dough.
Pour in the reserved 10 g of water, then use your fingers to gently pinch, squeeze, and fold the dough until the salt is thoroughly incorporated.
The dough may feel slippery or slightly loose immediately after adding the remaining water.
Continue mixing gently until it becomes more cohesive.
Salt plays several important roles in sourdough bread.
It improves flavor, contributes to the strength of the gluten network, and influences fermentation behavior.
Avoid leaving it out simply to shorten the recipe.
Once the salt is incorporated, cover the bowl again and allow the dough to rest for approximately 30 minutes before beginning the first set of stretches and folds.
From this point onward, the dough will gradually change from a rough mixture into a smoother, more elastic mass.
Step 4: Perform the First Stretch and Fold
Stretching and folding is one of the most useful techniques for developing gluten in homemade artisan bread without intensive kneading.
After the dough has rested, lightly wet your hands to prevent sticking.
Reach under one edge of the dough, gently lift it upward until you feel resistance, and fold it back over the center.
Rotate the bowl approximately one-quarter turn and repeat the movement.
Continue until you’ve stretched and folded all four sides.
This completes one set.
The goal is to strengthen the dough gradually without tearing it or squeezing out all the developing gas.
After the first set, cover the bowl and allow the dough to rest for another 30 minutes.
Repeat the same process for a total of approximately four sets, spaced 30 minutes apart.
You’ll notice that each set becomes easier as the dough develops strength.
At first, the mixture may spread across the bowl and feel difficult to handle.
After several folds, it should begin holding its shape more effectively and feel smoother and more elastic.
This gradual transformation is a sign that the gluten network is developing.
Step 5: Allow the Dough to Complete Bulk Fermentation
After the final stretch-and-fold set, leave the dough covered in a suitable warm location until bulk fermentation is complete.
Bulk fermentation begins when the starter is incorporated into the dough; the mixing and folding periods are already part of it.
For a same-day method, a dough temperature of approximately 75–79°F (24–26°C) can provide favorable conditions for steady fermentation.
Under suitable conditions, the total bulk fermentation period may take approximately 4–6 hours from the initial mixing, but it can be shorter or considerably longer depending on the starter and dough temperature.
Rather than relying only on the clock, watch for the following signs:
- The dough has increased in volume by roughly 40–60%, as a useful starting guideline for this method.
- Small bubbles are visible around the sides or surface.
- The top appears gently rounded rather than completely flat.
- The dough feels lighter and more aerated.
- The entire mass jiggles slightly when you move the bowl.
These signs are more reliable than assuming the dough must always double in size.
In fact, allowing some sourdough doughs to double completely during bulk fermentation can result in overfermentation, depending on the temperature and recipe.
Important: A same-day schedule depends on proper fermentation, not simply making the dough rise as fast as possible. If the dough hasn’t developed enough volume or aeration, give it additional time.
Step 6: Pre-Shape the Sourdough Loaf
Once the dough has completed bulk fermentation, gently transfer it onto a clean work surface.
You can lightly dust the counter with flour if necessary, but avoid using excessive flour because it can make shaping more difficult.
Using a dough scraper or your hands, gently bring the outer edges of the dough toward the center to form a loose round.
Turn the dough so the smoother surface faces upward.
Then use your hands or bench scraper to gently pull the dough toward you, creating a little tension along its outer surface.
Avoid pressing too hard or flattening the dough.
The goal is to organize the dough into a manageable shape while preserving some of the air developed during fermentation.
Once you have formed a loose round, cover it lightly and allow it to rest on the counter for approximately 15–20 minutes.
This is called the bench rest.
During this time, the gluten relaxes slightly, making the dough easier to shape without excessive tearing.
Step 7: Shape the Dough Into a Round Artisan Loaf
After the bench rest, it’s time to create the final loaf shape.
Lightly flour the top of the dough and turn it over so the floured side faces downward.
Gently stretch the dough into a rough rectangle without pressing out all its gas.
Fold one side toward the center, followed by the opposite side.
Then fold the top and bottom portions toward the middle, forming a compact package.
Turn the dough over so the seam is underneath.
Cup your hands around the loaf and carefully pull it toward you along the work surface, creating tension across the outer surface.
Rotate slightly and repeat until the dough forms a smooth, rounded loaf.
The goal is to develop enough surface tension to help the bread hold its shape during proofing and baking.
Avoid pulling so aggressively that the surface begins tearing.
For a traditional round loaf, also known as a boule, place the shaped dough seam-side up into a lightly floured proofing basket.
If you don’t own a banneton, a medium bowl lined with a clean, well-floured kitchen towel can work.
Rice flour is particularly useful for dusting proofing baskets because it tends to resist sticking better than ordinary wheat flour.
Step 8: Let the Bread Rise During the Final Proof
Cover the proofing basket and allow the shaped loaf to rise at room temperature.
For this recipe, final proofing may take approximately 1–2 hours in a moderately warm environment, although the actual time depends on the condition of the dough.
During this stage, the loaf should become slightly fuller and more aerated.
The surface may feel softer, and the dough should show signs of gentle expansion.
One way to assess the dough is to lightly press the surface with a floured finger.
If the indentation springs back very quickly, the dough may need additional proofing.
If it slowly and partially springs back, the dough may be approaching readiness.
However, this test isn’t completely reliable for every flour or hydration level.
It’s better to consider the loaf’s overall appearance, expansion, and texture together.
Avoid leaving the shaped dough in an excessively hot location just to make it rise faster.
Overproofed sourdough can become weak, sticky, and difficult to transfer into the oven.
The goal is a loaf with enough fermentation to expand well during baking while maintaining its structure.
Step 9: Preheat the Oven and Dutch Oven
While the shaped dough is finishing its final proof, preheat your oven to 450°F (230°C).
Place a Dutch oven with its lid inside the oven and allow it to heat for approximately 40–45 minutes, following the manufacturer’s temperature limits and safety instructions.
A properly preheated Dutch oven helps provide the intense initial heat needed for good oven spring.
When the dough enters the hot pot, the heat encourages rapid expansion.
Meanwhile, moisture released from the dough becomes trapped beneath the lid, creating a steamy environment that delays the formation of a firm crust.
This gives the loaf more opportunity to rise before its exterior sets.
A Dutch oven is especially useful for achieving the crisp crust and rustic appearance associated with artisan sourdough bread.
If your Dutch oven has a plastic or heat-sensitive lid knob, check that it is rated for the baking temperature before preheating.
Always use sturdy oven mitts when handling the hot pot, lid, or parchment paper.
Step 10: Score the Sourdough Bread
Once the loaf has completed its final proof and the Dutch oven is ready, carefully turn the dough out of the proofing basket.
You can transfer it onto a sheet of oven-safe parchment paper to simplify moving it into the pot.
The smooth, rounded side of the loaf should now face upward.
Using a sharp bread lame or razor blade, make one confident slash across the surface, approximately 1/4–1/2 inch (6–12 mm) deep.
Scoring creates a controlled opening that allows the loaf to expand during baking.
Without an appropriate score, the bread may rupture unpredictably as pressure builds inside the dough.
A simple curved or diagonal slash is an excellent starting point for beginners.
There’s no need to create elaborate patterns unless you enjoy decorative bread scoring.
For the best results, use a sharp blade and work confidently to avoid dragging or tearing the dough.
Step 11: Bake the Same Day Sourdough Bread Until Golden and Crusty
Carefully remove the preheated Dutch oven from the oven and take off the lid.
Transfer the scored dough into the pot, using the parchment paper if suitable for the oven temperature.
Replace the lid and bake at 450°F (230°C) for approximately 20 minutes.
Frequently Asked Questions About Same Day Sourdough Bread
Want to bake beautiful homemade sourdough bread without waiting overnight? These practical answers explain how to prepare an active starter, manage a one-day fermentation schedule, strengthen sticky dough, recognize proper proofing, and achieve a golden, crispy crust with a soft, airy interior. Discover the techniques that make a Same Day Sourdough Bread Recipe easier and more reliable.
1. Can you really make sourdough bread in one day?
Yes! You can make authentic sourdough bread in a single day using a mature, active sourdough starter and an appropriate fermentation schedule. Instead of refrigerating the dough overnight, same-day sourdough recipes generally use warmer dough temperatures and sometimes a higher proportion of active starter. The result can be a beautifully crusty loaf with a tender interior and a pleasantly mild sourdough flavor. Success depends on the starter’s strength, room temperature, and observing the dough as it rises.
2. What is the difference between same-day sourdough and traditional sourdough bread?
The main difference is the fermentation schedule. Same-day sourdough is mixed, fermented, shaped, and baked within one day, while many traditional artisan sourdough methods include an overnight refrigerated proof. Longer, cooler fermentation can develop a more pronounced tangy flavor and allow greater scheduling flexibility. Same-day bread often tastes milder but can still develop excellent texture. For another naturally fermented bread with a different shape and crust, explore our Sourdough Focaccia Recipe .
3. Can I make same-day sourdough bread without commercial yeast?
Absolutely! A healthy sourdough starter contains wild yeast capable of raising bread dough without packaged yeast. Naturally leavened same-day sourdough relies on this active culture and sufficiently warm fermentation. Some quick sourdough recipes include instant yeast to shorten or stabilize the rise, but it isn’t essential when the starter is strong and the formula is designed for natural leavening. Follow the exact method in your recipe rather than adding or removing commercial yeast without adjusting the fermentation schedule.
4. How do I know if my sourdough starter is ready to bake?
A baking-ready sourdough starter should be visibly bubbly, expanded, and pleasantly fermented in aroma. A reliable sign of starter strength is its ability to approximately double in volume within 6–8 hours after feeding, although a vigorous starter in a warm environment may rise faster. For best results, use it near its normal peak of activity. Don’t rely only on the float test; some healthy starters sink despite being active. Consistent rising behavior is more informative.
5. Should I feed my sourdough starter the night before or in the morning?
Both schedules can work, depending on your starter’s feeding ratio and the time you want to mix the dough. If you’re aiming to bake by dinner, feeding the starter the night before can help ensure it is active early the next morning. Alternatively, an early morning feeding may work if your starter reaches peak activity quickly enough. Use a clear jar to track its rise and plan to mix the dough when the starter is vigorous, rather than relying on a fixed hour.
6. How long does same-day sourdough bread take to make?
Many same-day sourdough recipes take approximately 7–12 hours from mixing to a baked loaf, depending on fermentation conditions and whether the starter is already active. This includes mixing, resting, stretch-and-folds, bulk fermentation, shaping, final proofing, and baking. Cooling before slicing requires additional time. The exact schedule varies significantly with room temperature, starter strength, hydration, and loaf size. Rather than rushing to finish by a particular hour, allow the dough to develop properly.
7. What temperature is best for same-day sourdough fermentation?
A comfortably warm dough temperature can help sourdough ferment within a shorter schedule. Many same-day recipes target approximately 75–80°F (24–27°C) during bulk fermentation. Cooler dough generally ferments more slowly, while warmer dough may rise faster and become easier to overproof. If your kitchen is cool, use appropriately warm mixing water or a controlled proofing environment. Avoid excessive heat, which can damage the starter’s microorganisms and make fermentation difficult to manage.
8. Is bread flour better than all-purpose flour for same-day sourdough?
Bread flour is often preferred for artisan sourdough because its higher protein content helps develop a strong gluten network that holds fermentation gases. This can contribute to better loaf structure and a chewy, airy crumb. All-purpose flour also works in recipes formulated for its protein level. However, switching flour types can change water absorption and dough strength. For reliable results, weigh the flour and follow the recipe’s intended hydration rather than substituting blindly.
9. Why is my same-day sourdough dough so sticky?
Sticky dough is common in sourdough recipes with relatively high hydration. The water helps develop an airy texture, but the dough may feel difficult to handle before its gluten structure develops. Avoid adding large amounts of extra flour, which can change the recipe’s moisture balance. Instead, lightly wet your hands, use a dough scraper, and allow the dough to rest between folds. Proper mixing and resting should gradually improve strength and handling.
10. Do I need to knead same-day sourdough, or can I use stretch-and-folds?
Many same-day sourdough recipes use stretch-and-folds instead of traditional kneading. During the early fermentation stage, gently stretch one side of the dough upward and fold it toward the center. Rotate the bowl and repeat according to your recipe. These movements strengthen gluten and improve the dough’s ability to hold its shape. Some recipes prefer coil folds or mechanical mixing. The most important consideration is building sufficient dough strength without unnecessarily tearing or deflating it.
11. How do I know when bulk fermentation is finished?
Bulk fermentation is finished when the dough has developed enough gas, strength, and elasticity for shaping. Look for noticeable volume increase, bubbles near the surface and sides, and a lighter, slightly jiggly appearance. The dough should feel aerated rather than dense and completely inactive. It doesn’t always need to double in volume, especially in warmer sourdough formulas. The ideal rise depends on dough temperature and the recipe. Observe these signs alongside your recipe’s fermentation guidance.
12. How can I tell if sourdough bread is underproofed or overproofed?
Underproofed dough often feels tight and dense, has limited visible aeration, and may produce a loaf with a compact crumb or large uneven tunnels. Overproofed dough can become excessively slack, difficult to shape, and prone to spreading or collapsing. Both conditions can reduce oven spring. Monitor the dough’s expansion, surface bubbles, elasticity, and handling rather than depending only on the clock. In a warm same-day process, fermentation can progress quickly, so frequent observation is especially useful.
13. Do I need a Dutch oven to bake same-day sourdough bread?
A Dutch oven is helpful but not essential for homemade sourdough bread. Its heavy, covered construction traps moisture from the dough, creating steam that delays crust setting and supports oven spring. Many artisan loaves are baked in a preheated Dutch oven, first covered and then uncovered to develop color. However, suitable covered bread bakers or other oven-safe baking setups can also work. For a rustic no-knead alternative, try our Stecca Bread Recipe .
14. How do you get a crispy crust and good oven spring?
A crispy crust and attractive oven spring begin with adequate fermentation, proper shaping, and a sufficiently preheated oven. Score the surface of the shaped dough with a sharp bread lame or suitable blade just before baking, allowing the loaf to expand along the cut. Baking with steam during the early stage helps keep the crust flexible while the loaf rises. Later exposure to dry oven heat encourages browning and crispness. Follow the temperatures and covered baking stages in your recipe card.
15. Why is my same-day sourdough bread gummy inside?
A gummy crumb may result from insufficient baking, premature slicing, excessive moisture, or fermentation problems. Allow the loaf to cool thoroughly before cutting, ideally for approximately 1–2 hours depending on its size. The interior continues setting as steam redistributes during cooling. Check that the crust is well browned and the center is fully baked before removing the bread from the oven. If gumminess persists, review dough hydration, fermentation, and baking time rather than simply adding more flour.
16. How do you store, freeze, and serve same-day sourdough bread?
Let sourdough bread cool completely before storing it. For best texture, keep a plain loaf at room temperature in a bread bag or suitable container for approximately 2–3 days. For longer storage, slice the loaf and freeze the portions in an airtight freezer-safe bag for up to 2–3 months for best quality. Toast frozen slices directly or thaw before reheating. Serve with olive oil, butter, soups, or savory spreads. For a cozy meal, pair it with our Easy Lasagna Soup Recipe or enjoy another homemade bread variation with our Easy and Quick Focaccia Recipe .