


There’s nothing quite like the satisfying crunch of a homemade pickle, especially when it’s packed with tangy, garlicky flavor! If you love classic dill pickles but want to try something more traditional, this Fermented Pickles Recipe is exactly what you need. Made with fresh cucumbers, garlic, dill, salt, and water, these naturally fermented pickles develop their signature sour flavor through a simple process called lacto-fermentation. No vinegar, complicated equipment, or cooking required!
What makes this easy Fermented Pickles Recipe so special is the way a basic saltwater brine transforms fresh cucumbers into deliciously crisp, flavorful pickles. As naturally occurring lactic acid bacteria ferment the cucumbers, they produce the tangy acidity that makes fermented pickles so irresistible. The result is a refreshingly sour pickle with a satisfying crunch, aromatic dill, and just the right amount of garlic.
These homemade fermented dill pickles are perfect for topping juicy burgers, adding crunch to sandwiches, serving alongside grilled chicken, or enjoying straight from the jar as a savory snack. Unlike traditional vinegar pickles, fermented cucumbers develop their flavor gradually, giving them a wonderfully complex taste.
Best of all, making your own lacto-fermented pickles requires only a handful of affordable ingredients and a little patience. With the correct salt concentration, clean equipment, and proper fermentation conditions, you can create delicious homemade pickles right in your kitchen.
In this OoohDelish guide, you’ll discover how to make the best Fermented Pickles Recipe, keep your cucumbers crunchy, prepare a reliable saltwater brine, understand fermentation times, and recognize important food safety signs for deliciously tangy pickles every time.
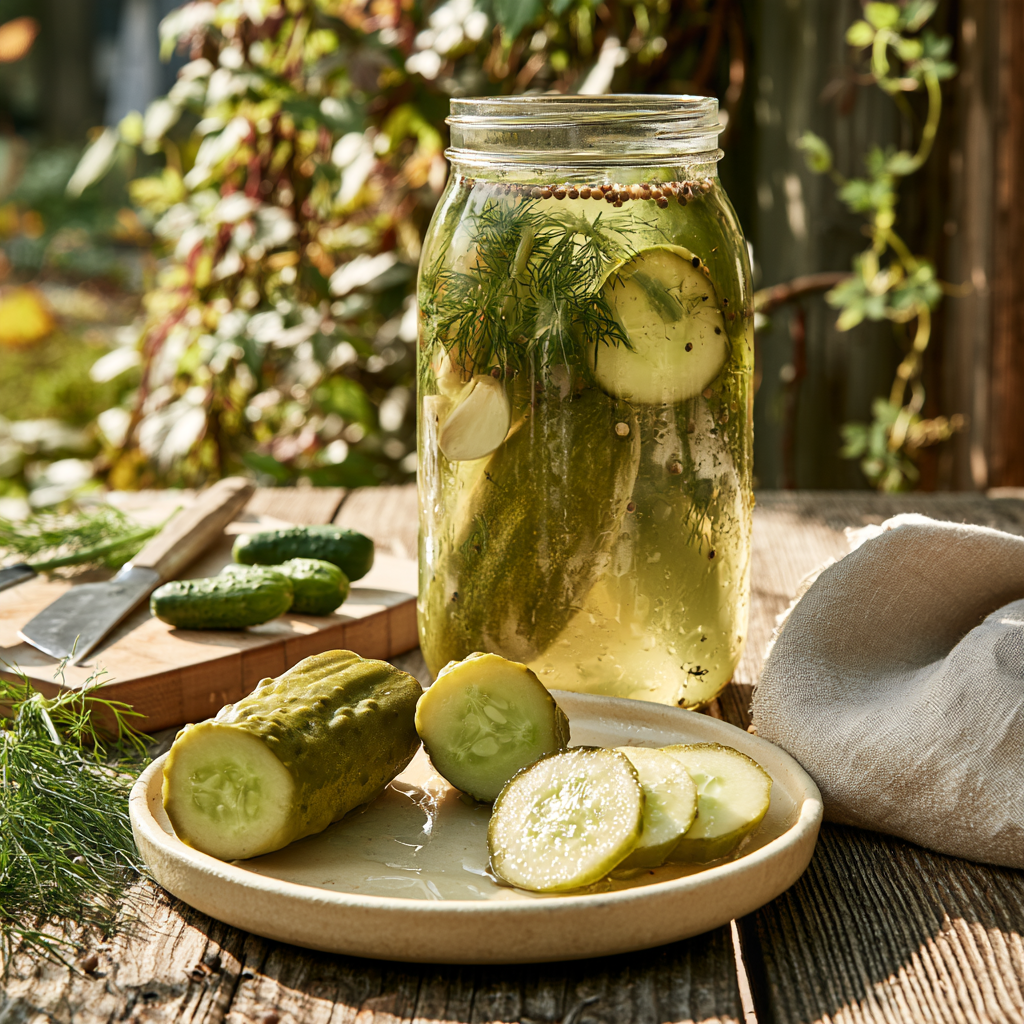
Fermented Pickles Recipe
Equipment
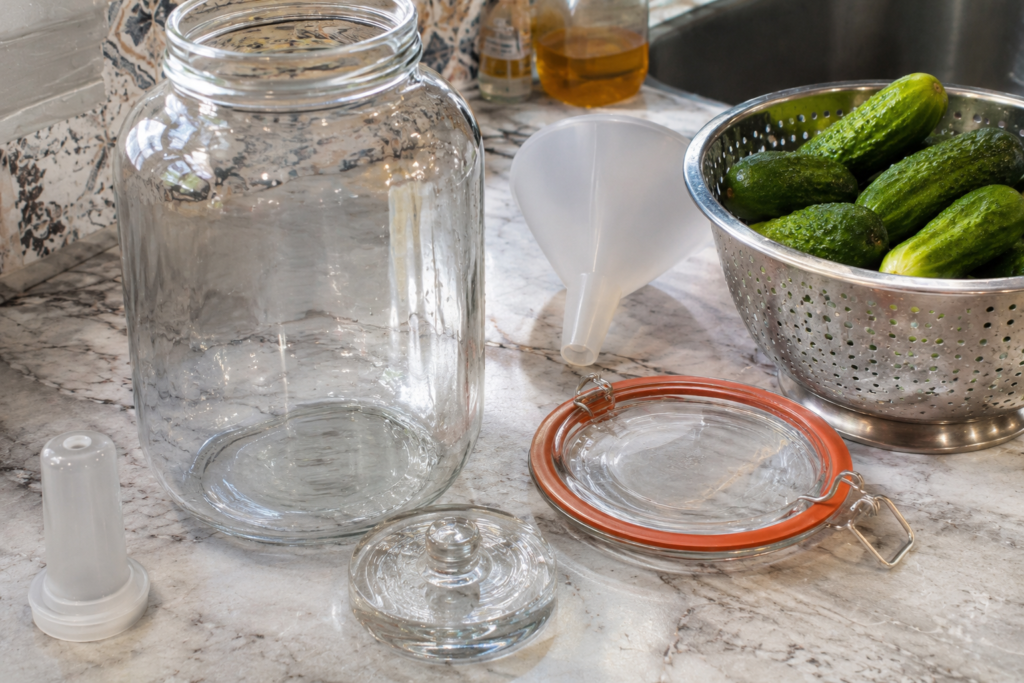
- Clean glass, glazed ceramic, or food-grade plastic fermentation vessel of appropriate capacity
- Food-safe fermentation weight or properly weighted plate
- Suitable loose cover or fermentation airlock
- Large mixing bowl
- Measuring cups and spoons
- Kitchen scale for weighing cucumbers
- Colander
- Small clean knife
- Clean spoon for mixing brine
- Thermometer for checking fermentation-room temperature
- Clean containers for refrigerated storage
- Use only food-safe containers; never use galvanized metal or unsuitable plastic for fermentation.
Ingredients
- 4 lb 1.8 kg fresh pickling cucumbers, approximately 4 inches long
- 2 tablespoons dill seed OR 4–5 heads of fresh or dried dill weed
- ½ cup canning or pickling salt measure according to the tested recipe; do not substitute an arbitrary weight
- ¼ cup 60 ml vinegar with 5% acidity
- 8 cups 1.9 liters water
- 2 garlic cloves peeled (optional)
Instructions
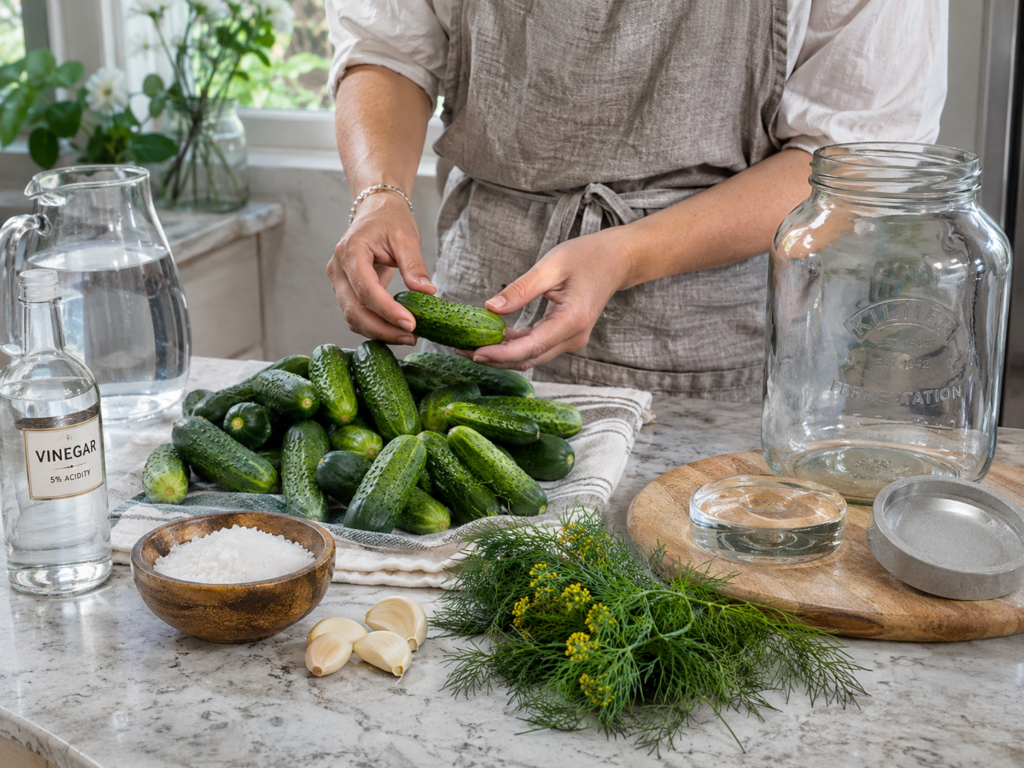
- Step 1: Gather and Inspect the Cucumbers. Begin by selecting 4 lb (1.8 kg) of fresh, firm pickling cucumbers, preferably around 4 inches long and similar in size. Choose cucumbers without soft spots, mold, wrinkles, or visible damage, since the condition of the vegetables strongly influences the final texture. Small pickling cucumbers generally produce a better crunch than large, overripe slicing cucumbers. Gather the dill, canning or pickling salt, 5%-acidity vinegar, water, and optional garlic before you begin. Set out a clean, food-safe fermentation vessel large enough for the entire batch, together with a suitable weight and cover. Preparing everything in advance helps you follow the tested ingredient quantities accurately.

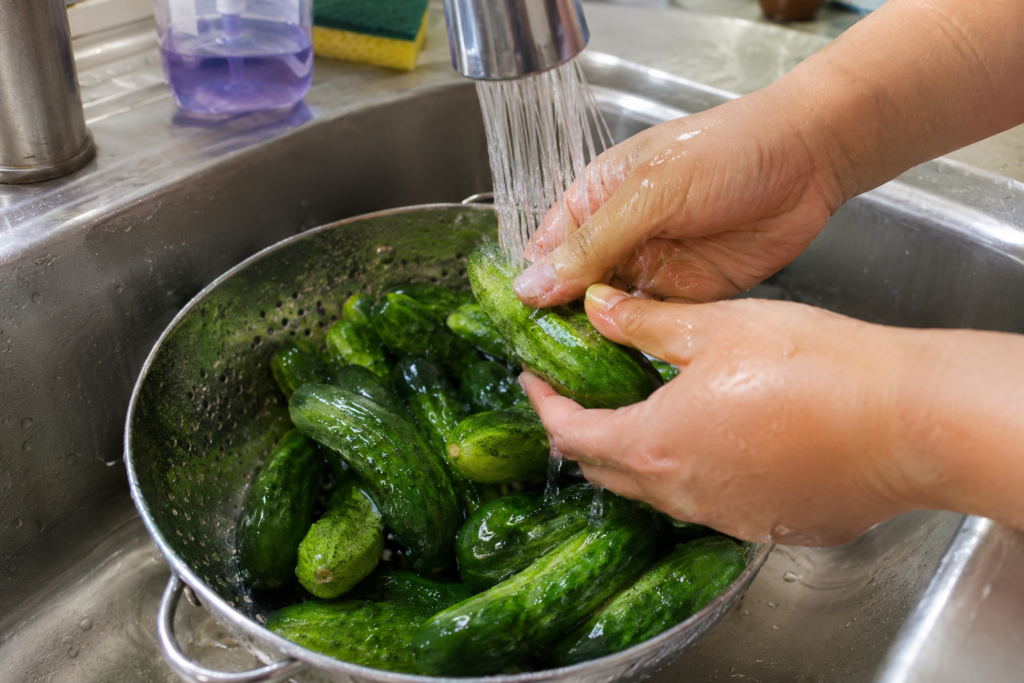
- Step 2: Wash the Cucumbers Gently. Rinse the cucumbers thoroughly under cool running water, rubbing their surfaces gently to remove dirt and debris without bruising them. Avoid scrubbing aggressively or using soap, detergent, or household disinfectants on the vegetables. Drain them in a clean colander and check again for damaged or excessively soft cucumbers, discarding any unsuitable ones. Freshness is especially important because fermentation will not restore firmness to produce that has already started deteriorating. Do not peel the cucumbers, since their skins help maintain their characteristic shape and texture. Keep the cleaned cucumbers on a clean work surface while you prepare their ends.

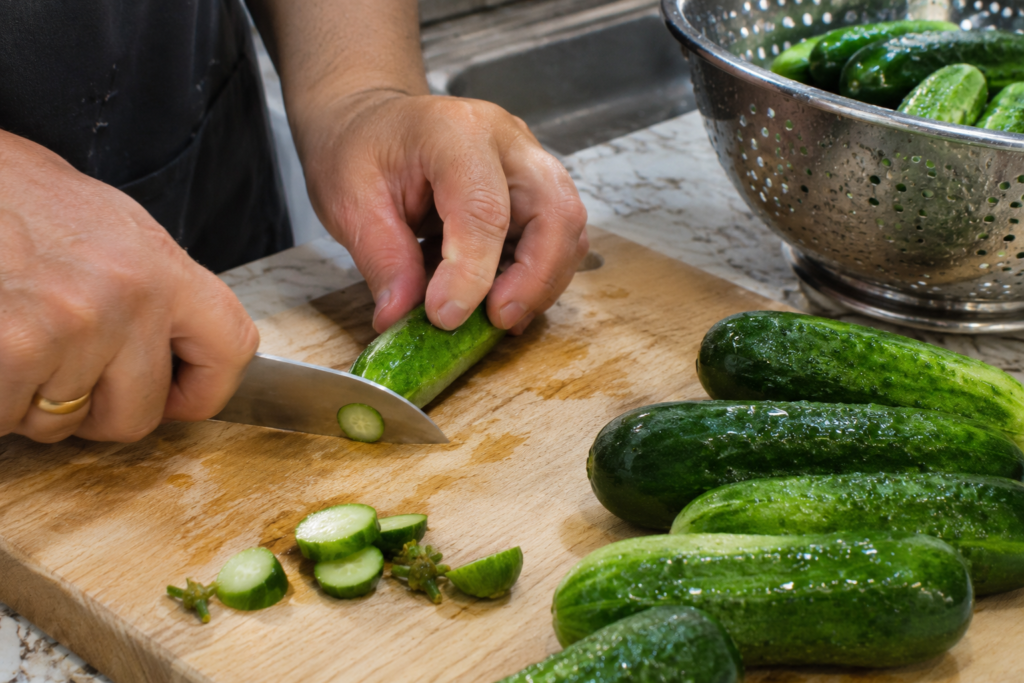
- Step 3: Trim the Blossom Ends. Identify the blossom end of each cucumber and use a clean, sharp knife to remove a thin slice approximately 1/16 inch (1.5 mm) thick. Discard these pieces because enzymes associated with the blossom end may contribute to undesirable softening during pickling. The tested procedure allows approximately ¼ inch of stem to remain attached at the opposite end. Work carefully so you remove only the necessary amount and keep the cucumbers intact. Consistent trimming helps preserve their firmness during the slow fermentation process. Once trimmed, place the cucumbers into a clean bowl or colander while you prepare the brine and fermentation vessel.
- Step 4: Prepare the Fermentation Container. Wash the food-safe fermentation vessel, weight, and utensils thoroughly before using them, following the manufacturer’s instructions for cleaning any fermentation lid or airlock. Choose a glass, glazed ceramic, or approved food-grade plastic container that comfortably accommodates the cucumbers, spices, and brine while leaving space for a fermentation weight. Avoid ordinary metal containers that could react with the acidic brine, and never use galvanized metal or non-food-grade containers. Inspect the vessel for cracks, chips, or damaged seals before packing the cucumbers. Place the cleaned container on a stable countertop where you can fill it without introducing dirt or other contaminants.
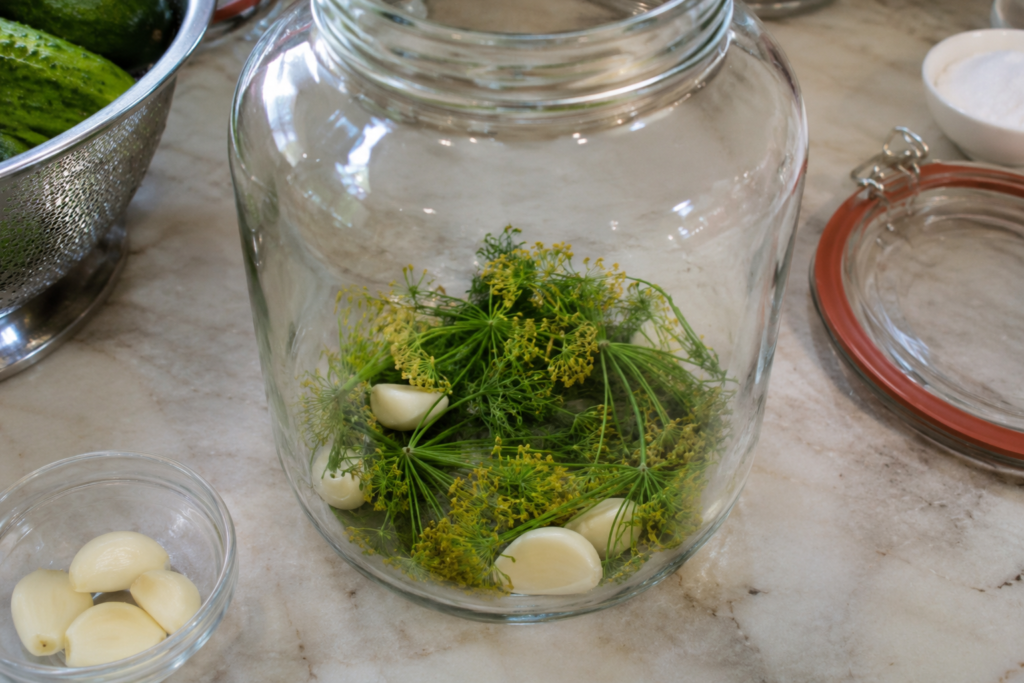
- Step 5: Arrange the Dill and Garlic. Place approximately half of the dill seed or dill heads at the bottom of the clean fermentation vessel. If using the optional two garlic cloves, peel them and add them to the container with the dill. These aromatic ingredients provide the familiar herbal, garlicky flavor of traditional fermented dill pickles. You may also include the optional dried red peppers or mixed pickling spices specified in the tested recipe, but avoid experimenting with the salt, vinegar, water, or cucumber proportions. Spreading some seasonings beneath the cucumbers helps distribute their flavor throughout the brine. Reserve the remaining dill to add after arranging the cucumbers.
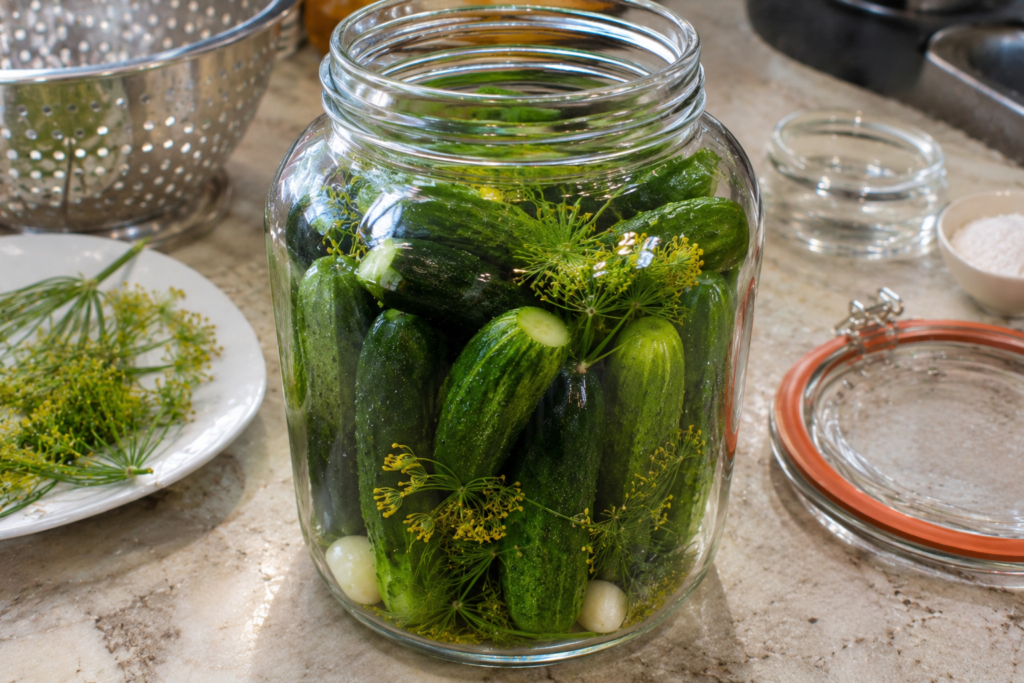
- Step 6: Pack the Cucumbers Into the Vessel. Place the prepared cucumbers into the fermentation vessel, arranging them neatly without crushing or tightly forcing them into place. Depending on the size and shape of your container, you can position the cucumbers upright or lay them horizontally in even layers. Try to keep similar-sized cucumbers together so they ferment at a reasonably consistent rate. Add the remaining dill on top or between the upper layers to distribute its aroma throughout the batch. Avoid filling the vessel so tightly that the brine cannot circulate around the vegetables. Leave sufficient room near the top for the brine, the fermentation weight, and any bubbling that develops during fermentation.
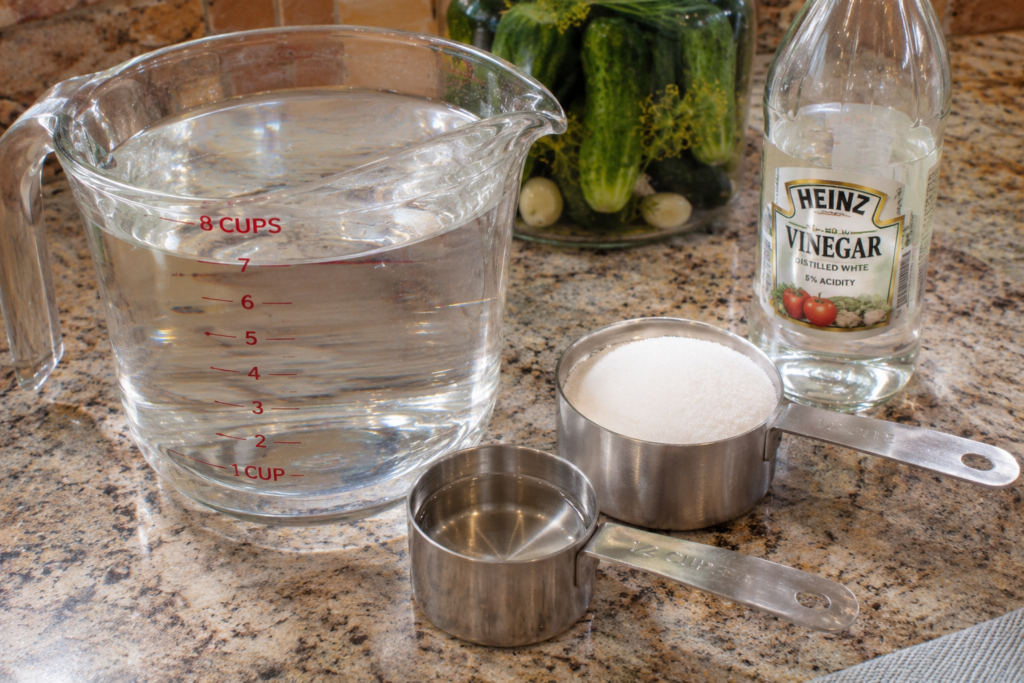
- Step 7: Measure the Salt, Vinegar, and Water. Measure exactly ½ cup canning or pickling salt, ¼ cup (60 ml) vinegar labeled 5% acidity, and 8 cups (1.9 liters) water. These quantities come from the research-tested fermented dill pickle formulation and should be followed as written rather than adjusted by taste. Use canning or pickling salt rather than assuming that an equal volume of flaky, coarse, or specialty salt provides the same amount. Add the water and vinegar to a large clean mixing bowl or suitable pitcher, then stir in the measured salt until it is completely dissolved. The finished brine should contain no obvious undissolved salt crystals at the bottom. Avoid adding sugar or other untested ingredients to the brine.
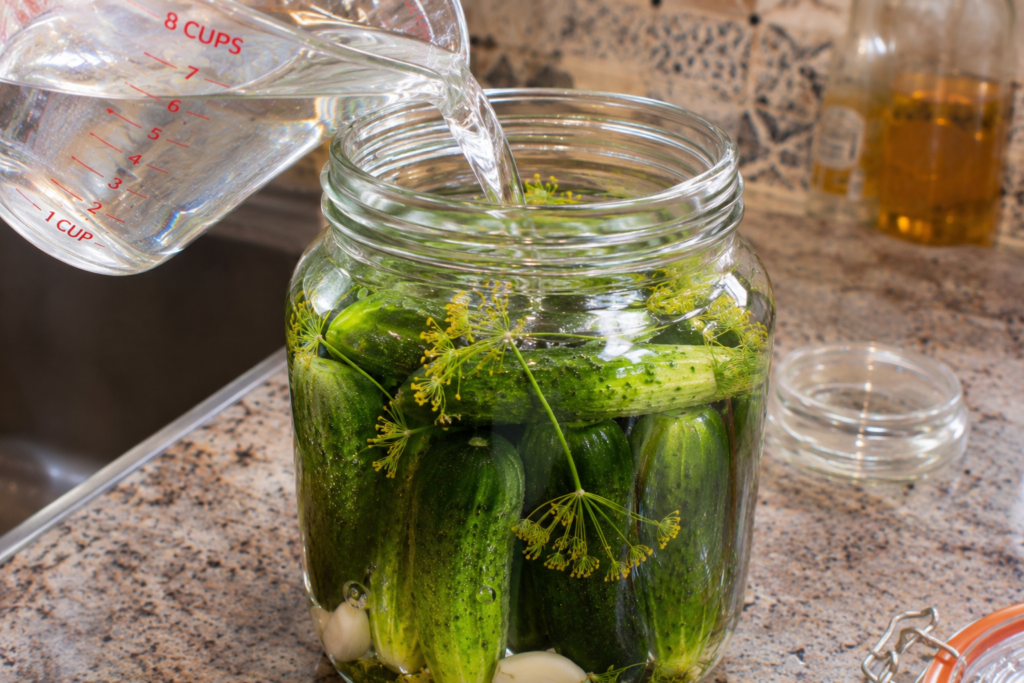
- Step 8: Pour the Brine Over the Cucumbers. Carefully pour the prepared salt, vinegar, and water mixture over the packed cucumbers, making sure the liquid flows between the vegetables and surrounds the garlic and dill. Use the full measured formulation for the intended batch and fermentation vessel capacity. The cucumbers must remain completely below the surface of the brine during fermentation because exposed vegetables are more vulnerable to undesirable microbial growth. If the cucumber arrangement prevents proper coverage, rearrange the vegetables or choose a more suitable vessel rather than diluting the brine with plain water. Do not change the brine’s salt-to-liquid proportions. Leave sufficient space above the liquid to accommodate a weight and fermentation activity.
- Step 9: Add a Fermentation Weight and Cover. Place a clean, food-safe fermentation weight or properly weighted plate over the cucumbers so that every cucumber stays submerged beneath the brine. Check that small floating pieces of dill, garlic, or cucumber are not left exposed unnecessarily. Cover the vessel with a suitable fermentation cover, clean cloth secured against insects, or an appropriate airlock system that allows fermentation gases to escape safely. Do not tightly seal an ordinary jar without a gas-release method, because fermentation produces carbon dioxide and pressure can build up. Set the vessel on a stable tray in a clean location away from direct sunlight. The combination of correct brine ratios, adequate coverage, and appropriate temperature is essential to successful fermentation.
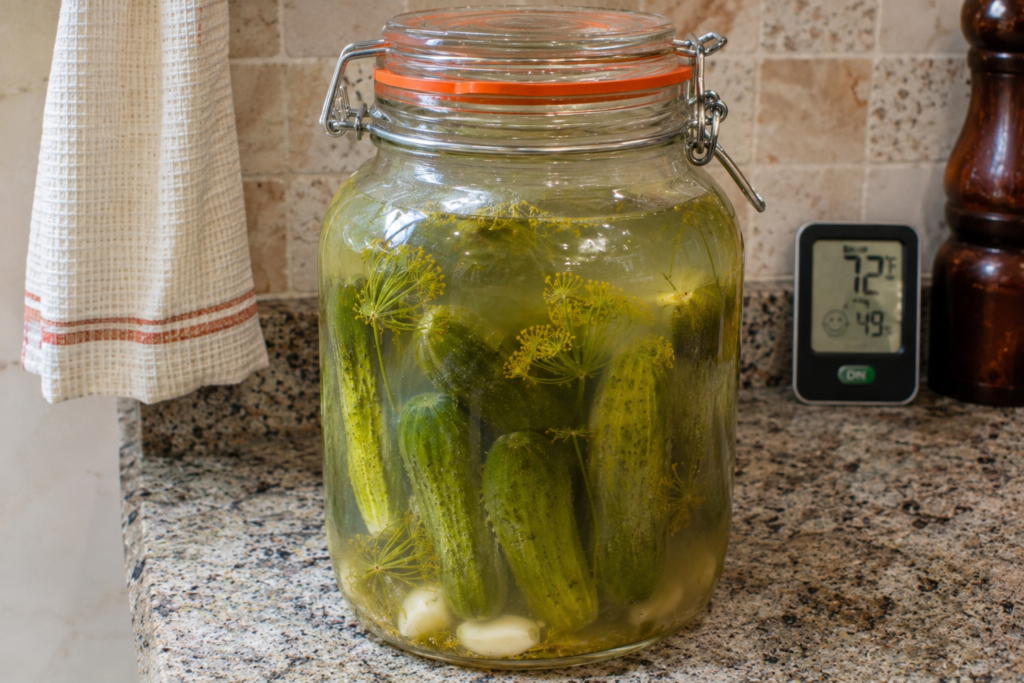
- Step 10: Ferment at the Correct Temperature. Place the covered fermentation vessel in a location that remains approximately 70–75°F (21–24°C) and allow the cucumbers to ferment for about 3–4 weeks, as recommended in the tested recipe. At cooler temperatures of 55–65°F (13–18°C), fermentation may require around 5–6 weeks. Avoid temperatures above 80°F (27°C), which can increase softening and spoilage risks. Check the surrounding temperature regularly rather than relying on how warm the room feels. Small bubbles and some cloudiness may develop as fermentation progresses, but these observations alone do not establish safety or completion. Keep the cucumbers submerged and do not shorten the recommended fermentation period simply because the brine begins to taste sour.
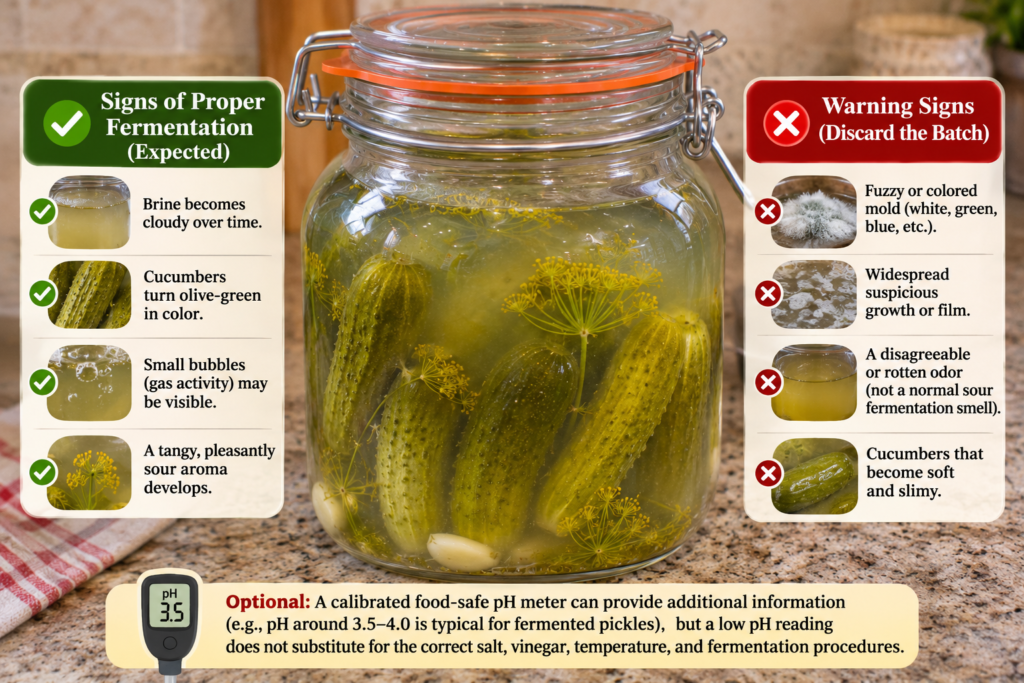
- Step 11: Check for Proper Fermentation and Spoilage. Inspect the fermentation vessel several times each week, checking that the cucumbers remain fully submerged, the weight is secure, and the cover is functioning properly. The brine may gradually become cloudy, and the cucumbers may shift toward an olive-green color as fermentation develops. Monitor for unwanted surface growth and follow the tested preservation guidance for your setup. For a beginner-friendly household recipe, discard the batch if you observe fuzzy or colored mold, widespread suspicious growth, a disagreeable or rotten odor, or cucumbers that become soft and slimy. Never taste pickles to determine whether a suspicious batch is safe. A calibrated food-safe pH meter may provide additional information about acidity, but a low pH reading does not substitute for correct salt, vinegar, temperature, and fermentation procedures.
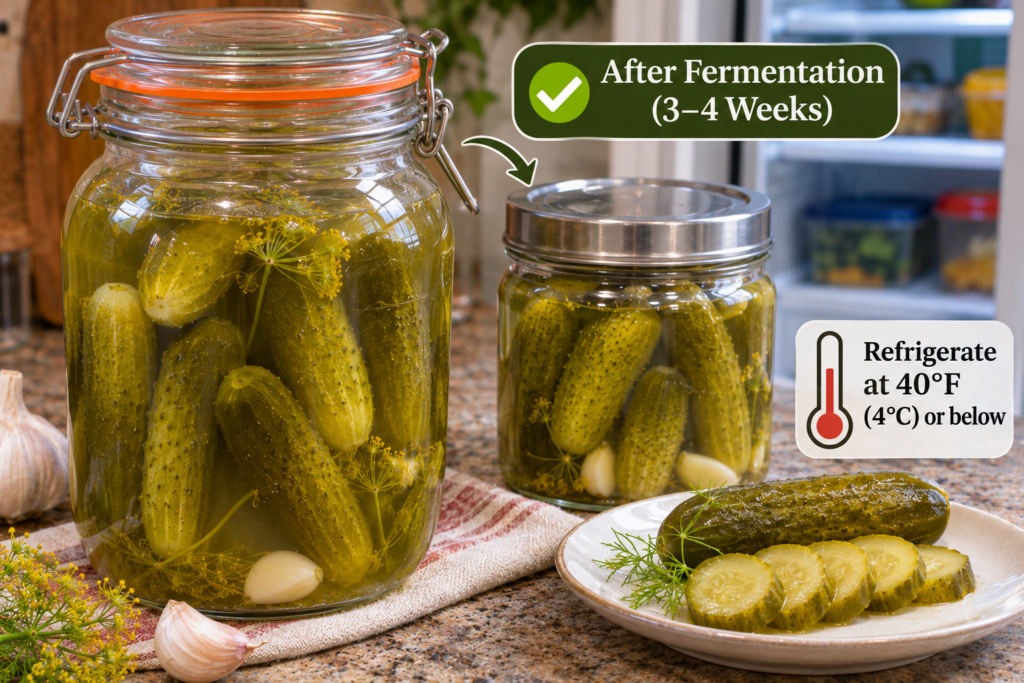
- Step 12: Finish Fermentation and Refrigerate. After approximately 3–4 weeks at 70–75°F (21–24°C), evaluate the batch according to the tested recipe’s completion guidance, including the expected olive-green appearance and pleasant fermented dill-pickle flavor, provided there are no signs of spoilage. Once fermentation is complete, transfer the pickles and enough of their brine to clean, covered food-safe containers and refrigerate at 40°F (4°C) or below. Keep the finished pickles submerged as much as possible and use clean utensils when removing individual cucumbers. Refrigeration slows further fermentation and helps preserve the pickles’ quality, but the finished product is not automatically shelf-stable. This recipe does not include canning instructions, so do not store unrefrigerated jars in a pantry.
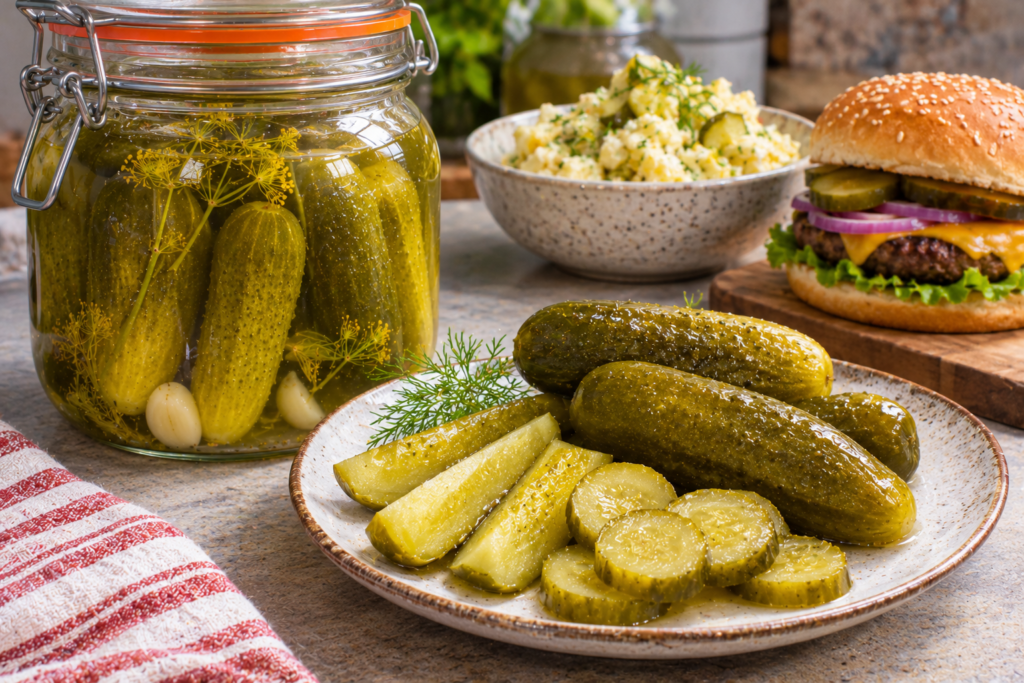
- Step 13: Serve and Store the Homemade Pickles. Remove a fermented dill pickle from its refrigerated container using a clean utensil, then serve whole or slice it into spears or rounds according to your preference. Enjoy the pickles as a crunchy snack, tuck them into sandwiches and burgers, or chop them into potato salads and other savory dishes. Their tangy, garlicky flavor pairs especially well with rich foods. Return the remaining pickles to the refrigerator promptly and keep them in their brine. Properly fermented pickles prepared with the tested method may keep for several months under refrigeration according to NCHFP guidance, but inspect them regularly and discard any batch that develops spoilage signs. For home recipe publication, emphasize safe handling, refrigeration, and the importance of following the tested formulation.
Notes
The Origins of Fermented Pickles Recipe
The Fermented Pickles Recipe has a fascinating history that stretches back thousands of years. Long before refrigerators existed, people discovered that preserving vegetables in saltwater helped keep food available for longer periods. This traditional method became one of the oldest and most beloved food preservation techniques in the world.
The history of pickling is often traced to ancient Mesopotamia around 2400 BC, although the exact origins of fermented cucumber pickles remain uncertain. Over the centuries, different cultures developed their own methods of preserving cucumbers and other vegetables using salt, spices, and naturally occurring fermentation.
Fermented pickles became especially important in Eastern European kitchens, where families preserved seasonal vegetables to enjoy throughout the cold winter months. Cucumbers were packed into large wooden barrels with saltwater, garlic, dill, and aromatic spices, then left to develop their signature sour flavor.
During the late nineteenth and early twentieth centuries, Eastern European Jewish immigrants brought their traditional fermented dill pickles to the United States. These crunchy, garlicky pickles became particularly popular in New York City’s Lower East Side, where street vendors and delicatessens introduced generations of Americans to classic kosher-style dill pickles.
Unlike vinegar pickles, traditional fermented pickles develop their tangy flavor naturally through lactic acid fermentation. Beneficial lactic acid bacteria convert sugars in cucumbers into lactic acid, creating that distinctive sour taste.
Today, the homemade Fermented Pickles Recipe is enjoying renewed popularity among home cooks who appreciate traditional food preservation, simple ingredients, and deliciously crunchy results.
From ancient preservation methods to modern kitchen fermentation jars, these pickles remain a timeless favorite.
OoohDelish Secret: The magic of fermented pickles comes from fresh, firm cucumbers, fragrant dill, garlic, and a properly measured saltwater brine. Follow a tested fermentation method and keep the cucumbers fully submerged for beautifully tangy, crunchy homemade pickles.

Health Benefits of Fermented Pickles Recipe
This Fermented Pickles Recipe isn’t just crunchy, tangy, and delicious! Made with fresh cucumbers, garlic, dill, and a naturally fermented saltwater brine, homemade fermented pickles offer several potential nutritional benefits. They’re a flavorful addition to a balanced diet, especially when prepared and stored safely.
1. Supports Gut Health
Naturally fermented pickles may contain live lactic acid bacteria that can contribute to a diverse gut microbiome. However, not all fermented pickles contain proven probiotic strains, and the health benefits depend on the microorganisms present.
2. Low in Calories
Cucumbers are naturally low in calories, making fermented pickles a satisfying, crunchy snack without adding many calories to your meals.
3. Provides Antioxidants
Cucumbers, garlic, and dill contain naturally occurring antioxidants and plant compounds that contribute to a varied, nutrient-rich diet.
4. Contains Vitamins and Minerals
Fermented cucumbers provide small amounts of nutrients such as vitamin K and potassium. Their exact nutritional content depends on the cucumber variety and fermentation process.
5. May Support Digestive Health
Fermented vegetables contain organic acids produced during fermentation. Along with any live microorganisms that remain, these compounds may contribute to digestive health, although more research is needed to establish specific benefits.
6. Naturally Free From Added Sugar
A traditional homemade Fermented Pickles Recipe can be prepared without added sugar, using only cucumbers, salt, water, garlic, and herbs.
7. Encourages Eating More Vegetables
Adding fermented pickles to sandwiches, salads, and meals provides extra flavor and crunch, making vegetables more enjoyable.
Are Fermented Pickles Healthy?
Fermented pickles can be part of a healthy, balanced diet, but they are often high in sodium because salt is essential to the fermentation process. People who need to limit sodium should pay attention to portion sizes.
Also, fermented pickles are not automatically probiotic. Live cultures may be present in properly fermented, unpasteurized products, but their presence does not guarantee a specific health benefit.
OoohDelish Healthy Tip: Enjoy a few crunchy fermented dill pickles alongside a balanced meal, and choose naturally fermented, unpasteurized varieties when live cultures are important to you. When making them at home, always follow a tested recipe with the correct salt concentration never reduce salt simply to make the pickles seem healthier.

Important Food Safety Tips for Fermented Pickles
Making homemade fermented pickles is easy and rewarding, but a few simple precautions help keep your pickles safe, crunchy, and delicious.
- Start clean: Wash your hands, jars, and utensils thoroughly before beginning.
- Use the right amount of salt: Follow a tested recipe and measure your salt and water carefully. Don’t reduce the salt or guess the quantities.
- Keep cucumbers underwater: Make sure your cucumbers stay completely submerged beneath the brine to help prevent unwanted mold growth.
- Let gases escape: Use a fermentation lid or airlock to release pressure safely.
- Watch for spoilage: If you notice fuzzy mold, a rotten smell, or an unusually slimy texture, discard the entire batch. Never taste suspicious pickles.
- Check acidity: For extra safety, use a calibrated food-safe pH meter to confirm the brine reaches pH 4.6 or lower. A safe pH alone does not replace proper fermentation practices.
- Refrigerate when ready: Once fermentation is complete, store your pickles in the refrigerator at 40°F (4°C) or below.
OoohDelish Safety Tip: A pleasantly tangy smell, small bubbles, and slightly cloudy brine can be normal signs of fermentation. Always follow a tested recipe, keep your cucumbers submerged, and refrigerate finished pickles for the best results.
Frequently Asked Questions About Fermented Pickles Recipe
Want to make delicious homemade fermented pickles with a satisfying crunch, tangy flavor, and fragrant dill and garlic? Traditional fermented dill pickles develop their distinctive taste through a carefully controlled salt-brine fermentation. These helpful answers explain how to select fresh pickling cucumbers, prepare the correct brine, prevent soft or slimy pickles, recognize normal fermentation activity, and store the finished pickles safely. Whether you’re preserving garden-fresh cucumbers or trying traditional fermentation for the first time, these tips will help you understand the entire process.
1. What are fermented pickles, and how are they different from regular pickles?
Fermented pickles are cucumbers preserved through lactic acid fermentation. Naturally occurring beneficial fermentation bacteria transform available sugars into acids, gradually producing the characteristic tangy flavor. Unlike quick refrigerator pickles, which depend primarily on vinegar for their acidity, traditional fermented pickles develop much of their acidity during fermentation. This particular tested-style recipe also includes a small amount of 5%-acidity vinegar in the starting brine. For another cucumber-preserving method, explore our Dill Relish Canning Recipe , which uses a different vinegar-based preparation.
2. What ingredients do you need for this homemade Fermented Pickles Recipe?
This traditional recipe uses 4 pounds (1.8 kg) fresh pickling cucumbers, 1/2 cup canning or pickling salt, 1/4 cup vinegar with 5% acidity, and 8 cups (1.9 L) water. For dill flavor, include 4–5 heads of fresh or dried dill, or 2 tablespoons dill seed. Optional flavorings include 2 garlic cloves, 2 dried red peppers, or 2 teaspoons whole mixed pickling spices. These quantities are intended for a suitable container with approximately 1-gallon capacity. Preserve the tested salt, vinegar, and water proportions.
3. Why does this fermented pickle recipe contain vinegar?
Although lactic acid fermentation creates acidity naturally, this particular recipe includes 1/4 cup of 5%-acidity vinegar as part of its established brine formula. The vinegar is not intended to replace fermentation or turn the recipe into quick refrigerator pickles. Instead, it is one component of the specified preparation. Do not omit it, reduce its strength, or substitute a vinegar with unknown acidity. Follow the complete brine recipe rather than combining measurements from different fermentation methods.
4. What kind of salt should you use for fermented pickles, and can you reduce it?
Use canning or pickling salt and keep the specified 1/2-cup quantity. Salt contributes flavor, influences fermentation, and helps control unwanted microbial growth. Canning and pickling salt is preferred because it dissolves readily and does not contain the additives found in some table salts. Different salt products have different crystal sizes, making casual volume substitutions unreliable. Do not reduce the amount simply to make lower-sodium pickles. For reduced-sodium preservation, follow a separate tested recipe designed for that purpose.
5. What are the best cucumbers for making crunchy fermented pickles?
Choose fresh, firm pickling cucumbers approximately 4 inches (10 cm) long. Pickling varieties generally have firmer flesh and a more suitable texture than large slicing cucumbers. Use cucumbers that are free from mold, decay, bruising, or noticeably soft areas. Freshly harvested cucumbers are especially useful because they tend to retain their firmness better. Select pieces of similar size so they ferment more evenly. Avoid overripe cucumbers with large seeds or soft centers, which can produce disappointing results.
6. Why should you trim the blossom ends of cucumbers before fermentation?
Removing a thin slice from the blossom end helps prevent unwanted softening during fermentation. The blossom end can contain enzymes that contribute to a loss of crispness. Wash the cucumbers gently under running water and remove approximately 1/16 inch (1.5 mm) from the blossom end. The traditional instructions allow about 1/4 inch (6 mm) of stem to remain at the opposite end. Handle the cucumbers carefully to avoid bruising. This simple preparation step helps support a better finished texture.
7. What type of jar or container is best for fermenting pickles?
Choose a clean, food-safe fermentation container made from glass, suitable food-grade plastic, or an appropriate ceramic crock. This recipe is intended for approximately 1 gallon of container capacity. The vessel should provide enough room for the cucumbers, brine, and a suitable fermentation weight. Avoid reactive metal containers that can interact with acidic brine. A properly designed fermentation lid or airlock may be used according to its instructions. Never tightly seal an ordinary rigid jar without allowing fermentation gases to escape safely.
8. Why must cucumbers remain completely submerged during fermentation?
Keeping cucumbers submerged beneath the brine is essential for proper fermentation and reducing exposure to air. Use a clean, food-safe weight or an approved fermentation setup to hold the cucumbers below the liquid surface. Exposed vegetables are more likely to develop surface spoilage. Check the vessel regularly and follow the container manufacturer’s instructions. If additional brine is needed, prepare it using the original tested proportions, not plain water. Do not push obviously spoiled vegetables back into the brine.
9. What is the ideal temperature for fermenting dill pickles?
The recommended fermentation temperature is 70–75°F (21–24°C). At this temperature, traditional fermented dill pickles generally require approximately 3–4 weeks. Cooler conditions around 55–65°F (13–18°C) are acceptable, but fermentation may take 5–6 weeks. Avoid temperatures above 80°F (27°C), which can make pickles excessively soft. Place the fermentation container in a stable location away from direct sunlight, heating equipment, and strong temperature fluctuations. A room thermometer helps monitor conditions more accurately.
10. How long does it take to make fermented pickles from scratch?
Traditional fermented dill pickles generally take 3–4 weeks at 70–75°F (21–24°C). This is considerably longer than the preparation time for vinegar-based refrigerator pickles. Fermentation proceeds gradually as the brine becomes more acidic and the cucumbers develop their characteristic flavor. In cooler surroundings of 55–65°F (13–18°C), allow approximately 5–6 weeks. Do not shorten the process simply because the cucumbers have changed color or the brine has become cloudy. Follow the complete recommended fermentation period and monitor for spoilage.
11. Is cloudy brine or bubbling normal when fermenting pickles?
Cloudiness and some bubbling can be normal signs of active lactic acid fermentation. As microorganisms ferment available sugars, the brine can become cloudy and gas may develop. The cucumbers may gradually change from bright green to a duller olive-green color. These changes alone do not mean the batch has spoiled. However, bubbling or cloudiness does not guarantee safety either. Continue following the specified recipe, temperature, and fermentation duration. Inspect the pickles regularly for unusual odors, sliminess, or visible spoilage.
12. What should I do if white film, scum, or mold appears on fermented pickles?
Inspect the fermentation surface frequently and never ignore signs of spoilage. Some traditional fermentation methods allow prompt removal of surface scum during routine monitoring. However, a white film cannot always be identified safely by appearance alone, and visible mold should be treated cautiously. If you see fuzzy or colored growth, notice a disagreeable odor, or cannot confidently distinguish harmless scum from spoilage, discard the batch. Never taste suspicious pickles to determine whether they are safe.
13. Why are my fermented pickles soft, mushy, hollow, or slimy?
Soft fermented pickles can result from poor-quality cucumbers, excessive fermentation temperatures, or improper preparation. Use fresh, firm pickling varieties and trim the blossom ends before fermenting. Maintain the specified salt concentration and avoid temperatures above 80°F (27°C). Hollow centers can also be associated with cucumber quality and growth conditions. Never try to rescue pickles that become slimy, noticeably decomposed, or develop an unpleasant odor. Discard spoiled batches rather than attempting to fix them with extra salt or vinegar.
14. Can I add extra garlic, dill, or hot peppers to fermented pickles?
The traditional recipe already allows several optional flavorings. You may use 2 garlic cloves, 2 dried red peppers, or 2 teaspoons whole mixed pickling spices, alongside the specified dill. These ingredients contribute savory, herbal, or mildly spicy notes without requiring a different preserving method. Keep the tested cucumber, salt, vinegar, and water amounts unchanged, and avoid adding large untested quantities of extra vegetables. Once your pickles are ready, try chopping them into our Easy Pickle De Gallo Recipe for a crunchy appetizer.
15. Are fermented pickles probiotic, and are they healthier than vinegar pickles?
Unheated, properly fermented pickles may contain live microorganisms produced during lactic acid fermentation. However, not every live microorganism qualifies as a clinically proven probiotic, and the specific microorganisms present can vary between batches. Fermented pickles should not be presented as a guaranteed treatment for digestive or other health conditions. They can also contain substantial sodium because of their fermentation brine. Heat-processing or canning changes the live microbial content. Enjoy them as a flavorful addition to a balanced diet rather than as a medical remedy.
16. How do you store, refrigerate, and serve homemade fermented pickles?
Once fermentation is complete, store the pickles refrigerated at 40°F (4°C) or below. Keep them in a clean, suitable container, covered with their brine. Properly fermented pickles may keep for approximately 4–6 months under the traditional refrigerated storage guidance, provided they remain in good condition and are monitored regularly. Do not assume they are shelf-stable at room temperature: shelf storage requires an appropriate tested canning procedure. Serve chilled with sandwiches, burgers, or salads, or use them in our Fried Pickle Dip and Pickle Fries Recipe for tasty homemade appetizers.