


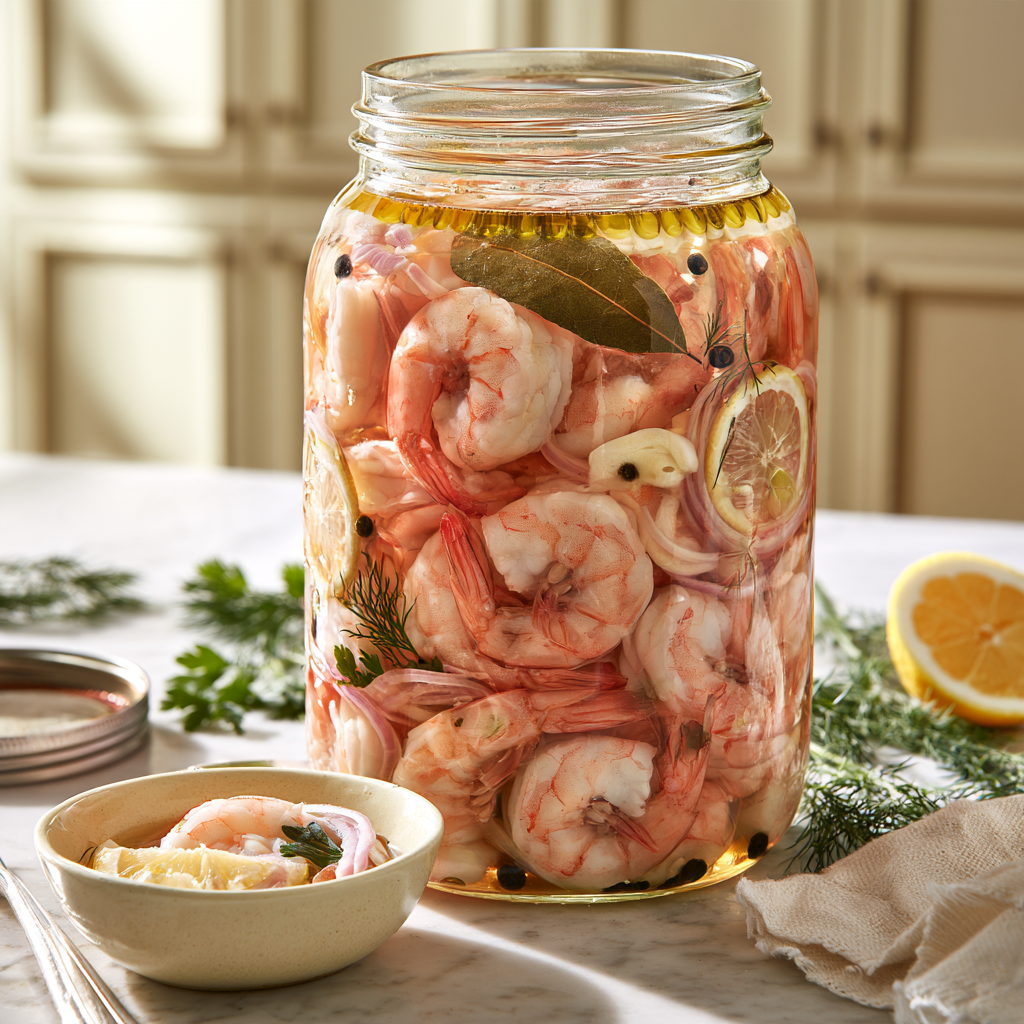
If you’re looking for a refreshing seafood appetizer that’s bursting with bright, tangy flavors, this Pickled Shrimp Recipe is about to become your new favorite! Imagine tender, juicy shrimp soaking in a delicious marinade of zesty lemon juice, tangy vinegar, extra virgin olive oil, thinly sliced red onions, fresh garlic, and fragrant herbs. Every bite delivers the perfect balance of citrusy freshness, savory seasoning, and a gentle kick of spice. It’s light, flavorful, and incredibly satisfying without feeling heavy or complicated. Whether you’re hosting a summer gathering, preparing an elegant appetizer for a dinner party, or simply craving something different from traditional shrimp dishes, this easy homemade pickled shrimp brings a little coastal Southern charm straight to your table.
What makes this easy Pickled Shrimp Recipe so special is that most of the magic happens while the shrimp chill in the refrigerator. Unlike traditional cucumber pickles that rely on a strongly acidic brine, Southern-style pickled shrimp are typically prepared by gently cooking fresh shrimp first, then marinating them in a flavorful mixture of vinegar, lemon juice, olive oil, onions, garlic, and aromatic spices. As the cooked shrimp rest in the chilled marinade, they absorb the bright, savory flavors while maintaining their naturally tender texture. The result is a delicious Southern pickled shrimp appetizer that’s wonderfully refreshing and perfect for making ahead. There’s no complicated cooking technique, no special equipment, and no need to spend hours standing over the stove. Simply cook the shrimp until perfectly done, combine them with the marinade, and allow the flavors to develop in the refrigerator.


Pickled Shrimp Recipe
Equipment
- ge saucepan or medium stockpot
- Colander
- Large mixing bowl
- Whisk
- Sharp kitchen knife
- Cutting board
- Measuring cups and spoons
- Digital kitchen scale
- citrus juicer
- Airtight glass container or glass bowl with lid, approximately 1½–2 qt capacity
- Slotted spoon
- Instant-Read Thermometer (optional)
- Refrigerator
Ingredients
- For the Shrimp
- Quantity Ingredient
- 1½ lb 680 g Raw medium or large shrimp, peeled and deveined
- 6 cups 1.4 L Water, for poaching
- 1 teaspoon 6 g Fine salt, for the poaching water
- 1 Lemon halved
- 2 Bay leaves
- For the Pickling Marinade
- Quantity Ingredient
- ½ cup 120 ml Apple cider vinegar
- ¼ cup 60 ml Fresh lemon juice
- ⅓ cup 80 ml Extra virgin olive oil
- 1 medium 150 g Red onion, very thinly sliced
- 3 cloves 9 g Garlic, finely sliced or minced
- ¼ cup 10 g Fresh flat-leaf parsley, chopped
- 1 teaspoon 2 g Yellow mustard seeds
- ½ teaspoon 1 g Whole black peppercorns
- ½ teaspoon 1 g Celery seeds
- ¼ teaspoon Crushed red pepper flakes optional
- ½ teaspoon 3 g Fine salt
- 2 Bay leaves
Instructions
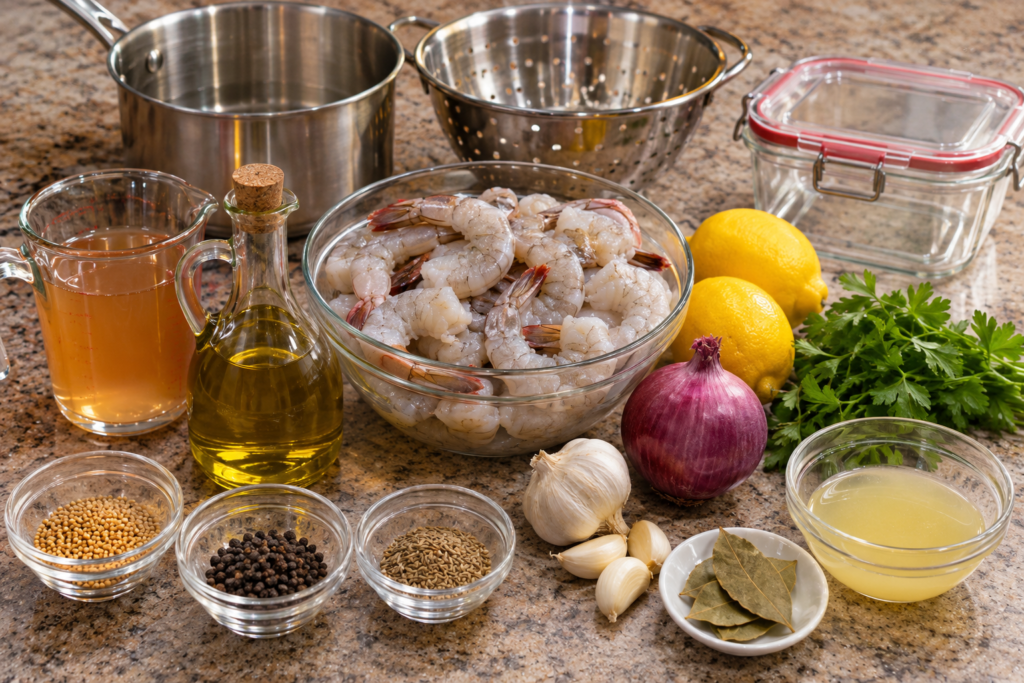
- Step 1: Gather and Prepare All the Ingredients. Begin by gathering everything needed for your homemade Pickled Shrimp Recipe, including 1½ pounds (680 g) of raw medium or large shrimp, apple cider vinegar, fresh lemons, extra virgin olive oil, red onion, garlic, parsley, mustard seeds, peppercorns, celery seeds, and bay leaves. Prepare a large saucepan for poaching, a colander for draining the shrimp, and a clean glass container with a tight-fitting lid for marinating. Measure the vinegar, olive oil, and lemon juice separately so the marinade can be assembled efficiently after cooking. Keep raw shrimp refrigerated at 40°F (4°C) or below until you are ready to prepare them. If using frozen shrimp, thaw them safely in the refrigerator before beginning, and avoid leaving raw seafood at room temperature while organizing the remaining ingredients.

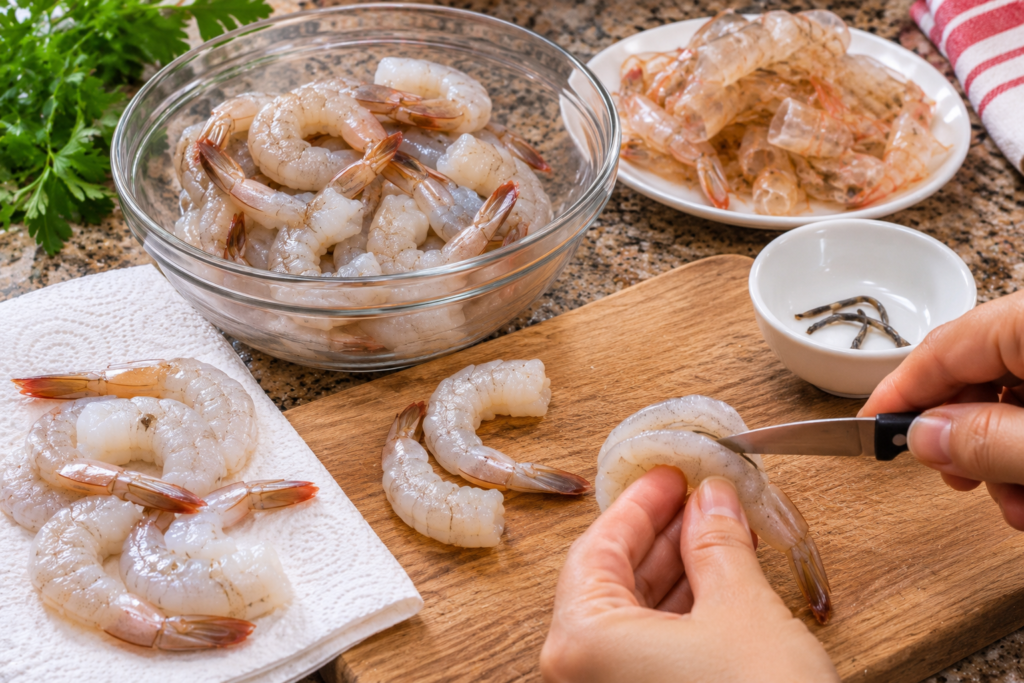
- Step 2: Clean, Peel, and Devein the Shrimp. If your shrimp are not already peeled and deveined, carefully remove the shells while leaving the tails attached if you prefer a more decorative appetizer presentation. Using a small, sharp knife, make a shallow slit along the back of each shrimp and remove the dark intestinal tract when present. Rinse the shrimp briefly under cold running water if needed, then drain thoroughly and pat dry with clean paper towels. Medium or large shrimp work especially well for this recipe because their size makes them easy to serve as individual appetizers while maintaining a pleasantly tender texture after marinating. Keep the prepared shrimp chilled until the poaching water is ready, and thoroughly wash your hands and any surfaces that have come into contact with raw seafood.
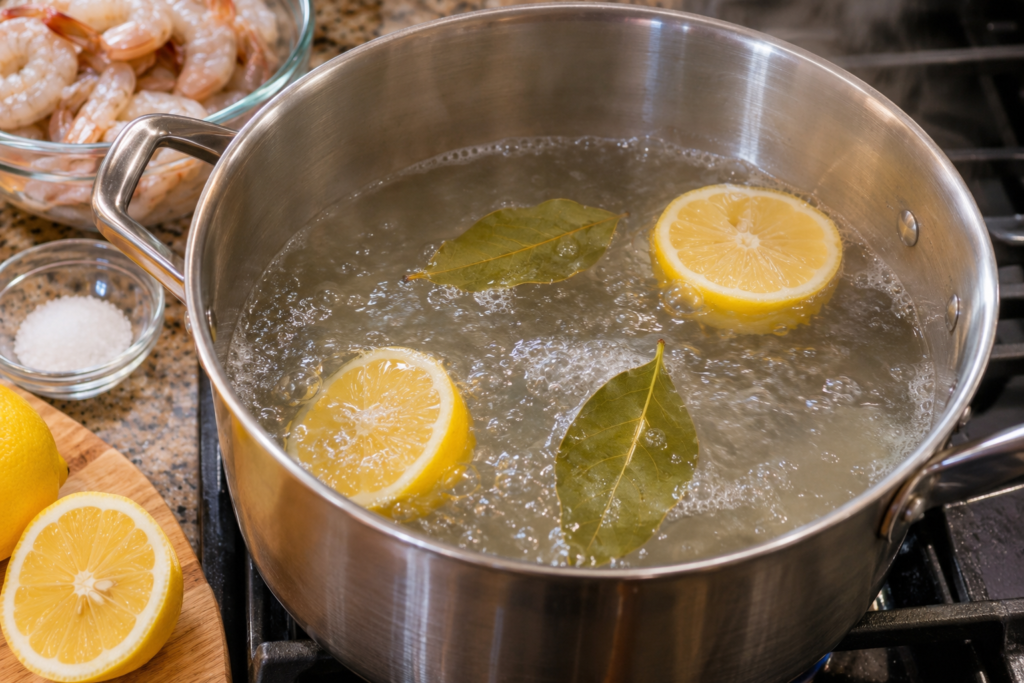
- Step 3: Prepare the Aromatic Poaching Water. Pour 6 cups (1.4 L) of water into a large saucepan or medium stockpot and add 1 teaspoon (6 g) of fine salt, one lemon cut in half, and two bay leaves. Place the saucepan over medium-high heat and bring the water to a gentle boil, allowing the lemon and bay leaves to release their subtle flavors into the liquid. Once the water is boiling, reduce the heat slightly so the liquid maintains a gentle simmer rather than a vigorous rolling boil. This lightly seasoned poaching liquid adds flavor to the shrimp without overpowering their naturally sweet seafood taste. Avoid using excessive salt because the shrimp will also absorb seasoning from the marinade during refrigeration.
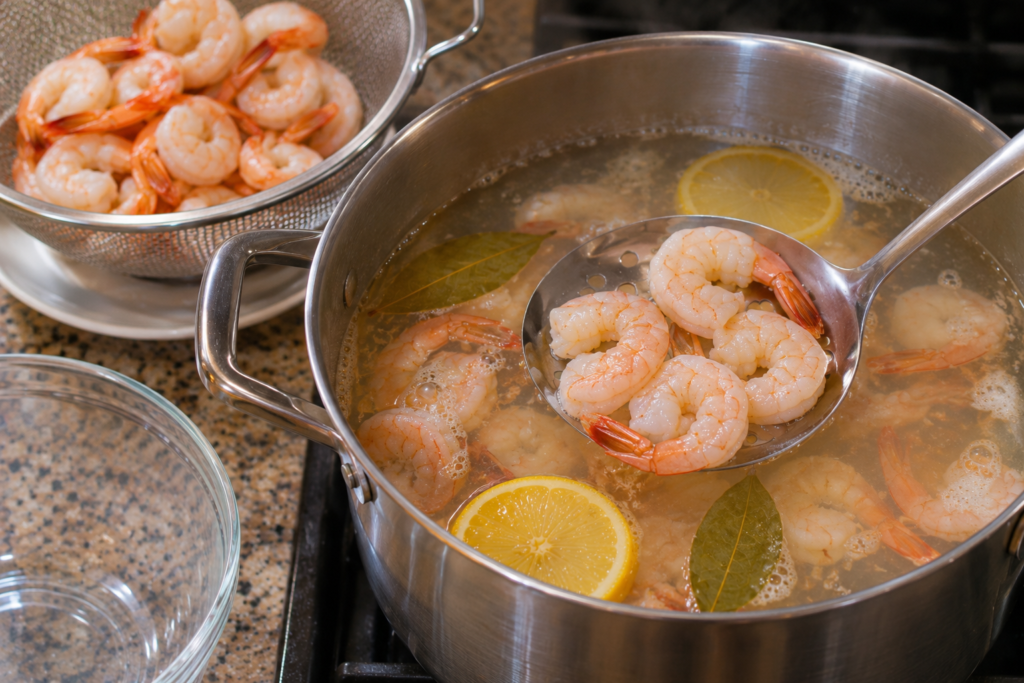
- Step 4: Gently Poach the Shrimp Until Fully Cooked. Carefully add the prepared shrimp to the gently simmering poaching water, stirring once or twice to ensure they are evenly submerged and separated. Cook for approximately 2–4 minutes, depending on their size, until the shrimp turn pink on the outside and the flesh becomes pearly, opaque, and firm throughout. Smaller shrimp may cook more quickly, while larger shrimp may need slightly more time. Avoid prolonged boiling because shrimp can become tough and rubbery when overcooked. If using an instant-read thermometer and the shrimp are large enough to measure accurately, a center temperature of 145°F (63°C) is a useful seafood cooking target. Once the shrimp are fully cooked, immediately remove the saucepan from the heat and transfer the shrimp to a colander using a slotted spoon or carefully drain them, discarding the poaching liquid.
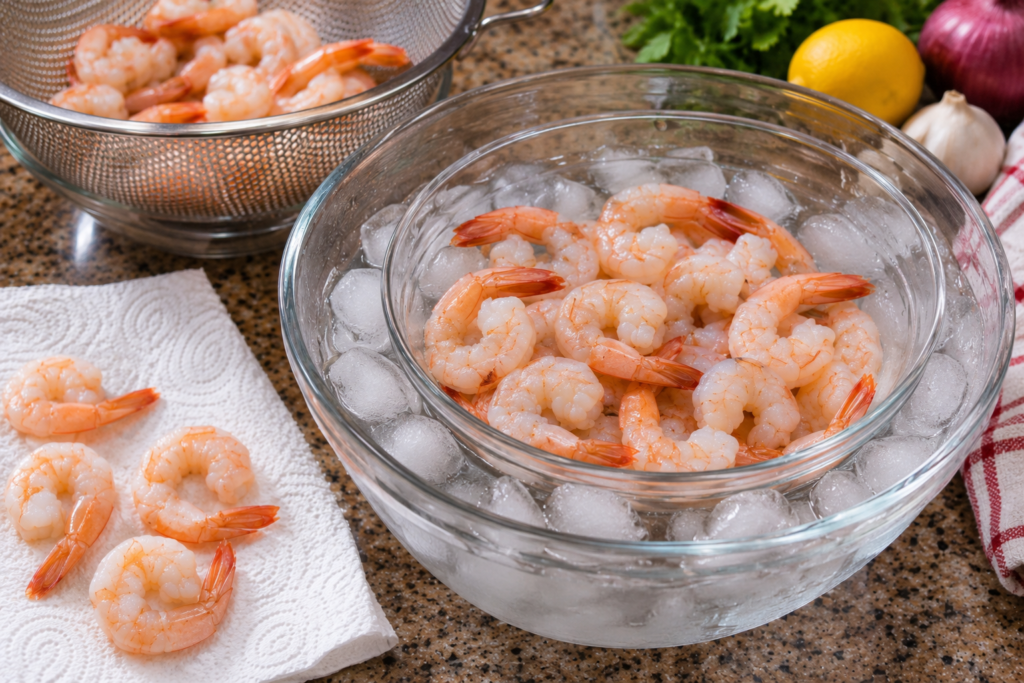
- Step 5: Cool the Cooked Shrimp Promptly. After draining, transfer the fully cooked shrimp to a clean, shallow bowl and cool them promptly before combining them with the pickling marinade. To speed up cooling, place the bowl over a larger bowl filled with ice, or briefly chill the shrimp in an ice-water bath using clean water and ice, then drain them thoroughly. Pat the shrimp gently with clean paper towels if necessary to remove excess water that could dilute the marinade. Aim to complete this cooling stage within approximately 15 minutes, although the exact time depends on the shrimp size and cooling method. Do not leave cooked shrimp sitting at room temperature for extended periods, and keep them properly chilled while preparing the remaining ingredients. Prompt cooling helps preserve their tender texture and reduces unnecessary time in the temperature range where bacteria can multiply.
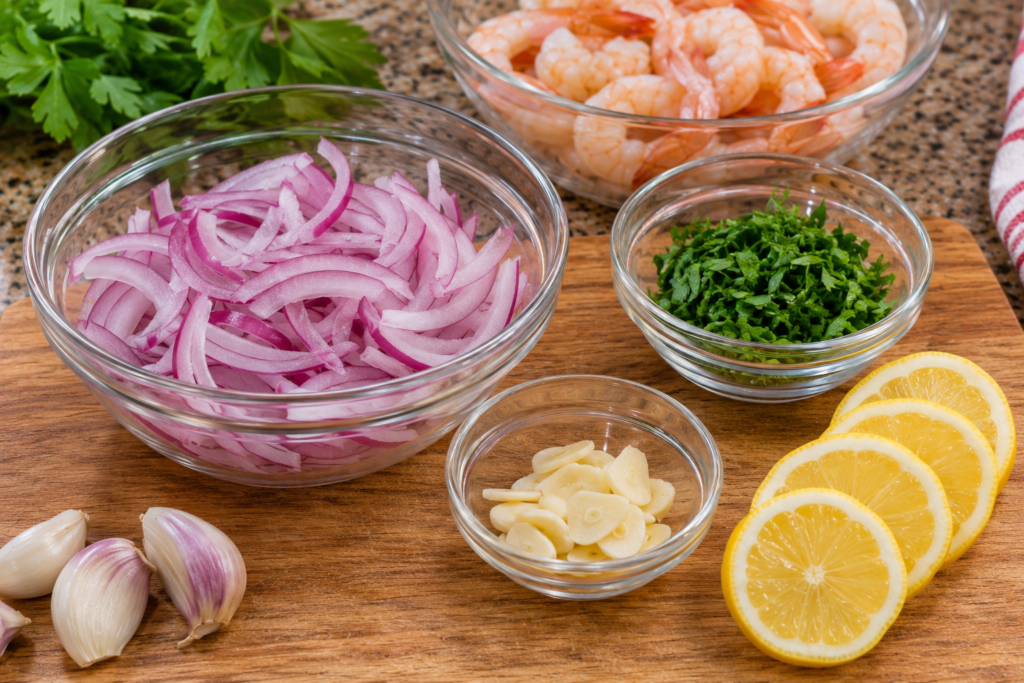
- Step 6: Slice the Red Onion and Prepare the Fresh Aromatics. Peel one medium red onion, approximately 150 g, and slice it into very thin half-moons using a sharp knife or mandoline. Thin slices work particularly well because they soften slightly in the acidic marinade while retaining a pleasant crispness. Peel and finely slice or mince three garlic cloves, approximately 9 g, then wash, dry, and chop ¼ cup (10 g) of fresh flat-leaf parsley. If using optional fresh dill, chop it separately and reserve it for serving. Prepare the lemon slices for garnish if desired, keeping them refrigerated until needed. The combination of red onion, garlic, and parsley gives Southern pickled shrimp their characteristic aromatic freshness while adding attractive color and texture to the finished appetizer.
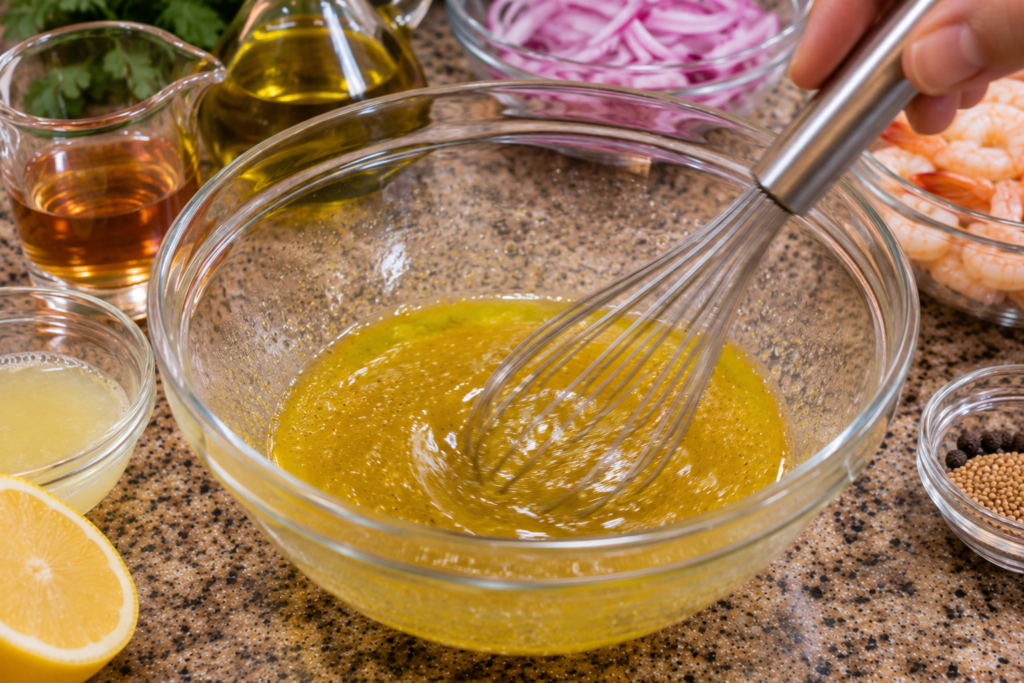
- Step 7: Combine the Vinegar, Lemon Juice, and Olive Oil. In a large, clean mixing bowl, pour ½ cup (120 ml) of apple cider vinegar and ¼ cup (60 ml) of freshly squeezed lemon juice, then add ⅓ cup (80 ml) of extra virgin olive oil. Whisk the ingredients together vigorously for approximately 20–30 seconds until they form a temporarily combined, lightly emulsified dressing. The olive oil will not remain permanently mixed with the acidic ingredients, which is completely normal for this style of marinade. The vinegar provides a pleasantly sharp tanginess, the lemon juice contributes fresh citrus flavor, and the olive oil adds richness that balances the acidity. Avoid substituting large quantities of water for the vinegar because it would weaken the flavor and change the character of the recipe. Remember that this is a refrigerated marinade intended to flavor fully cooked shrimp rather than a shelf-stable preservation solution.
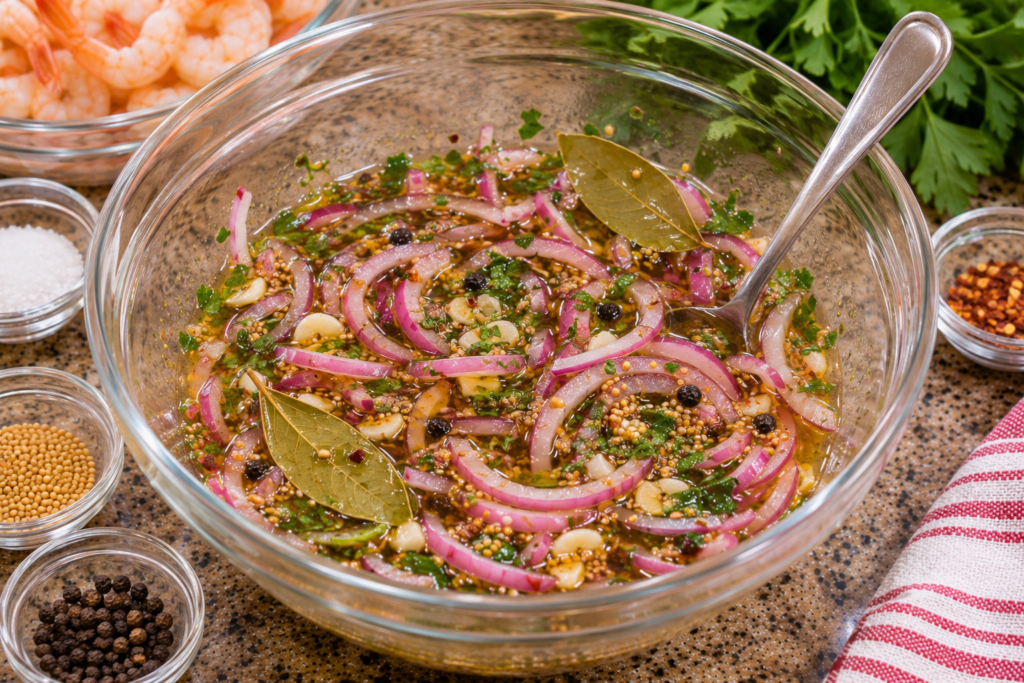
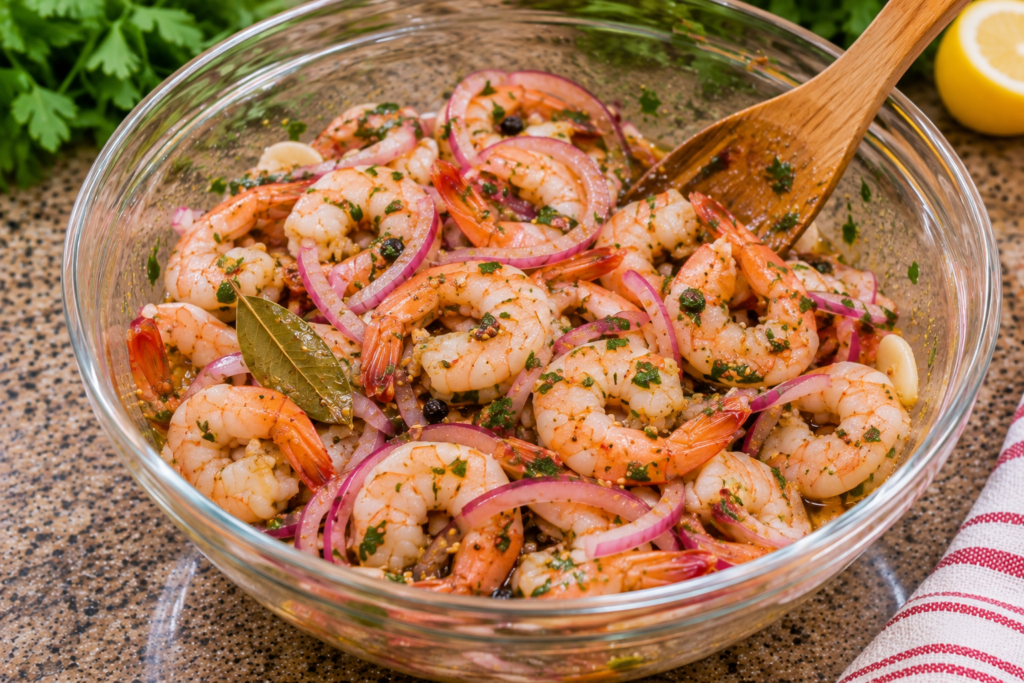
- Step 8: Add the Onions, Garlic, Herbs, and Aromatic Spices. Add the thinly sliced red onion, minced garlic, and chopped parsley to the bowl containing the vinegar, lemon juice, and olive oil. Sprinkle in 1 teaspoon (2 g) of yellow mustard seeds, ½ teaspoon (1 g) of whole black peppercorns, ½ teaspoon (1 g) of celery seeds, ¼ teaspoon of optional crushed red pepper flakes, and ½ teaspoon (3 g) of fine salt. Add the remaining two bay leaves, then stir thoroughly with a clean spoon until the onion slices are separated and evenly coated in the dressing. The combination of mustard seeds, peppercorns, celery seeds, and bay leaves creates a gently aromatic Southern-inspired flavor without overwhelming the shrimp. If you prefer a milder appetizer, omit the crushed red pepper flakes. Taste a small amount of the marinade using a clean spoon and adjust the seasoning slightly if desired, remembering that the flavor will develop as the shrimp chill.
- Step 9: Combine the Cooked Shrimp with the Pickling Marinade. Add the fully cooked, promptly cooled, and thoroughly drained shrimp to the bowl containing the prepared marinade. Using a large spoon or silicone spatula, gently fold the shrimp through the dressing until each piece is coated with the vinegar, lemon juice, olive oil, onions, garlic, and herbs. Avoid stirring too aggressively because excessive handling may damage the delicate shrimp or break smaller pieces apart. The marinade should coat the shrimp generously, although the shrimp do not need to be completely submerged in liquid at all times. Make sure the onion slices and aromatic spices are distributed throughout the mixture rather than collecting in one area of the bowl. The shrimp should remain firm, opaque, and tender, ready to absorb the marinade's bright, savory flavors during refrigeration.
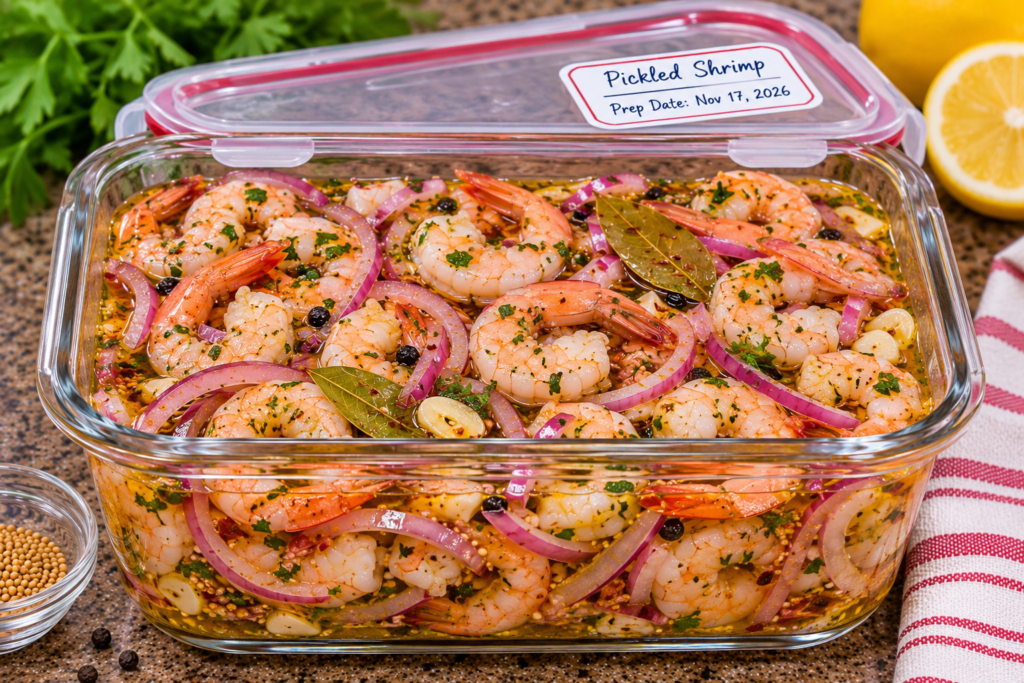
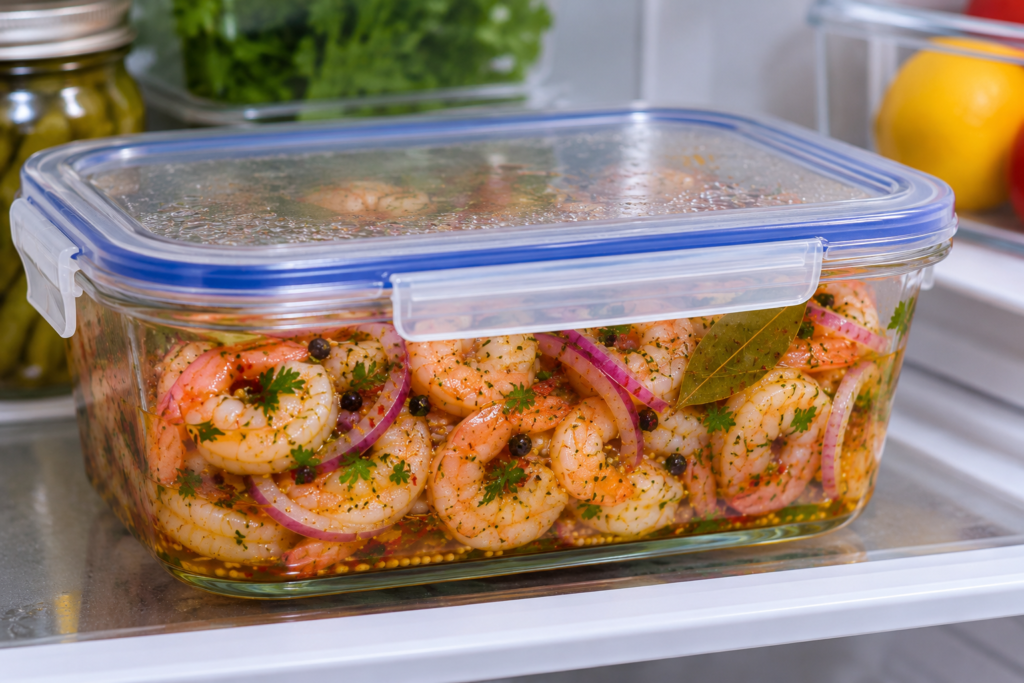
- Step 10: Transfer the Shrimp to a Clean Marinating Container. Carefully spoon the marinated shrimp and accompanying onions into a clean glass container or glass bowl with a tight-fitting lid, preferably one with enough room to hold approximately 1½–2 quarts. Pour the remaining vinegar-and-oil marinade over the shrimp, using a spatula to transfer the herbs, garlic, and spices from the mixing bowl. Arrange the shrimp and onions in relatively even layers so the flavorful dressing can reach the ingredients throughout the container. If using a wide bowl rather than a jar, cover it securely with an airtight lid or food-safe wrap. Avoid using reactive containers made from materials that may interact with acidic ingredients; glass or suitable food-grade plastic is a convenient choice. Label the container with the preparation date if making the appetizer ahead of time.
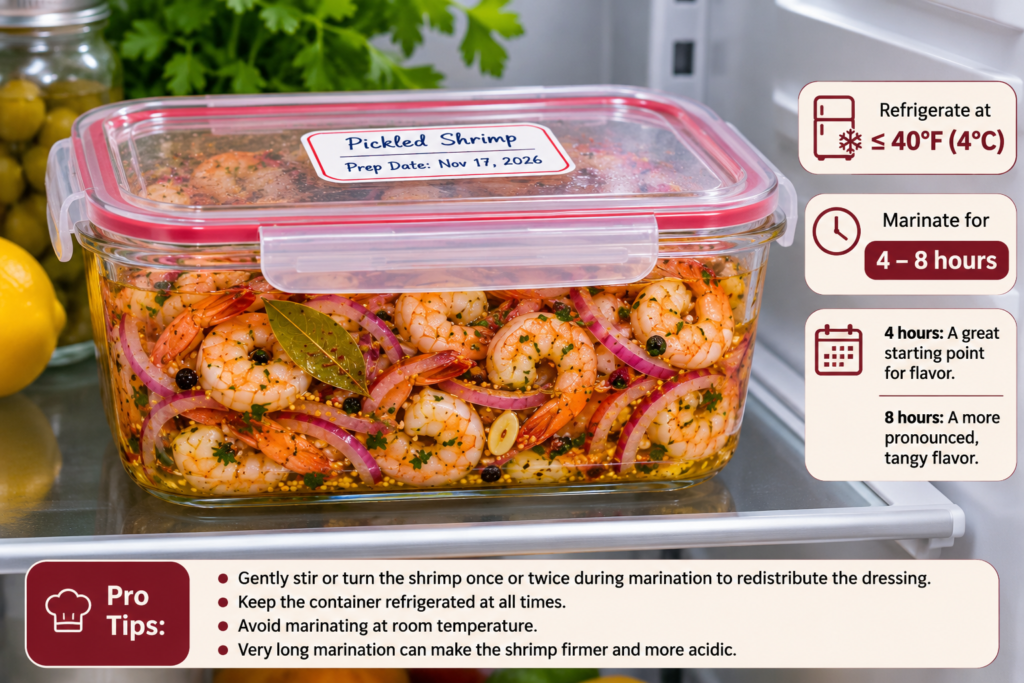
- Step 11: Refrigerate the Pickled Shrimp for Flavor Development. Place the covered container immediately into the refrigerator and allow the shrimp to marinate at 40°F (4°C) or below for approximately 4–8 hours. During this time, the vinegar, lemon juice, olive oil, garlic, onions, herbs, and aromatic spices gradually flavor the cooked shrimp, creating the refreshing combination of acidity and savory seasoning associated with Southern pickled shrimp. If convenient, gently turn or stir the shrimp once or twice during marination using a clean utensil to redistribute the dressing, then return the container to the refrigerator promptly. Four hours is a useful starting point for developing flavor, while longer marination may create a more pronounced tanginess. Avoid leaving the shrimp at room temperature to marinate, and keep in mind that extended exposure to a strongly acidic dressing may eventually produce a firmer texture.
- Step 12: Taste and Adjust the Flavor Before Serving. After approximately four hours of refrigeration, remove the container briefly and use a clean spoon to taste a small piece of shrimp along with some of the marinade. The flavor should be pleasantly tangy, with noticeable lemon, vinegar, garlic, onion, and herbal notes that complement rather than overpower the seafood. If the mixture tastes too sharp, you may balance an individual serving with a small amount of additional olive oil rather than significantly diluting the full batch. If it needs more brightness, add a small squeeze of fresh lemon juice, or sprinkle in a little extra chopped parsley for a fresher finish. Avoid adding excessive salt because the marinade already contains seasoning. Once adjustments are complete, cover the container and return it to the refrigerator until ready to serve.
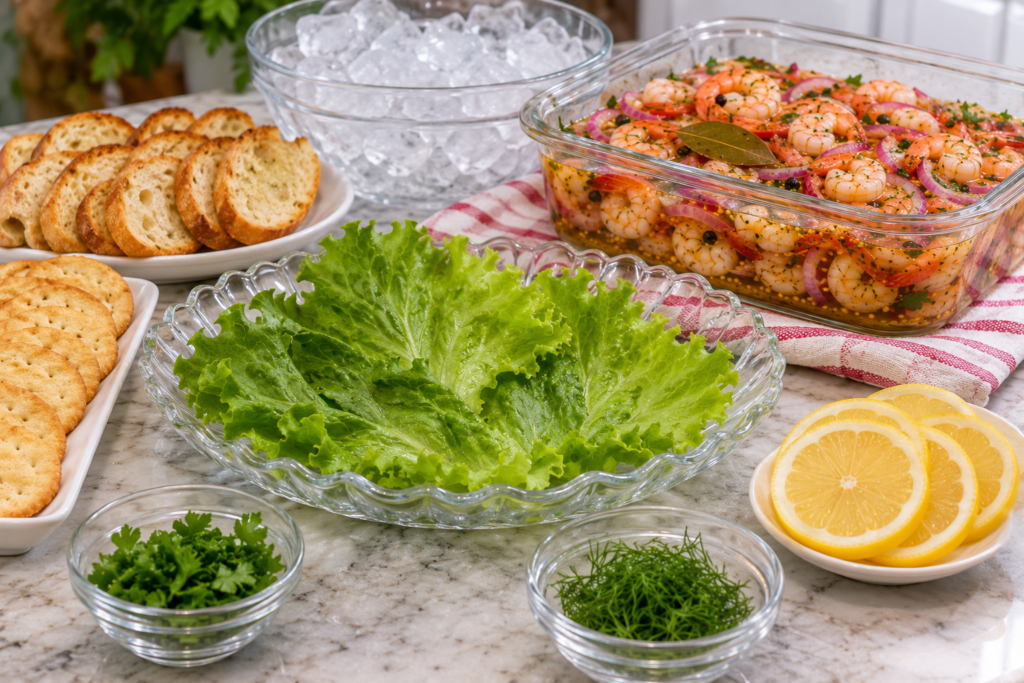
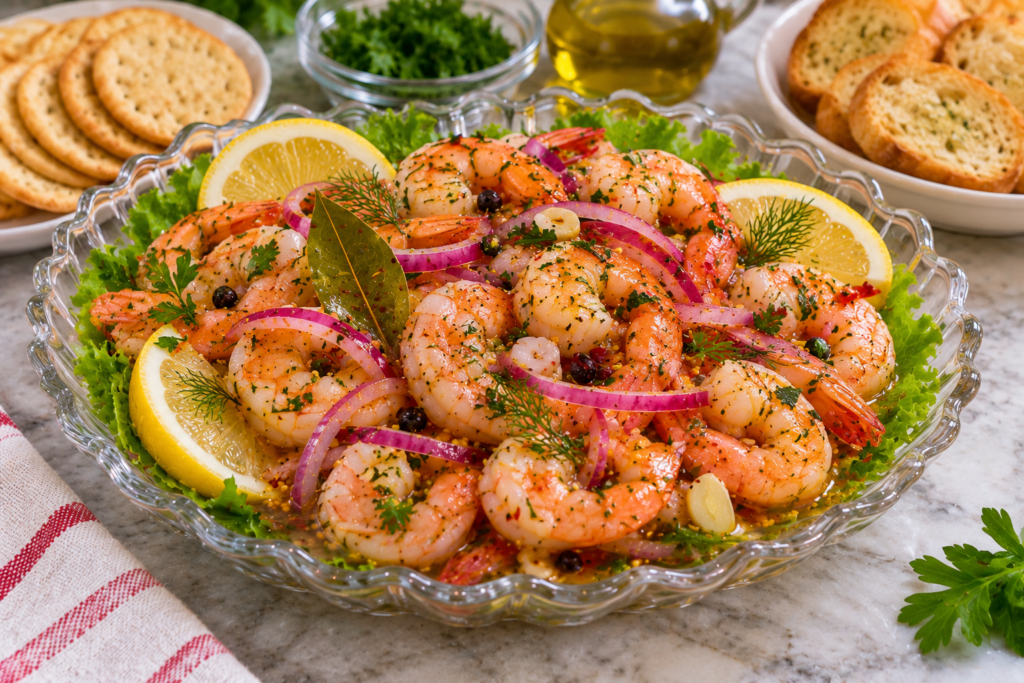
- Step 13: Prepare the Serving Platter and Garnishes. Shortly before serving, prepare a shallow glass serving bowl or attractive seafood platter, along with fresh lemon slices, additional chopped parsley, and any optional dill. Arrange crisp crackers, toasted baguette slices, or crusty bread nearby so guests can easily enjoy the shrimp as an appetizer. For a lighter presentation, line a serving platter with clean lettuce leaves or fresh salad greens and reserve space for the chilled shrimp and marinated onions. If the appetizer will be displayed for an extended gathering, prepare a larger bowl of ice to hold the serving dish and help keep the seafood cold. Avoid placing the shrimp on the serving platter too far in advance because they should remain refrigerated until shortly before guests are ready to eat.
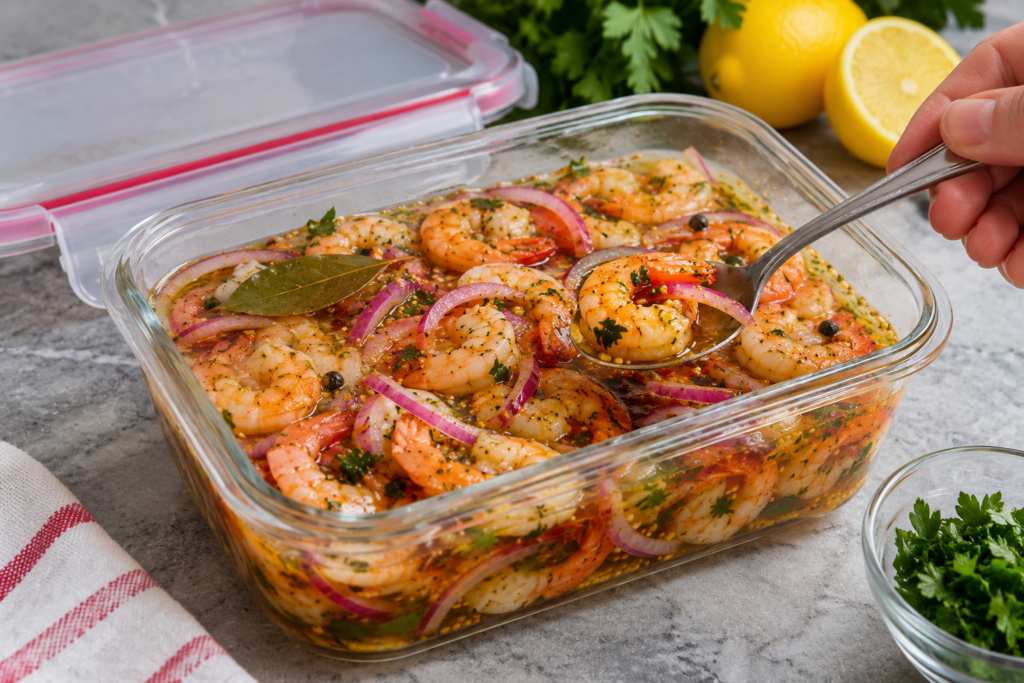
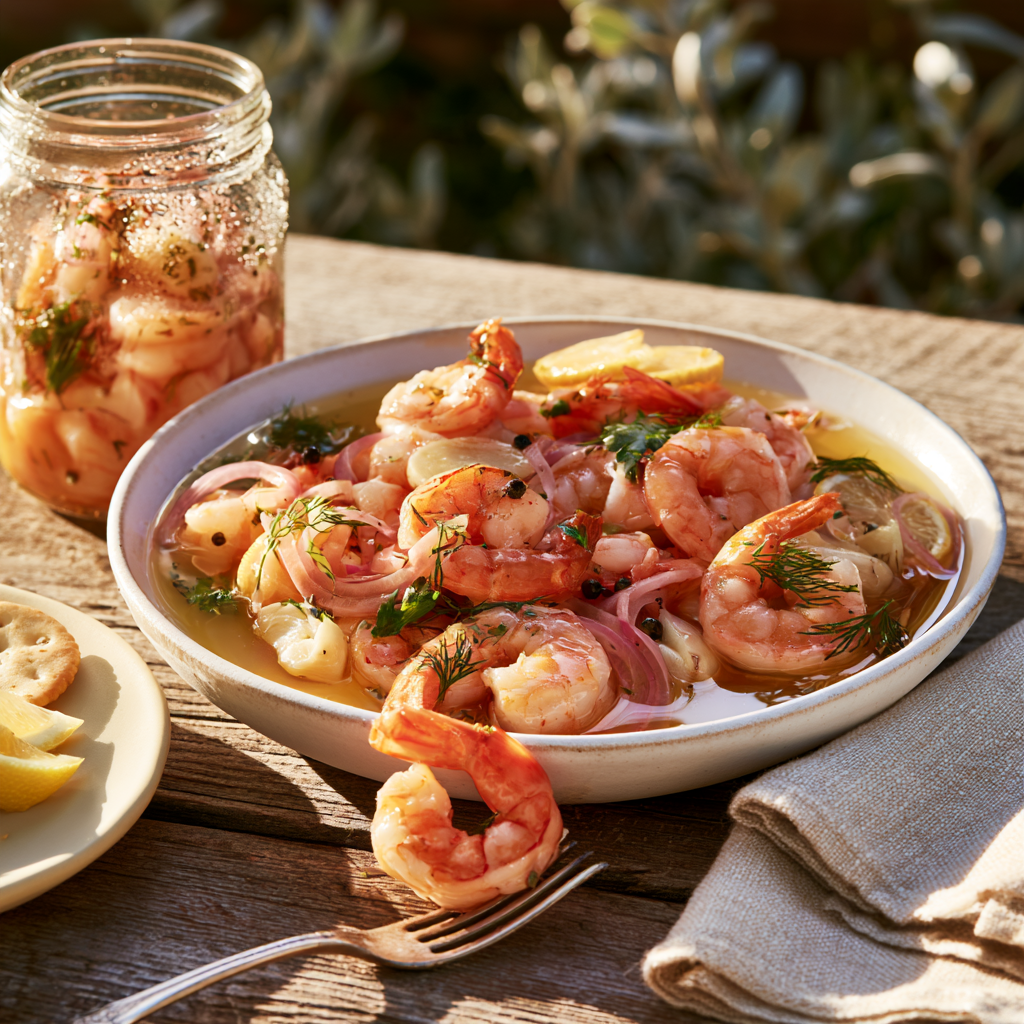
- Step 14: Arrange and Serve the Pickled Shrimp Chilled. Remove the marinated shrimp from the refrigerator immediately before serving and gently stir the mixture to redistribute the flavorful dressing. Using a slotted spoon, transfer the shrimp and a generous portion of the marinated red onions to the prepared serving bowl or platter, allowing some of the excess liquid to drain away. Spoon a small amount of the marinade over the shrimp for extra flavor if desired, then garnish with chopped parsley, fresh lemon slices, and optional dill. Serve the shrimp thoroughly chilled with crackers, toasted baguette, crusty bread, or fresh vegetables. For an elegant presentation, arrange the shrimp neatly around the bowl with the colorful onions and herbs visible between them. Keep the remaining shrimp refrigerated rather than leaving the full batch on the table throughout the gathering.
- Step 15: Store Any Leftover Pickled Shrimp Safely. Transfer leftover pickled shrimp into a clean airtight container and refrigerate promptly at 40°F (4°C) or below. Because this recipe contains fully cooked seafood, it should be treated as a perishable refrigerated appetizer rather than a shelf-stable preserved food. For the best flavor and texture, aim to enjoy the shrimp within approximately 1–2 days of preparation, although properly handled cooked shrimp may generally remain refrigerated for 3–4 days, counting from the original cooking time. Discard any shrimp that have been left unrefrigerated for more than two hours, or one hour when the surrounding temperature exceeds 90°F (32°C). Do not rely on the vinegar or lemon juice to preserve the shrimp safely at room temperature. Freezing the completed marinated dish is not recommended for optimal texture, although plain cooked shrimp may be frozen separately for future use.
Notes


- Origins of the Pickled Shrimp
- Health Benefits of the Pickled Shrimp
- Nutritional Benefits of Pickled Shrimp Ingredients
- 1. Provides Lean Protein for Muscle Maintenance
- 2. Supplies Selenium for Normal Cell Function
- 3. Contains Vitamin B12 for Nervous System Health
- 4. Provides Iodine to Support Thyroid Function
- 5. Olive Oil Contributes Unsaturated Fats
- 6. Includes Vitamin C and Fresh Plant Ingredients
- 7. Offers a Lighter Alternative to Fried Shrimp Appetizers
- 8. Can Be Part of a Heart-Healthy Eating Pattern
- 9. Naturally Low in Carbohydrates
- 10. A Flavorful Make-Ahead Appetizer Without Heavy Sauces
- Are Pickled Shrimp Healthy?
- Ways To Enjoy Pickled Shrimp
Origins of the Pickled Shrimp
The Lowcountry pickled shrimp recipe became especially well suited to the coastal lifestyle of South Carolina and Georgia, where shrimp harvesting has remained an important part of local food culture. Freshly caught shrimp could be boiled or gently poached, then combined with thinly sliced onions, lemon, vinegar, bay leaves, peppercorns, and other aromatic seasonings. Some variations included mustard seeds, celery seeds, fresh herbs, or a touch of hot pepper, creating a balance of bright acidity, savory richness, and subtle warmth. The mixture was then chilled to allow the flavors to develop, producing a refreshing appetizer that could be prepared before family gatherings, holiday celebrations, or casual outdoor meals. While ingredient combinations vary from household to household, the essential idea remains consistent: tender cooked shrimp coated in a lively, flavorful marinade.
As Southern cuisine gained wider recognition through regional cookbooks, restaurants, and food publications, pickled shrimp became increasingly appreciated beyond its traditional coastal setting. Its popularity is easy to understand. Unlike fried seafood or elaborate baked appetizers, pickled shrimp can be prepared with relatively simple ingredients and served directly from the refrigerator. It also fits naturally into the Southern tradition of entertaining with make-ahead dishes that allow hosts to spend more time with their guests. From elegant appetizer platters to casual seafood spreads, the dish offers an appealing combination of convenience, bright flavor, and regional character. Modern variations may incorporate fresh dill, parsley, red onion, garlic, olive oil, or different types of vinegar, but they continue to reflect the same Southern-inspired approach to marinated seafood.

Health Benefits of the Pickled Shrimp
Who says a delicious, tangy seafood appetizer can’t also provide valuable nutrients? This Pickled Shrimp Recipe combines tender, fully cooked shrimp with fresh lemon juice, tangy vinegar, extra virgin olive oil, crisp red onions, garlic, and aromatic herbs to create a refreshing dish that’s both flavorful and nourishing. Inspired by the coastal cooking traditions of the American South, especially the Lowcountry, Southern pickled shrimp offer a wonderful combination of lean protein, essential minerals, and naturally occurring nutrients without requiring heavy breading or deep-frying.
One of the biggest advantages of making homemade pickled shrimp is having complete control over the ingredients. Instead of relying on rich mayonnaise-based dressings or heavily processed sauces, this recipe uses a bright, citrusy marinade that allows the natural flavor of the shrimp to shine. Shrimp provides protein, vitamin B12, selenium, and iodine, while olive oil contributes heart-friendly unsaturated fats. Fresh herbs, onions, and garlic add flavor and small amounts of beneficial plant compounds.
Although pickled shrimp can be part of a balanced diet, its nutritional value depends on portion size, sodium content, and the amount of olive oil used. Let’s explore what makes this refreshing seafood appetizer an appealing addition to your meal rotation.
Nutritional Benefits of Pickled Shrimp Ingredients
| Ingredient | Nutritional Benefits |
|---|---|
| Cooked Shrimp | Provides lean protein, selenium, vitamin B12, iodine, and phosphorus. |
| Extra Virgin Olive Oil | Supplies primarily monounsaturated fats and naturally occurring antioxidant compounds. |
| Fresh Lemon Juice | Adds vitamin C and citrus flavor with relatively few calories. |
| Red Onions | Contain small amounts of fiber, vitamin C, and flavonoid compounds such as quercetin. |
| Garlic | Contains sulfur-containing compounds that contribute to its distinctive aroma and flavor. |
| Fresh Parsley | Provides vitamin K and small amounts of vitamin C and other micronutrients. |
| Vinegar | Adds acidity and flavor without contributing significant calories in typical recipe quantities. |
| Black Pepper and Spices | Provide aromatic plant compounds and help build flavor without excessive added salt. |
1. Provides Lean Protein for Muscle Maintenance
One of the most significant nutritional advantages of this Pickled Shrimp Recipe is its protein content. Shrimp is naturally rich in high-quality protein while containing relatively little total fat before the marinade is added.
Protein is essential for maintaining muscle tissue, supporting normal growth and repair, and producing enzymes and other important compounds throughout the body. It also contributes to feelings of fullness, making protein-containing foods useful components of balanced meals.
A 3-ounce (85 g) portion of cooked shrimp typically provides approximately 20 grams of protein, although the exact amount varies by shrimp species and preparation method.
Because this Southern-style pickled shrimp recipe uses fully cooked seafood rather than breaded or deep-fried shrimp, the shrimp itself remains a relatively lean protein source. Serve it with a fresh green salad, whole-grain crackers, or vegetables for a more complete meal.
2. Supplies Selenium for Normal Cell Function
Shrimp is a source of selenium, an essential trace mineral involved in several important processes within the body.
Selenium contributes to normal thyroid hormone metabolism, supports immune function, and plays a role in antioxidant defense through specialized proteins called selenoproteins.
These proteins help protect cells from certain forms of oxidative damage and support normal physiological functions.
Including selenium-containing foods such as seafood, eggs, meat, and grains can help people meet their daily requirements. However, consuming more selenium than necessary does not automatically produce additional health benefits, and excessive intake can be harmful.
The selenium content of shrimp varies depending on the species and its environment.
3. Contains Vitamin B12 for Nervous System Health
Another benefit of homemade pickled shrimp is that shrimp naturally provides vitamin B12, a nutrient important for normal nerve function, DNA synthesis, and red blood cell formation.
Vitamin B12 is primarily found naturally in animal-derived foods, including fish, shellfish, meat, eggs, and dairy products.
Adequate vitamin B12 intake helps prevent deficiency, which can contribute to anemia and neurological problems.
Because this recipe features shrimp as its main ingredient, it can contribute to your daily vitamin B12 intake when enjoyed as part of a varied diet.
4. Provides Iodine to Support Thyroid Function
Shrimp contains iodine, an essential mineral the thyroid gland uses to produce thyroid hormones.
These hormones help regulate metabolism and support normal growth and development.
Seafood can be an important dietary source of iodine, although the amount found in shrimp varies considerably according to species, harvesting conditions, and other factors.
Enjoying pickled shrimp occasionally can contribute iodine to your diet, but it’s important to maintain an appropriate overall intake rather than assuming seafood alone will meet individual nutritional requirements.
People with thyroid conditions who have been advised to manage iodine intake should follow their healthcare professional’s recommendations.
5. Olive Oil Contributes Unsaturated Fats
The extra virgin olive oil used in this Southern Pickled Shrimp Recipe does more than add a rich, silky texture to the marinade.
Olive oil is composed primarily of monounsaturated fatty acids, particularly oleic acid. Replacing some saturated fats with unsaturated fats is generally consistent with heart-healthy dietary recommendations.
Extra virgin olive oil also contains naturally occurring phenolic compounds, although their concentrations vary depending on the variety, processing method, and storage conditions.
Using olive oil instead of a creamy dressing can provide a different fat profile while preserving the refreshing character of the dish.
However, olive oil remains calorie-dense, so the amount used will influence the finished recipe’s total calories and fat content. Much of the marinade may also remain in the serving bowl rather than being consumed.
6. Includes Vitamin C and Fresh Plant Ingredients
The lemon juice, red onions, and fresh herbs in this easy pickled shrimp recipe contribute fresh flavors along with small amounts of vitamins and naturally occurring plant compounds.
Lemon juice provides vitamin C, which supports normal immune function, collagen synthesis, and the body’s antioxidant defenses.
Red onions contain flavonoids, including quercetin, while fresh parsley supplies vitamin K and additional plant compounds.
Because these ingredients are generally used in relatively small amounts, their nutritional contribution depends on how much of the marinade and accompanying vegetables you actually consume.
For additional vitamins and fiber, serve the shrimp over a generous bed of fresh vegetables or alongside a colorful salad.
7. Offers a Lighter Alternative to Fried Shrimp Appetizers
Traditional fried shrimp can be delicious, but breading and frying often add substantial amounts of fat and calories.
This Pickled Shrimp Recipe takes a different approach by gently cooking the shrimp before combining them with a chilled vinegar-and-lemon marinade.
The finished dish has a bright, refreshing taste without requiring a crispy coating or deep-frying.
The amount of added fat depends on how much olive oil is included and how much marinade is served with each portion.
For a lighter appetizer, lift the shrimp from the marinade with a slotted spoon and serve them with fresh cucumber slices, lettuce leaves, or crisp vegetables.
This allows the tangy seasoning to remain prominent without requiring large amounts of dressing on the plate.
8. Can Be Part of a Heart-Healthy Eating Pattern
Seafood can play an important role in a varied, heart-conscious diet because it provides protein and essential nutrients.
Shrimp contains relatively little saturated fat on its own, although it does contain dietary cholesterol. For many people, overall dietary patterns and saturated fat intake are more relevant to cardiovascular health than the cholesterol content of a single food.
The olive oil in this recipe adds unsaturated fats, while the citrus juice, garlic, onions, and herbs contribute flavor without needing heavy sauces.
However, shrimp is not as rich in omega-3 fatty acids as oily fish such as salmon or sardines, so it should not be considered an equivalent source.
If you are monitoring sodium intake, pay attention to the amount of added salt and whether your shrimp has been treated with sodium-containing ingredients during processing.
9. Naturally Low in Carbohydrates
Another practical advantage of this homemade Pickled Shrimp Recipe is that its main ingredients are naturally low in carbohydrates.
Shrimp contains very little carbohydrate, while vinegar, lemon juice, herbs, and olive oil contribute minimal amounts in typical serving quantities.
Red onions and any optional sweetener add some carbohydrates, but the overall amount will depend on the precise formulation.
This makes pickled shrimp a flexible appetizer for people who prefer lower-carbohydrate meals.
Keep in mind that the nutritional profile changes when you serve it with crackers, bread, rice, or sweetened sauces.
For a lower-carbohydrate serving option, arrange the shrimp over fresh salad greens with cucumber slices and a small amount of the flavorful marinade.
10. A Flavorful Make-Ahead Appetizer Without Heavy Sauces
One of the most appealing qualities of Southern pickled shrimp is that the dish develops its flavor while chilling in the refrigerator.
The vinegar, lemon juice, garlic, onions, and herbs create a lively marinade that complements the naturally sweet flavor of cooked shrimp.
This approach can make the appetizer satisfying without requiring mayonnaise, cream, or large amounts of additional seasoning.
Preparing the dish ahead of time can also make entertaining easier because most of the work is completed before guests arrive.
However, the acidic marinade should not be mistaken for a reliable preservation method. Pickled shrimp is a refrigerated, perishable seafood dish, not a shelf-stable pickle.

Are Pickled Shrimp Healthy?
Pickled shrimp can be a nutritious appetizer when prepared with fully cooked shrimp, fresh ingredients, moderate amounts of olive oil, and carefully measured salt.
Shrimp provides high-quality protein and several essential nutrients, including selenium, iodine, and vitamin B12. The marinade adds flavor through vinegar, lemon juice, garlic, onions, and fresh herbs.
However, there are a few considerations worth remembering. Shrimp is a major shellfish allergen and must be avoided by anyone with a shrimp allergy. Its sodium content can also vary depending on processing and seasoning.
The recipe’s calories depend on how much olive oil is added and consumed, while the accompanying crackers, bread, and sauces can significantly change the overall meal.
For most people who can safely eat shellfish, enjoying appropriately cooked and refrigerated pickled shrimp as part of a varied diet is a reasonable way to include seafood.
Ways To Enjoy Pickled Shrimp
One of the best things about this Pickled Shrimp Recipe is how incredibly versatile it is! With its tender, juicy shrimp, tangy vinegar-and-lemon marinade, crisp red onions, fragrant garlic, and fresh herbs, this Southern-inspired appetizer can be served in so many delicious ways. Whether you’re hosting a summer barbecue, preparing an elegant holiday appetizer, or simply looking for a refreshing seafood dish to enjoy at home, Southern pickled shrimp brings a bright, zesty flavor to almost any occasion. The secret is to pair its lively acidity with ingredients that complement the shrimp’s delicate sweetness without overpowering the marinade.
From simple crackers and crusty bread to colorful salads and elegant seafood platters, here are some of our favorite ways to enjoy homemade pickled shrimp.
Oooh Delish! Serving Tips for the Best Pickled Shrimp
To make your Southern Pickled Shrimp Recipe especially enjoyable, consider how you serve the marinade and accompanying ingredients. Since the shrimp have already absorbed plenty of flavor while chilling, you usually need only a small amount of extra dressing when plating.
For crackers, crostini, and sandwiches, use a slotted spoon to prevent excess liquid from making the bread soggy. For salads and grain bowls, a little of the marinade can double as a delicious tangy dressing.
Fresh parsley, dill, lemon wedges, and thinly sliced red onions all add an attractive finishing touch without overpowering the shrimp.
Frequently Asked Questions About Carrot Cake Recipe With Pineapple
Want to make an incredibly moist Carrot Cake Recipe With Pineapple, featuring tender carrot cake layers, sweet crushed pineapple, warm cinnamon, and rich cream cheese frosting? These helpful answers explain how to prepare fresh carrots, drain pineapple correctly, prevent dense or soggy cake, avoid overbaking, and make smooth, creamy frosting. Whether you’re baking a birthday cake, Easter dessert, holiday centerpiece, or homemade treat for your family, these practical tips will help you prepare a delicious pineapple carrot cake with a beautifully soft texture.
1. What makes Carrot Cake With Pineapple different from traditional carrot cake?
Carrot Cake With Pineapple combines freshly grated carrots with crushed pineapple for additional moisture and gentle fruity sweetness. Traditional carrot cake often relies on carrots, oil, eggs, and warm spices for its soft texture. This OoohDelish version adds 180 g drained crushed pineapple, which contributes small pieces of fruit throughout the cake. The pineapple flavor remains subtle rather than dominating the cinnamon and nutmeg. Finished with cream cheese frosting, it creates a rich, tender layer cake. For another tropical-inspired dessert, explore our Pineapple Cake Recipe .
2. What ingredients do you need for this Carrot Cake Recipe With Pineapple?
The cake uses 250 g all-purpose flour, 250 g freshly grated carrots, 180 g drained crushed pineapple, 3 large eggs, 180 ml neutral vegetable oil, 150 g light brown sugar, and 100 g granulated sugar. Add 1 1/2 teaspoons baking powder, 1/2 teaspoon baking soda, 2 teaspoons cinnamon, 1/4 teaspoon nutmeg, 1/2 teaspoon fine salt, and 2 teaspoons (10 ml) alcohol-free vanilla flavoring. You may include 60 g chopped walnuts or pecans. The proposed recipe makes two 8-inch cake layers and approximately 12 slices.
3. Is canned crushed pineapple better than fresh pineapple for carrot cake?
Canned crushed pineapple is a convenient choice because it has a consistent texture and is already finely chopped. This recipe uses 1 cup (180 g) drained crushed pineapple. Choose pineapple packed in juice rather than heavy syrup when possible, especially if you want better control over sweetness. Fresh pineapple can be finely chopped or pulsed into small pieces, but it may have a different moisture level and texture. Drain it carefully before using. Large pineapple chunks are less suitable because they can create uneven pockets of fruit in the cake layers.
4. Should you drain crushed pineapple before adding it to carrot cake?
Yes, drain the crushed pineapple before adding it to the carrot cake batter. The recipe calls for 180 g pineapple after draining, not 180 g of pineapple plus its packing juice. Place the fruit in a fine-mesh strainer and let excess liquid drain. Press gently if necessary, but avoid squeezing it completely dry. The goal is to remove excess free liquid while retaining enough moisture for a tender cake. Using undrained pineapple can introduce too much liquid, potentially producing a gummy or underbaked center.
5. What kind of carrots should you use, and should you grate them yourself?
Freshly grated carrots are recommended for the softest, most consistent carrot cake. This recipe uses approximately 2 cups (250 g) grated carrots. Wash and peel the carrots as needed, then grate them using the finer side of a box grater or a food processor with a shredding attachment. Avoid thick, dry, pre-shredded carrot pieces because they may remain noticeably firm after baking. Finely grated carrots distribute moisture throughout the crumb. For another fruit-rich homemade cake, try our Double Apple Cake .
6. Why does this Carrot Cake With Pineapple use vegetable oil instead of butter?
Vegetable oil helps create a moist, tender cake that stays relatively soft after refrigeration. This OoohDelish recipe uses 3/4 cup (180 ml) neutral vegetable oil rather than melted butter. Because oil remains liquid at temperatures where butter becomes firm, it supports a softer mouthfeel. Neutral oils such as canola or sunflower oil are suitable choices. Avoid strongly flavored oils unless you specifically want their flavor in the cake. Replacing the measured oil with butter can change moisture, tenderness, and the finished crumb.
7. How does pineapple make carrot cake extra moist without making it soggy?
Pineapple contributes natural moisture and small pieces of tender fruit to the cake batter. Along with the grated carrots and vegetable oil, it helps produce the moist texture associated with homemade carrot cake. However, the amount of liquid matters. Use the specified 180 g drained crushed pineapple, rather than adding all the juice from the can. Measure the flour accurately and bake until the center is properly set. If you enjoy particularly moist cakes, our Coconut Poke Cake Recipe offers a different approach to adding moisture.
8. Can you add walnuts, pecans, raisins, or coconut to pineapple carrot cake?
Yes, chopped walnuts or pecans are an optional addition to this recipe. The established formulation allows approximately 1/2 cup (60 g) chopped nuts, which provide a pleasant crunch against the tender cake crumb. Fold them in gently after the flour has been incorporated. Raisins or shredded coconut may also work in modified versions, but they change sweetness, moisture, and texture, so those variations should be tested separately. For another warmly spiced homemade dessert, explore our Pumpkin Bread With Brownie Chunks .
9. What temperature and how long should you bake Carrot Cake With Pineapple?
The proposed OoohDelish recipe uses 350°F (175°C) for approximately 30–35 minutes. Divide the batter evenly between two greased, parchment-lined 8-inch (20 cm) round cake pans. Bake on the center oven rack, checking for doneness around the 28-minute mark. The exact time depends on oven accuracy, pan material, and the amount of batter in each pan. The centers should be set before removing the cakes. This baking window is a proposed guideline and requires confirmation through kitchen testing.
10. How do you know when pineapple carrot cake is fully baked?
A properly baked carrot cake should have a set center that springs back gently when touched. Insert a toothpick or thin wooden skewer into the center of each cake layer. It should come out clean or with a few moist crumbs, rather than wet batter. Because this cake contains pineapple and carrots, the crumb may remain moist even when fully baked. Check both pans separately, as they may finish at slightly different times. Avoid removing the cakes while the center is still visibly soft or liquid.
11. Why is my Carrot Cake With Pineapple dense, gummy, or soggy in the middle?
Excess pineapple liquid, inaccurate flour measurements, overmixing, or underbaking can cause a gummy carrot cake. Drain the crushed pineapple before measuring the required 180 g and weigh the 250 g flour whenever possible. After adding the dry ingredients, fold the batter gently until just combined. Avoid vigorous mixing, which can create a tougher crumb. Make sure both cake layers are completely baked before cooling. If the centers remain wet, additional oven time may be necessary rather than more time on the cooling rack.
12. Why did my carrot cake layers sink, crack, or develop a large dome?
Uneven oven heat, excessive leavening, and opening the oven too early can affect cake shape and structure. The recipe uses 1 1/2 teaspoons baking powder and 1/2 teaspoon baking soda, so measure both carefully. Divide the batter evenly between the two prepared pans and avoid repeatedly opening the oven during early baking. A slight dome is normal and can be trimmed after the cakes have cooled. A severely sunken or wet center may indicate the cake was removed before it finished baking.
13. How do you make cream cheese frosting for Carrot Cake With Pineapple?
Use 8 ounces (225 g) full-fat block cream cheese, 1/2 cup (113 g) softened unsalted butter, 2 cups (240 g) sifted powdered sugar, and 1 teaspoon (5 ml) alcohol-free vanilla flavoring. You may add a small pinch of fine salt. Beat the softened butter until smooth, then incorporate the cream cheese. Add the powdered sugar gradually, mixing until creamy, and finish with vanilla. Avoid excessive beating, which can soften the frosting. Spread only over completely cooled cake layers to prevent melting.
14. Why is my cream cheese frosting runny, lumpy, or too soft to spread?
Runny cream cheese frosting often results from ingredients that are too warm, excessive beating, or using spreadable cream cheese instead of block cream cheese. Choose full-fat block cream cheese and softened, not melted, unsalted butter. Beat the ingredients only until the frosting becomes smooth. If it softens excessively, refrigerate it briefly until spreadable. For lumps, ensure the butter and cream cheese are softened enough to mix evenly before adding powdered sugar. Never frost cake layers that are still warm.
15. Can you make Carrot Cake With Pineapple ahead of time or freeze the cake layers?
Yes, the cake layers can be prepared ahead to make assembly easier. Bake the cakes, allow them to cool completely, and wrap each layer separately to prevent drying. For the best texture, freeze unfrosted layers in airtight, freezer-safe packaging for approximately 2–3 months. Thaw them covered in the refrigerator before frosting. You can also assemble the cream cheese-frosted cake the day before serving, provided it remains properly refrigerated. Chilling the cake briefly before slicing can help produce cleaner, neater portions.
16. How do you store and serve Carrot Cake With Pineapple and cream cheese frosting?
Keep the finished cake refrigerated at 40°F (4°C) or below because the frosting contains cream cheese. Store it covered to prevent drying and aim to enjoy it within approximately 3–4 days for best quality. Refrigerate promptly; do not leave the cake at room temperature for more than two hours, or one hour above 90°F (32°C). Slice into approximately 12 portions and serve with tea or coffee. For another cozy homemade dessert, try our Apple Cider Donut Loaf .