


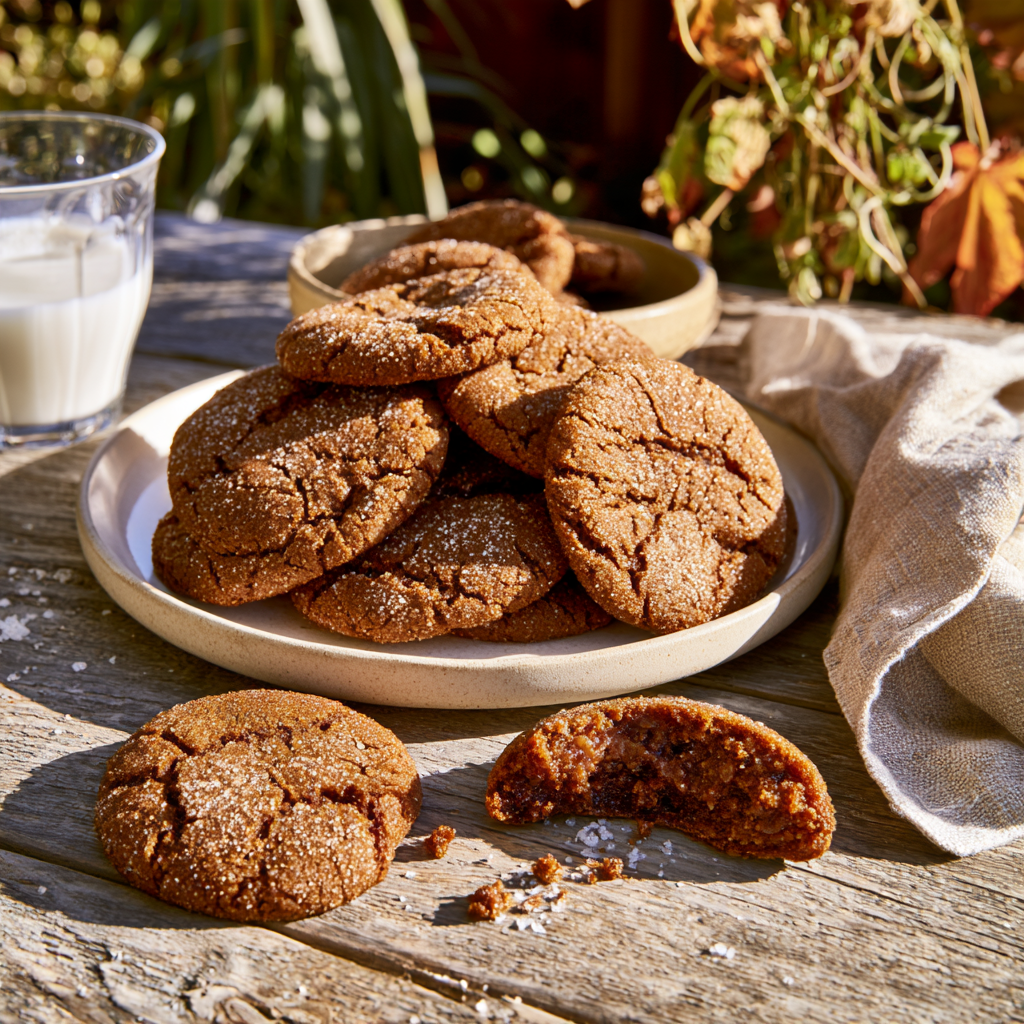
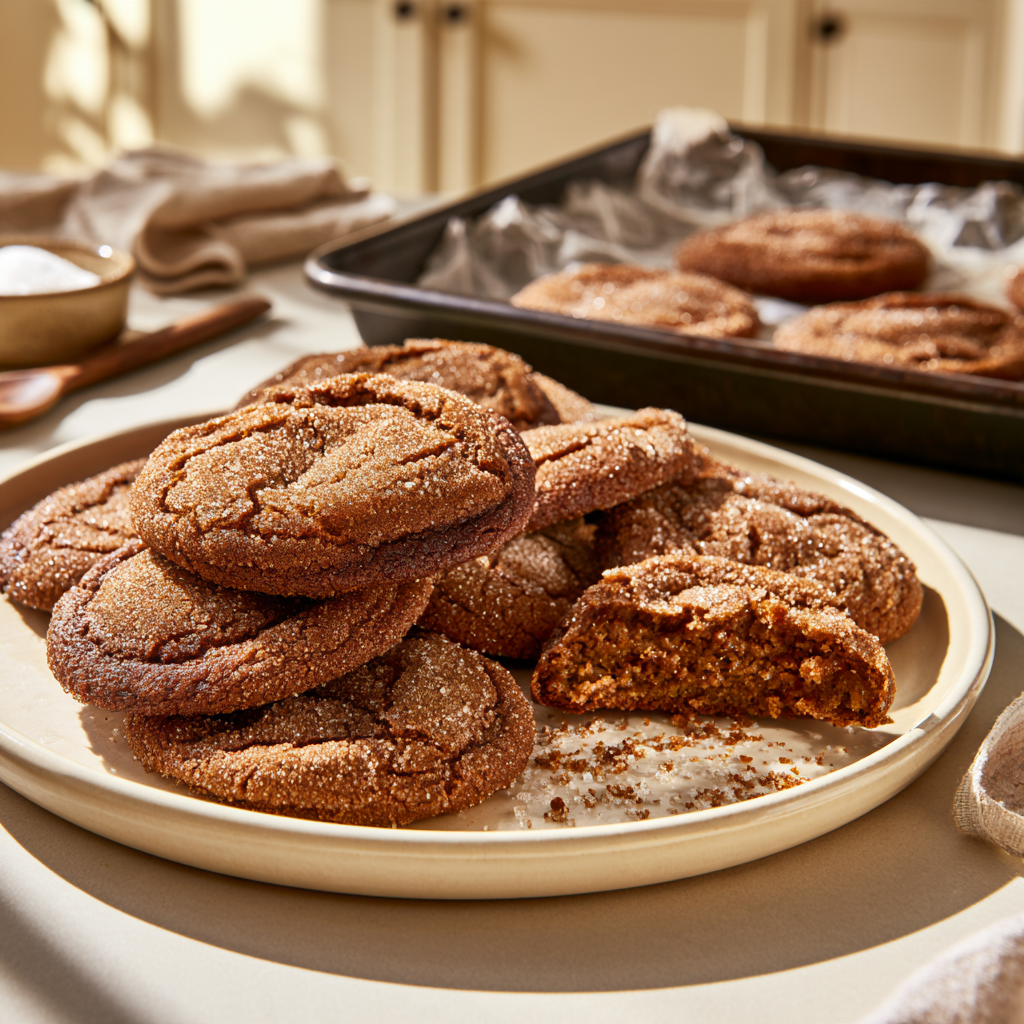
There’s something incredibly comforting about the smell of freshly baked molasses cookies filling the kitchen. The warm aroma of cinnamon and ginger, the rich sweetness of dark molasses, and the sight of beautifully crackled cookies cooling on a baking tray make even an ordinary afternoon feel a little special. And when you finally take that first bite, you get everything a homemade cookie should offer: lightly crisp, sugar-coated edges, an irresistibly soft and chewy center, and a deep, warmly spiced flavor that keeps you reaching for another.
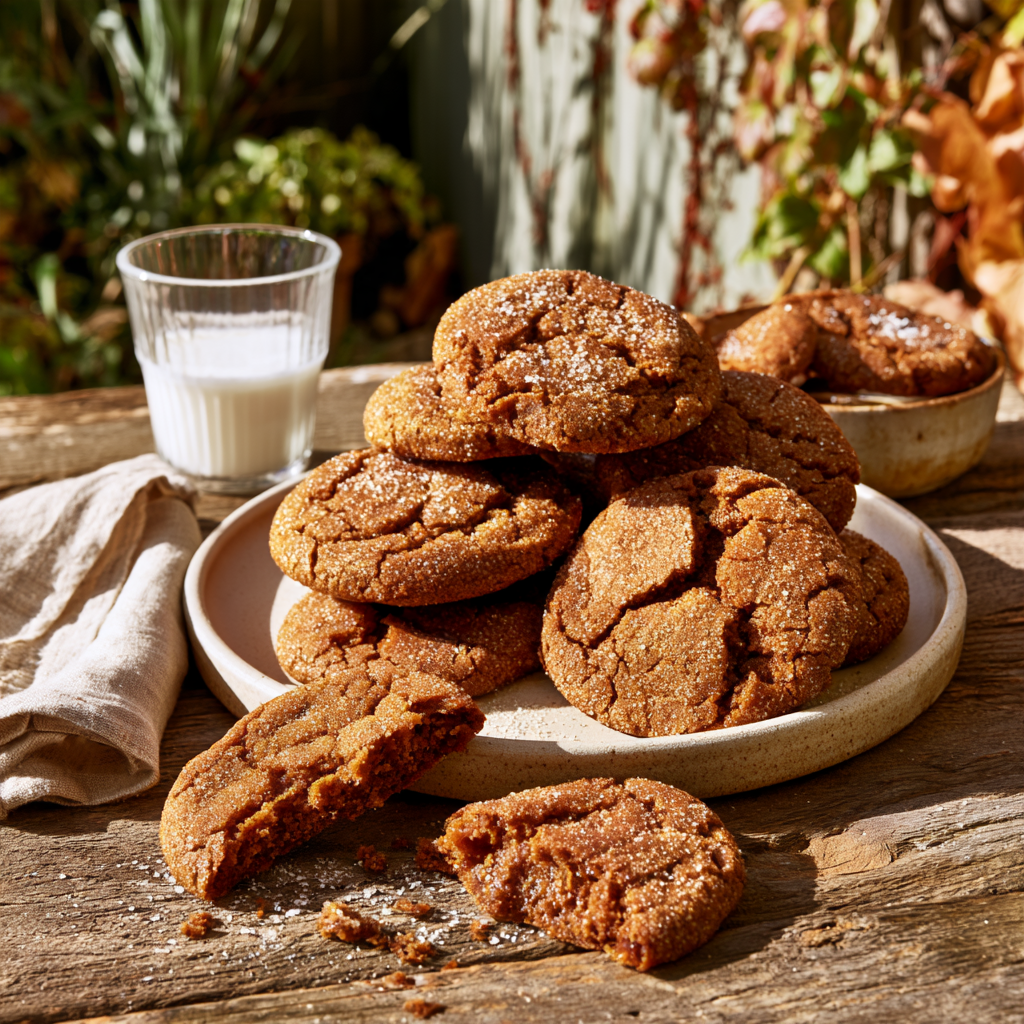
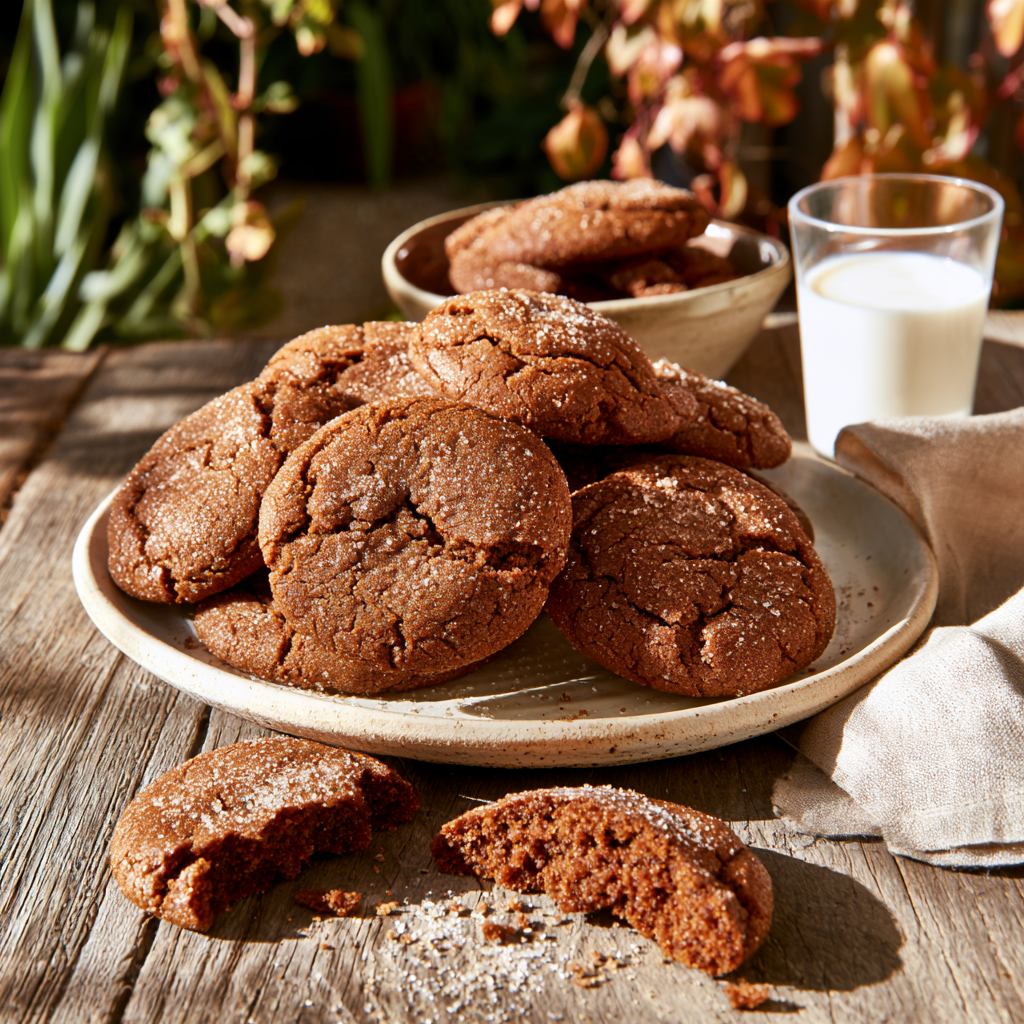
This Molasses Cookies Recipe is exactly the kind of old-fashioned homemade treat that deserves a permanent place in your recipe collection. These cookies have a beautiful deep brown color, delicate cracks across their sugary surfaces, and a rich flavor that tastes like a wonderful combination of caramel, ginger, cinnamon, and buttery goodness. They’re simple enough for everyday baking, yet special enough to serve during Christmas, Thanksgiving, cookie exchanges, and family gatherings.
If you’ve ever tasted a truly delicious molasses cookie, you already know that the magic is in the texture. Unlike hard, crunchy gingersnaps, soft and chewy molasses cookies should have gently crisp edges and tender centers that remain pleasantly chewy even after cooling. The sugar coating adds a subtle crunch, while the molasses keeps the cookies rich, moist, and full of flavor.
Molasses Cookies Recipe
Equipment
- Large mixing bowl
- Medium mixing bowl
- Electric hand mixer or stand mixer fitted with a paddle attachment
- Whisk
- Rubber spatula
- Measuring cups and measuring spoons
- Digital kitchen scale (recommended)
- Cookie scoop, approximately 1½-tablespoon capacity
- Two baking sheets
- Parchment paper
- Small shallow bowl for rolling sugar
- Airtight bowl cover or food-safe wrap
- Wire cooling rack
- Thin cookie spatula
- Oven thermometer (optional)
- Airtight storage container
Ingredients
- Group 1: Molasses Cookie Dough
- 2¼ cups 270 g all-purpose flour
- ¾ cup 170 g unsalted butter, softened
- ¾ cup 150 g packed light brown sugar
- ¼ cup 50 g granulated sugar
- ⅓ cup 110 g unsulfured molasses, mild or dark (not blackstrap)
- 1 large egg room temperature
- 1½ teaspoons baking soda
- 2 teaspoons ground ginger
- 1½ teaspoons ground cinnamon
- ¼ teaspoon ground cloves
- ¼ teaspoon ground nutmeg
- ½ teaspoon fine salt
- 1 teaspoon alcohol-free vanilla flavoring optional
- Group 2: Sugar Coating
- ¼ cup 50 g granulated sugar, for rolling the cookie dough balls
Instructions
- Step 1: Prepare Your Ingredients and Baking Equipment. Measure all the ingredients before beginning. Allow 3/4 cup (170 g) unsalted butter to soften until it yields gently when pressed but is not melted or greasy. Gather two mixing bowls, an electric mixer, a whisk, a rubber spatula, baking sheets, parchment paper, and a cooling rack. Measure the flour, sugars, molasses, baking soda, and spices accurately. A kitchen scale is particularly helpful for the flour because using too much can produce thick, dry cookies. Keep the additional 1/4 cup granulated sugar for rolling separate from the sugar used in the dough. The oven will be preheated while the dough is chilling.
- Step 2: Combine the Flour, Baking Soda, and Spices. In a medium mixing bowl, add 2 1/4 cups (270 g) all-purpose flour, 1 1/2 teaspoons baking soda, 2 teaspoons ground ginger, 1 1/2 teaspoons ground cinnamon, 1/4 teaspoon ground cloves, 1/4 teaspoon ground nutmeg, and 1/2 teaspoon fine salt. Whisk until the dry ingredients are thoroughly combined and the spices are distributed evenly. This helps ensure that every cookie has a balanced ginger-and-cinnamon flavor. The baking soda contributes to the cookies’ spread, structure, and characteristic crackled appearance. Set the bowl aside while preparing the butter and sugar mixture.
- Step 3: Cream the Butter and Sugars. Place 3/4 cup (170 g) softened unsalted butter into a large mixing bowl. Add 3/4 cup (150 g) packed light brown sugar and 1/4 cup (50 g) granulated sugar. Using an electric hand mixer or stand mixer fitted with a paddle attachment, beat on medium speed for approximately 2–3 minutes, until the mixture becomes creamy and well combined. Stop occasionally to scrape down the sides and bottom of the bowl. Brown sugar contributes moisture and a gentle caramel-like flavor, while butter provides richness and tenderness. Avoid using melted butter because it can make the dough overly soft and encourage excessive spreading during baking.
- Step 4: Add the Egg and Unsulfured Molasses. Crack 1 large egg into the creamed butter mixture and beat until incorporated. Add 1/3 cup (110 g) unsulfured mild or dark molasses and, if desired, 1 teaspoon alcohol-free vanilla flavoring. Continue mixing until the mixture looks thick, glossy, and evenly dark brown. Scrape down the bowl to incorporate any molasses clinging to its sides. Regular unsulfured molasses provides the characteristic rich sweetness and deep color of traditional molasses cookies. Avoid substituting blackstrap molasses directly because its stronger bitterness can significantly change the flavor. The mixture may look slightly sticky, which is normal.
- Step 5: Make the Molasses Cookie Dough. Add the prepared flour-and-spice mixture to the wet ingredients in two or three additions, mixing on low speed after each addition. Stop mixing as soon as the flour is incorporated and a thick, evenly colored dough forms. Use a rubber spatula to fold in any flour remaining at the bottom of the bowl. The finished dough should be soft, slightly sticky, and fragrant with molasses, ginger, and cinnamon. Do not add extra flour simply because the dough feels sticky. Excess flour can make the cookies dry and prevent them from spreading properly. Avoid overmixing because working the flour too much may produce a tougher texture.
- Step 6: Chill the Dough for One Hour. Cover the mixing bowl tightly with a lid or food-safe wrap and refrigerate for at least 1 hour. This chilling period helps firm the butter and makes the dough easier to scoop, shape, and roll in sugar. It also helps control spreading in the oven. After chilling, the dough should be firm enough to form into balls without sticking excessively to your hands. If the dough remains unusually soft, refrigerate it for an additional 20–30 minutes. For best results, keep the dough cool until just before baking. Chilling is one of the most important steps for creating cookies with lightly crisp edges, tender centers, and attractive crackled tops.
- Step 7: Preheat the Oven and Prepare the Baking Sheets. About 15 minutes before the dough finishes chilling, preheat the oven to 350°F (175°C) with a rack positioned near the center. Line two baking sheets with parchment paper. Place the additional 1/4 cup (50 g) granulated sugar into a small shallow bowl for coating the dough balls. If you’re using only one baking sheet, plan to bake the cookies in separate batches and allow the sheet to cool completely between batches. Placing chilled dough onto a hot baking sheet may cause premature spreading. A light-colored baking sheet can make it easier to control browning, especially when baking dark molasses cookies.
- Step 8: Scoop and Shape the Cookie Dough. Remove the chilled dough from the refrigerator. Use a cookie scoop to divide it into approximately 24 equal portions, around 30–35 g each. A scoop holding about 1 1/2 tablespoons of dough is a practical starting point. Gently roll each portion between your palms until it forms a round ball. Avoid compressing the dough excessively. Equal portions encourage consistent baking and help prevent some cookies from becoming dry while others remain underbaked. If the dough begins softening or sticking to your hands while shaping, return it to the refrigerator briefly. Keep any unused dough chilled until you’re ready to prepare the next baking sheet.
- Step 9: Roll the Dough Balls in Sugar. Place each shaped dough ball into the shallow bowl of granulated sugar and roll gently until evenly coated. The sugar should cover the surface without forming an excessively thick layer. This coating creates the classic sparkling appearance of homemade molasses cookies. As the cookies expand during baking, their surfaces develop irregular cracks that reveal the dark molasses dough beneath. You can substitute coarse sparkling sugar for regular granulated sugar if you prefer a slightly more pronounced crunchy coating. Keep the dough balls rounded rather than flattening them, and prepare them for baking shortly after coating.
- Step 10: Arrange the Cookies on the Baking Sheets. Place the coated dough balls onto the prepared parchment-lined baking sheets, leaving approximately 2–3 inches (5–7.5 cm) between them. This spacing gives the cookies room to spread without touching each other. Depending on the size of your baking sheets, arrange approximately 9–12 cookies per tray. There’s no need to press the dough balls flat because they will spread naturally during baking. If the dough has become noticeably warm while rolling, refrigerate the filled baking sheet for another 10 minutes before baking. For a consistent result, bake one tray at a time on the center rack unless you know your oven bakes two trays evenly.
- Step 11: Bake Until the Tops Are Crackled. Place a baking sheet into the preheated 350°F (175°C) oven and bake for approximately 10–12 minutes. Begin checking the first batch around the 10-minute mark. The cookies should spread, develop beautiful cracks across their sugar-coated surfaces, and have edges that appear set. Their centers should remain tender but should not look wet or raw. Because molasses cookies are naturally dark, don’t rely on color alone to judge doneness. Avoid baking until the entire cookie feels hard, as that can produce dry centers after cooling. Larger cookies may require a little additional time, so adjust based on actual size and oven performance.
- Step 12: Allow the Cookies to Rest on the Baking Sheet. Carefully remove the baking sheet from the oven and place it on a heat-safe surface. Allow the cookies to rest on the sheet for approximately 5 minutes. Freshly baked molasses cookies are delicate, and their centers continue setting as they cool. Moving them immediately can cause them to bend or break. After five minutes, use a thin spatula to transfer the cookies to a wire cooling rack. Let them cool until comfortable to handle. The finished cookies should have lightly crisp, sugar-coated edges and soft, chewy centers with a rich ginger-and-molasses aroma.
- Step 13: Bake the Remaining Cookies and Serve. Continue baking the remaining dough balls in batches, using cool baking sheets and maintaining the oven temperature at 350°F (175°C). Check each batch after approximately 10 minutes, since oven temperatures and baking sheet characteristics can affect cooking. Once the cookies are baked and cooled slightly, break one open to check its texture. The center should look tender and fully cooked rather than dry or raw. Serve the cookies slightly warm or at room temperature with milk, coffee, or tea. For a homemade holiday cookie platter, combine them with sugar cookies, snickerdoodles, or other favorite cookies for contrasting colors and textures.
- Step 14: Store and Freeze Leftover Molasses Cookies. Allow the baked cookies to cool completely before placing them in an airtight container. Store in a cool, dry location at room temperature and enjoy within approximately 4–5 days for best quality. Separate layers with parchment paper if necessary to protect the sugar-coated surfaces. For longer storage, place the fully cooled cookies in a freezer-safe container and freeze for approximately 2–3 months for best quality. To freeze unbaked dough, portion it into balls, freeze on a tray until firm, then transfer to a freezer-safe container. Roll in sugar before baking and allow a little additional baking time if the dough is still frozen. Never taste raw dough containing uncooked flour and egg.
Notes
- Origins of Molasses Cookies Recipe: The Sweet History Behind America's Favorite Spiced Cookies
- Health Benefits of Molasses Cookies Recipe: Nutrition, Ingredients & How to Enjoy Them Mindfully
- Molasses Cookies Health Benefits at a Glance
- 1. Molasses Contains More Minerals Than Refined White Sugar
- Nutritional Value of Molasses
- 2. Iron in Molasses Supports Normal Oxygen Transport
- 3. Potassium Helps Support Normal Muscle and Nerve Function
- 4. Molasses Provides Small Amounts of Calcium and Magnesium
- 5. Ginger, Cinnamon, Cloves & Nutmeg Add Flavor Without Much Extra Sugar
- 6. Eggs Add Protein and Other Nutrients
- 7. Molasses Cookies Provide Carbohydrates for Energy
- 8. Homemade Molasses Cookies Let You Control the Ingredients
- How to Make Molasses Cookies Recipe: Easy Step-by-Step Instructions for Soft, Chewy Cookies
- Step 1: Gather Your Ingredients and Prepare the Baking Equipment
- Step 2: Whisk the Flour, Baking Soda, and Warm Spices
- Step 3: Cream the Butter and Sugars Until Smooth
- Step 4: Add the Egg and Rich Molasses
- Step 5: Combine the Wet and Dry Ingredients
- Step 6: Chill the Molasses Cookie Dough
- Step 7: Preheat the Oven and Prepare the Baking Sheets
- Step 8: Scoop the Dough Into Even Portions
- Step 9: Roll the Dough Balls in Granulated Sugar
- Step 10: Arrange the Cookies on the Baking Sheets
- Step 11: Bake Until the Tops Are Beautifully Crackled
- Step 12: Let the Cookies Rest on the Baking Sheet
- Step 13: Check the Texture and Serve
- Step 14: Store the Cookies to Keep Them Soft
Origins of Molasses Cookies Recipe: The Sweet History Behind America’s Favorite Spiced Cookies
Long before soft and chewy molasses cookies became a favorite at Christmas gatherings, holiday cookie exchanges, and cozy family kitchens, their signature ingredient had already played an important role in American baking. The deep brown color, rich caramel-like sweetness, and warm ginger-and-cinnamon flavor we love today are connected to centuries of sugar production, European baking traditions, and the creativity of early American home cooks.
The history of the Molasses Cookies Recipe isn’t the story of one baker inventing a famous dessert overnight. Instead, it developed gradually as traditional gingerbread recipes, dark sugar syrups, familiar spices, and changing baking methods came together.
Early versions were often very different from the soft, sugar-coated cookies we recognize today. Some were thin and crisp, similar to gingersnaps. Others were rolled and cut into shapes, while certain preparations produced thicker, tender cookies with a strong molasses flavor.
By the nineteenth century, molasses cookies had become firmly established in American home baking. Their popularity continued through the twentieth century, eventually giving rise to the familiar version with soft centers, lightly crisp edges, and beautiful crackled tops.
Today, these cookies are especially associated with nostalgic holiday baking, but their history reaches far beyond Christmas.
Let’s explore where molasses cookies originated, how they evolved, and why this wonderfully simple cookie remains such a beloved homemade treat.
Health Benefits of Molasses Cookies Recipe: Nutrition, Ingredients & How to Enjoy Them Mindfully
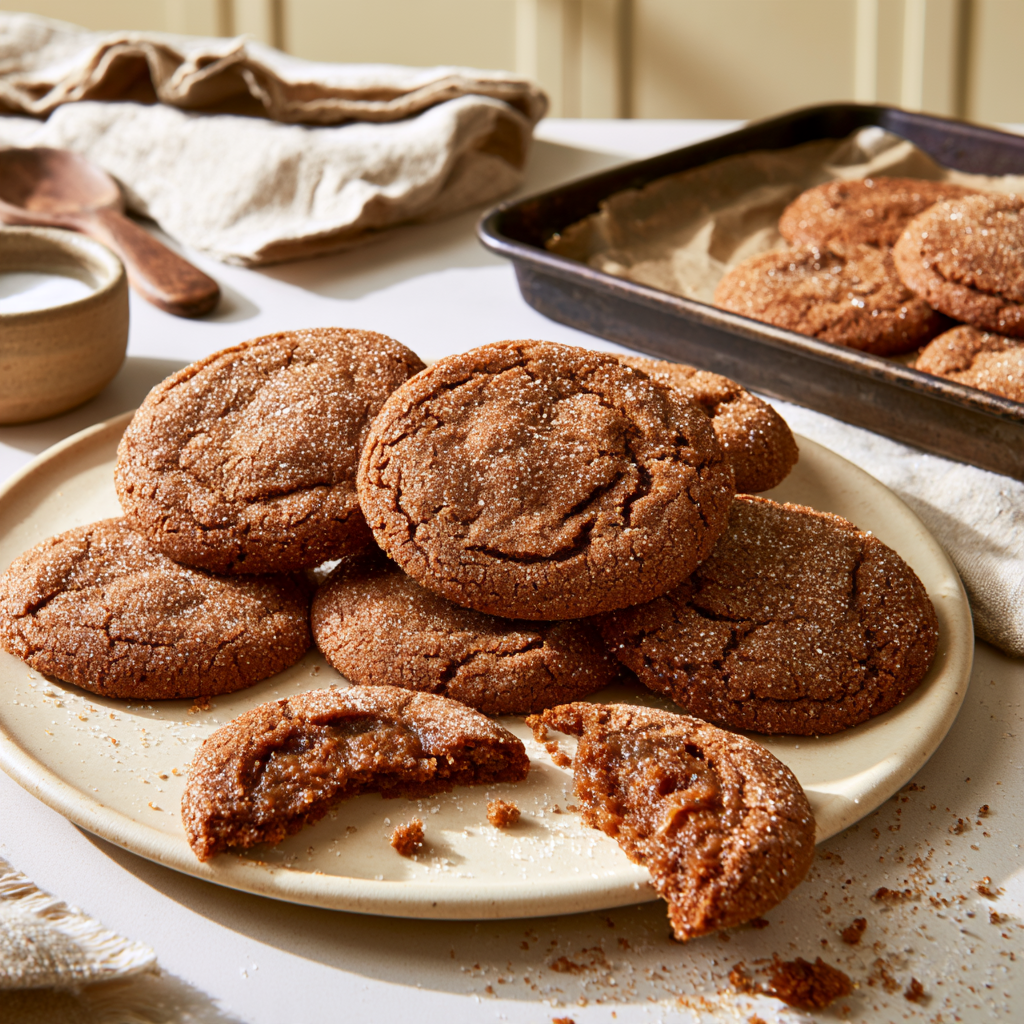
Warm, soft, chewy, and filled with the comforting flavors of ginger, cinnamon, and rich molasses, homemade molasses cookies are one of those old-fashioned treats that make any kitchen feel a little cozier. Their deep brown color, delicate sugar-crackled tops, and wonderfully tender centers make them especially popular during the holidays, but there’s no reason to save these delicious cookies only for Christmas.
Beyond their irresistible flavor, you might be wondering: Are molasses cookies healthy? Do they offer any nutritional benefits? And is molasses actually better for you than regular sugar?
The answer is more interesting than you might expect.
Unlike cookies sweetened exclusively with refined white sugar, a traditional Molasses Cookies Recipe contains dark molasses, which naturally provides small amounts of minerals, including iron, potassium, calcium, and magnesium. The eggs and flour contribute additional nutrients, while ginger, cinnamon, and other spices bring plenty of flavor without requiring large quantities of extra sugar.
However, there’s an important distinction between the nutritional properties of an ingredient and those of the finished dessert.
Molasses cookies still contain added sugar, butter, and refined flour. Although their ingredients offer some nutritional value, they are not a particularly nutrient-dense food or a substitute for balanced meals.
The good news is that homemade molasses cookies can absolutely fit into a varied eating pattern when enjoyed in sensible portions.
Preparing them yourself gives you control over the ingredients, cookie size, amount of sugar, and optional variations. You can also enjoy the deep sweetness of molasses and warm spices without adding frosting or sugary fillings.
Let’s explore what makes molasses cookies different from other desserts, the nutrients their ingredients provide, and how to enjoy this classic homemade cookie a little more mindfully.
Molasses Cookies Health Benefits at a Glance
| Ingredient | Nutritional Contribution | Why It Matters |
|---|---|---|
| Unsulfured molasses | Small amounts of iron, potassium, calcium, and magnesium | Adds minerals as well as rich sweetness and flavor |
| All-purpose flour | Carbohydrates, some protein, and nutrients when enriched | Provides energy and cookie structure |
| Eggs | Protein, choline, and vitamin B12 | Contribute nutrients and help bind the dough |
| Butter | Dietary fat and small amounts of fat-soluble vitamins | Adds richness and tenderness, but also saturated fat |
| Brown sugar | Carbohydrates and moisture | Creates sweetness and a chewy texture |
| Ground ginger | Aromatic plant compounds | Adds distinctive flavor in small amounts |
| Cinnamon | Natural flavor and aroma | Contributes warm sweetness without additional sugar |
| Cloves and nutmeg | Strong aromatic compounds | Provide flavor complexity in tiny quantities |
| Homemade preparation | Control over ingredients and serving sizes | Makes portions and ingredient choices easier to manage |
Important: These are the contributions of individual ingredients. A finished molasses cookie contains only a portion of each ingredient, so its nutritional value is more modest than the table might initially suggest.
1. Molasses Contains More Minerals Than Refined White Sugar
One of the most interesting features of this Molasses Cookies Recipe is its use of molasses.
Molasses is a thick syrup produced during sugar processing. It has a distinctive dark color and a rich, caramel-like flavor that contributes to the familiar taste of gingerbread and old-fashioned spice cookies.
Unlike refined white sugar, molasses retains some minerals.
These include iron, potassium, calcium, magnesium, and smaller quantities of other minerals, with exact amounts varying according to the product and processing method.
That doesn’t mean molasses should be considered a nutritional supplement.
It remains a concentrated source of sugar and calories.
But it does have a more varied mineral composition than ordinary granulated sugar.
Nutritional Value of Molasses
The following values represent approximate USDA reference data for 1 tablespoon (20 g) of standard molasses, not blackstrap molasses specifically.
| Nutrient | Approximate Amount |
|---|---|
| Calories | 60 kcal |
| Carbohydrates | 15 g |
| Total Sugars | 15 g |
| Protein | 0 g |
| Total Fat | 0 g |
| Dietary Fiber | 0 g |
| Potassium | 290 mg |
| Calcium | 40 mg |
| Iron | 0.9 mg |
| Magnesium | 48 mg |
These values demonstrate why molasses is sometimes described as containing more minerals than refined sugar.
However, this recipe uses approximately ⅓ cup of molasses for the entire batch.
Once that amount is divided among individual cookies, each serving contains only a small fraction of the minerals listed above.
For example, if the batch produces about 24 cookies, the molasses alone would contribute roughly 0.2 mg of iron and around 65–70 mg of potassium per cookie, based on generic reference data.
Those are modest amounts, not enough to describe an ordinary cookie as an excellent source of either nutrient.
OoohDelish Tip: Choose regular unsulfured light or dark molasses for the best balance of flavor and sweetness. Blackstrap molasses is often stronger and more bitter, so it shouldn’t be substituted directly unless the recipe has been adjusted for it.
2. Iron in Molasses Supports Normal Oxygen Transport
Iron is an essential mineral involved in several important functions throughout the body.
One of its best-known roles is helping produce hemoglobin, the protein in red blood cells that carries oxygen.
Iron also contributes to normal cellular processes and energy metabolism.
Molasses naturally contains some iron, which makes it nutritionally different from refined white sugar.
However, the iron found in molasses is non-heme iron, the type present in plant-derived foods.
Non-heme iron is generally absorbed less efficiently than the heme iron found in animal foods, and its absorption can vary depending on the other foods consumed.
Because this Molasses Cookies Recipe uses only a limited amount of molasses divided among an entire batch, the iron contribution from each cookie is relatively small.
That means these cookies shouldn’t be promoted as a treatment for iron deficiency or anemia.
For people seeking substantial dietary iron, foods such as legumes, fortified cereals, meats, and other iron-rich ingredients are generally more useful.
Still, the presence of iron adds a small amount of nutritional variety to a dessert enjoyed primarily for its delicious flavor.
3. Potassium Helps Support Normal Muscle and Nerve Function
Another mineral naturally present in molasses is potassium.
Potassium is an essential electrolyte involved in maintaining normal fluid balance, transmitting nerve signals, and supporting muscle contraction.
The body requires potassium regularly, and it is available in many everyday foods.
Fruits, vegetables, potatoes, beans, and other whole foods are generally more meaningful sources than cookies.
Molasses does contain potassium, but the amount included in a single cookie is relatively modest.
For this reason, it’s best to think of potassium as a small nutritional contribution from the molasses rather than a major health benefit of the finished dessert.
The distinction matters.
Eating molasses cookies will not provide the same nutritional advantages as eating potassium-rich whole foods.
However, understanding the mineral composition of molasses helps explain why it differs from refined sugar.
4. Molasses Provides Small Amounts of Calcium and Magnesium
Calcium and magnesium are two additional minerals found naturally in molasses.
Calcium is important for maintaining normal bones and teeth, while also contributing to muscle and nerve function.
Magnesium participates in numerous biological processes, including normal muscle function, energy metabolism, and protein synthesis.
The quantities present in molasses vary depending on its type and processing.
Blackstrap molasses may have a different mineral concentration from mild or dark molasses, but it also has a much stronger flavor and isn’t interchangeable in every cookie recipe.
In our homemade version, regular unsulfured molasses is chosen primarily for its taste, color, and moisture-retaining properties.
The calcium and magnesium are welcome additions, but they shouldn’t be the main reason for eating the cookies.
A normal serving provides only a fraction of the minerals present in the full batch.
For a more substantial calcium intake, foods such as milk, yogurt, and calcium-fortified alternatives are better choices.
For magnesium, nuts, seeds, legumes, and whole grains are generally more useful.
5. Ginger, Cinnamon, Cloves & Nutmeg Add Flavor Without Much Extra Sugar
One of the most enjoyable qualities of homemade molasses cookies is their warming spice blend.
Ground ginger contributes a distinctive spicy warmth.
Cinnamon adds a familiar sweetness and inviting aroma.
Cloves bring a deeper, stronger flavor, while nutmeg provides subtle complexity.
Together, they create a cookie that tastes rich and satisfying without requiring frosting or sweet fillings.
These spices contain naturally occurring plant compounds, many of which have been studied for their chemical and biological properties.
However, the amounts used in an ordinary cookie recipe are very small.
It’s therefore important not to assume that eating molasses cookies delivers the same effects observed in research involving concentrated extracts or much larger doses.
For example, ginger has been studied in several nutritional and clinical contexts, but that doesn’t establish molasses cookies as a remedy for digestive problems or inflammation.
Similarly, cinnamon’s flavor is valuable in baking, but a few pinches spread across a batch of cookies shouldn’t be promoted as a method for controlling blood sugar.
The clearest practical benefit of these spices is culinary.
They provide a rich, layered flavor that makes the cookie enjoyable without needing elaborate sugary toppings.
If you enjoy cinnamon-coated cookies with a softer, buttery flavor, try our Recipe for Snickerdoodle Cookies Without Cream of Tartar. Snickerdoodles feature a familiar cinnamon-sugar coating, while molasses cookies add ginger, cloves, and dark molasses for a deeper spice profile.
6. Eggs Add Protein and Other Nutrients
Eggs help give molasses-cookie dough structure.
They bind the flour, sugar, butter, and molasses together, supporting a soft center and a cohesive cookie.
Eggs also contain protein and several nutrients, including choline and vitamin B12.
Protein contributes to normal tissue maintenance and many essential bodily processes.
Choline plays an important role in cell membrane structure and normal nervous system function.
Vitamin B12 contributes to normal red blood cell formation and neurological function.
However, this recipe uses one large egg for the entire batch.
When the dough is divided into two dozen or more cookies, the protein contribution from that egg becomes quite small.
Flour also provides some protein, but these ingredients do not make the finished dessert high in protein.
Molasses cookies are best enjoyed as a sweet treat rather than an important dietary protein source.
For anyone with an egg allergy, a specifically tested egg-free variation is preferable to making an untested substitution.
7. Molasses Cookies Provide Carbohydrates for Energy
The flour, brown sugar, granulated sugar, and molasses in this recipe all contribute carbohydrates.
Carbohydrates are an important source of energy for the body.
During digestion, many carbohydrates are broken down into glucose, which cells can use to support normal functions.
However, there’s a difference between carbohydrate-rich whole foods and sweet baked goods.
Whole grains, beans, fruits, and vegetables can provide fiber, vitamins, minerals, and other nutrients along with carbohydrates.
Molasses cookies contain more refined flour and added sugar, so they’re generally less nutrient-dense.
They also provide relatively little dietary fiber in their traditional form.
This doesn’t mean they need to be avoided completely.
It simply means they are better enjoyed as a dessert than relied upon as an everyday source of nutrition.
For readers who enjoy simple traditional cookies, our 3 Ingredient Sugar Cookie Recipe offers another homemade option using familiar pantry ingredients.
Although both recipes provide carbohydrates and fat, molasses cookies have a stronger spice flavor and use dark syrup for part of their sweetness.
Neither cookie should automatically be considered a low-sugar or health-focused dessert.
8. Homemade Molasses Cookies Let You Control the Ingredients
One practical advantage of baking molasses cookies at home is knowing exactly what goes into them.
You can choose the type of molasses, butter, flour, and spices.
You can also decide how large to make each cookie.
For this OoohDelish version, the dough uses approximately 2¼ cups of all-purpose flour, ¾ cup butter, ¾ cup brown sugar, ¼ cup granulated sugar, ⅓ cup unsulfured molasses, one egg, and a balanced blend of warm spices.
The dough balls are rolled in additional granulated sugar before baking.
That coating creates the familiar sparkling, crackled surface.
When you prepare the recipe yourself, you can adjust the size of each cookie and the amount of sugar used for rolling.
You can also choose whether to make the cookies moderately spiced or slightly more aromatic.
These changes provide flexibility, but they shouldn’t be described as automatically making the cookies healthy.
The real advantage of homemade baking is control and transparency, not a guarantee that the finished dessert is lower in calories than a bakery version.
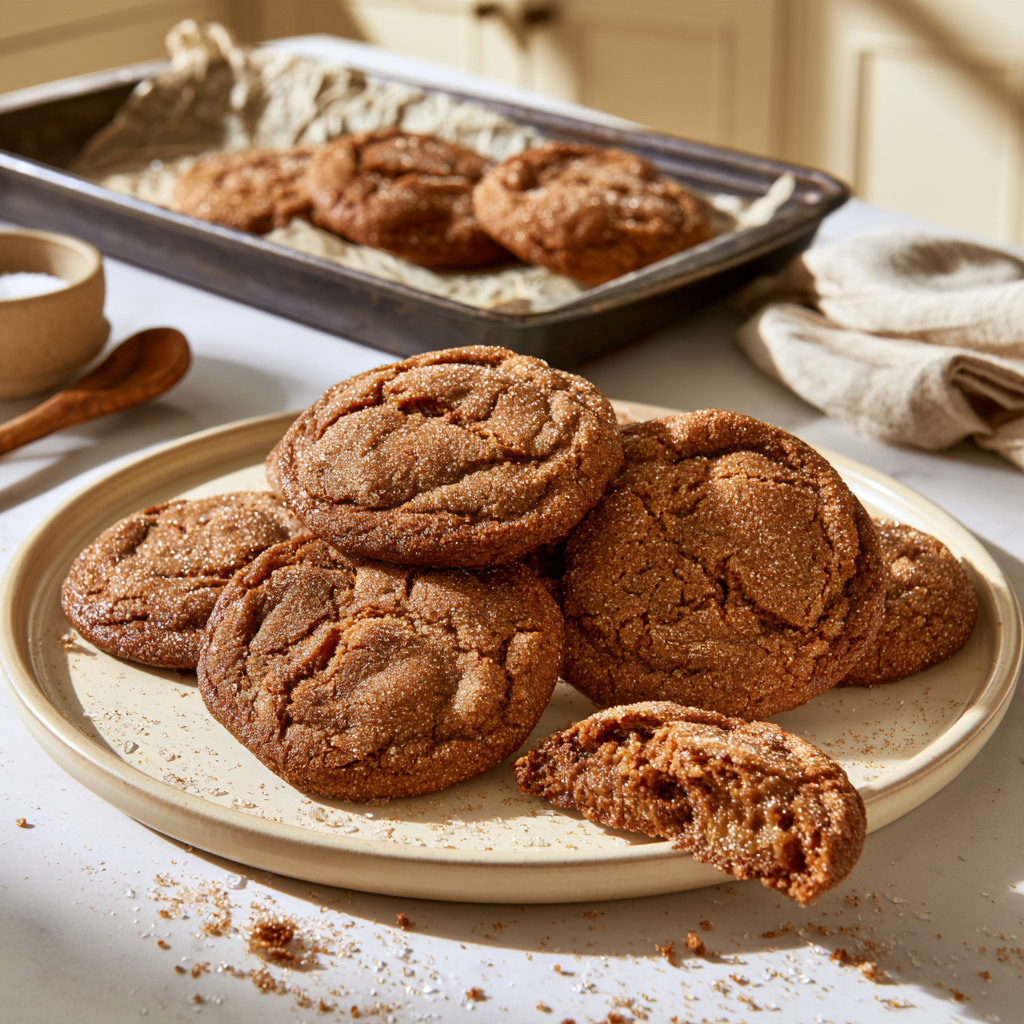
How to Make Molasses Cookies Recipe: Easy Step-by-Step Instructions for Soft, Chewy Cookies
Step 1: Gather Your Ingredients and Prepare the Baking Equipment
Before mixing the cookie dough, gather everything you’ll need.
Place the butter, brown sugar, granulated sugar, flour, egg, molasses, baking soda, and spices on the kitchen counter.
You’ll also need a large mixing bowl, a medium bowl, a whisk, an electric hand mixer or stand mixer, a rubber spatula, two baking sheets, parchment paper, and a wire cooling rack.
A cookie scoop is especially useful for creating evenly sized cookies.
For this recipe, a scoop holding approximately 1½ tablespoons of dough works well.
Make sure the butter is properly softened before beginning.
It should feel slightly soft when pressed but should not be melted, greasy, or excessively warm.
If the butter is too cold, it won’t cream evenly with the sugar.
If it’s melted, the cookie dough may become overly soft and spread excessively during baking.
OoohDelish Tip: Take the butter out of the refrigerator about 30–60 minutes before baking, depending on your kitchen temperature. You want it soft enough to mix smoothly while still retaining its shape.
Step 2: Whisk the Flour, Baking Soda, and Warm Spices
In a medium mixing bowl, combine:
- 2¼ cups all-purpose flour
- 1½ teaspoons baking soda
- 2 teaspoons ground ginger
- 1½ teaspoons ground cinnamon
- ¼ teaspoon ground cloves
- ¼ teaspoon ground nutmeg
- ½ teaspoon fine salt
Whisk everything together until the ingredients are evenly distributed.
This step ensures that every cookie receives a balanced amount of ginger, cinnamon, cloves, and nutmeg.
It also helps distribute the baking soda throughout the flour.
Baking soda contributes to spreading and the characteristic crackled appearance of molasses cookies.
Ground ginger provides the signature warming flavor, while cinnamon contributes a familiar sweetness.
Cloves and nutmeg are more concentrated, so a little goes a long way.
Avoid increasing these two spices too aggressively, especially if you’re baking for people who prefer a gentler spice flavor.
Set the dry mixture aside while preparing the wet ingredients.
Step 3: Cream the Butter and Sugars Until Smooth
Place ¾ cup (170 g) softened unsalted butter into a large mixing bowl.
Add:
- ¾ cup packed light brown sugar
- ¼ cup granulated sugar
Using an electric hand mixer or stand mixer, beat on medium speed for approximately 2–3 minutes.
The mixture should become creamy, smooth, and slightly lighter in appearance.
You may still notice some sugar granules, which is normal.
Brown sugar plays an important role in creating soft and chewy molasses cookies.
Its moisture-retaining properties complement the molasses, helping the finished cookies develop their tender texture.
Granulated sugar adds sweetness and also contributes to the structure and spreading of the cookies.
Stop the mixer occasionally and scrape the sides and bottom of the bowl using a rubber spatula.
This ensures all the butter and sugar are evenly incorporated.
OoohDelish Secret: Don’t skip proper creaming. A smoothly blended butter-and-sugar mixture helps produce cookies with an even texture instead of unevenly mixed dough.
Step 4: Add the Egg and Rich Molasses
Once the butter and sugars are creamy, add the large egg.
Beat on low to medium speed until combined.
Next, pour in ⅓ cup (110 g) unsulfured molasses.
If desired, add 1 teaspoon of alcohol-free vanilla flavoring.
Continue mixing until the ingredients form a thick, dark, creamy mixture.
The color should deepen noticeably as the molasses combines with the butter and brown sugar.
Scrape down the sides of the bowl to make sure no molasses remains unmixed.
The mixture may look slightly glossy and sticky.
That’s normal.
Molasses gives the cookies their distinctive dark color, deep sweetness, and soft texture.
Regular unsulfured molasses works especially well because it provides rich flavor without the pronounced bitterness of blackstrap molasses.
Ingredient tip: If molasses sticks to your measuring cup, use a flexible spatula to transfer as much as possible into the bowl. Accurate measurements matter because the molasses affects both flavor and moisture.
Step 5: Combine the Wet and Dry Ingredients
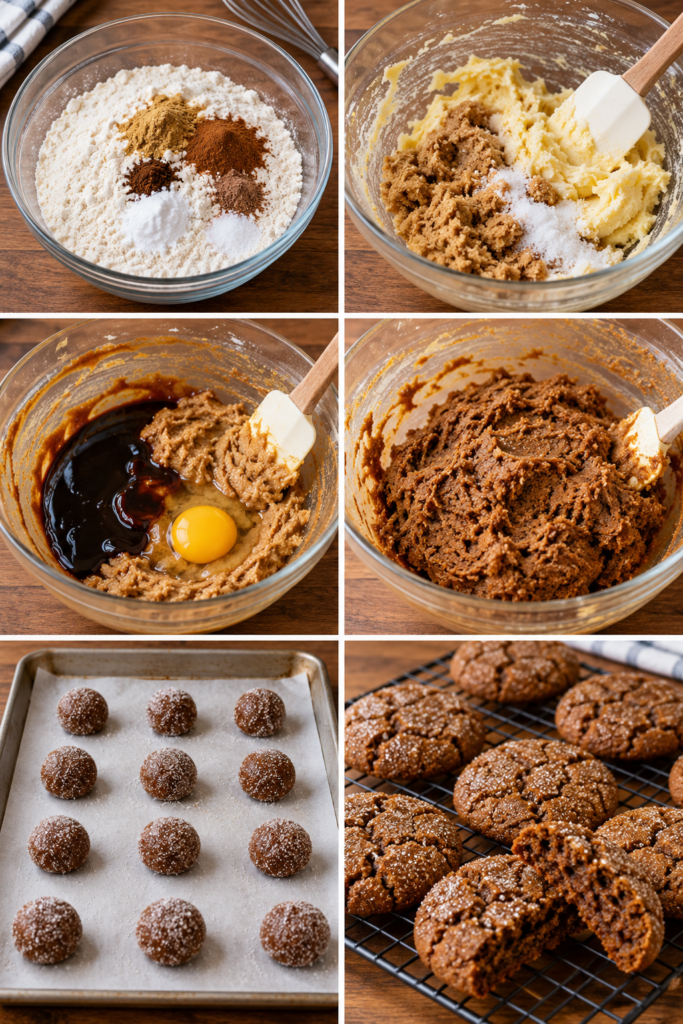
Add the prepared flour-and-spice mixture to the bowl containing the wet ingredients.
Mix on low speed, adding the dry ingredients gradually.
Continue just until the flour disappears and a thick cookie dough forms.
The dough should have a deep brown color, a rich ginger-and-molasses aroma, and a soft, slightly sticky consistency.
Avoid overmixing once the flour is incorporated.
Mixing excessively can develop more gluten, which may make the baked cookies tougher rather than pleasantly tender.
If necessary, finish combining the last traces of flour using a rubber spatula.
The dough shouldn’t be runny.
It should be thick enough to hold together but soft enough that it may initially stick slightly to your hands.
Don’t immediately add extra flour just because the dough feels sticky.
The chilling stage will help firm it considerably.
Step 6: Chill the Molasses Cookie Dough
Cover the mixing bowl tightly with reusable food wrap, a lid, or another suitable cover.
Place the dough in the refrigerator for at least 1 hour.
This step is especially helpful for creating soft, chewy molasses cookies that don’t spread excessively.
The dough contains softened butter, brown sugar, and molasses, so it may be relatively sticky immediately after mixing.
Chilling helps firm the butter and makes the dough easier to scoop and roll.
It also gives the flour time to hydrate more evenly.
When properly chilled, the dough should be firm enough to form into balls without spreading immediately in your hands.
If the dough remains unusually sticky after one hour, refrigerate it for another 20–30 minutes before shaping.
If you prepare the dough further ahead and refrigerate it for several hours or overnight, it may become quite firm.
Allow it to soften slightly in the refrigerator or briefly at room temperature, just until scoopable, while keeping the dough cool.
OoohDelish Tip: Don’t skip chilling to save time. It makes the dough easier to handle and can improve the thickness and shape of your cookies.
Step 7: Preheat the Oven and Prepare the Baking Sheets
About 15 minutes before the chilling time ends, preheat your oven to 350°F (175°C).
Position an oven rack in the center.
Line two baking sheets with parchment paper.
If you have only one baking sheet, you can bake the cookies in batches.
Allow the sheet to cool between batches so the next round of dough doesn’t begin melting on a hot surface.
Prepare a small bowl containing ¼ cup granulated sugar for rolling the dough.
You’ll use this sugar to create the beautiful sparkling coating that makes molasses cookies so recognizable.
A light-colored baking sheet is particularly helpful for controlling browning.
Very dark baking sheets may cause the bottoms to brown more quickly.
If you’re using a convection oven, you may need to adjust the temperature or baking time according to your appliance.
For the first batch, follow the standard 350°F temperature and monitor the cookies carefully.
Step 8: Scoop the Dough Into Even Portions
Remove the chilled dough from the refrigerator.
Using a cookie scoop or tablespoon, divide it into approximately 24 portions, around 30–35 grams each.
Try to make the portions as similar in size as possible.
Evenly sized cookies bake more consistently, making it easier to achieve the same soft, chewy texture throughout the batch.
Gently roll each portion between your palms to form a round ball.
Don’t compress the dough excessively.
If it begins sticking to your hands, return it to the refrigerator briefly.
The dough should be cool enough to handle comfortably.
Keep the remaining portions refrigerated while working on the first baking sheet if your kitchen is particularly warm.
For larger cookies, you can use slightly more dough per portion, but the final yield will be lower and the baking time may increase.
For this OoohDelish version, medium cookies are ideal because they offer a balanced combination of crisp edges and chewy centers.
Step 9: Roll the Dough Balls in Granulated Sugar
Place the prepared granulated sugar in a small shallow bowl.
Take one dough ball and roll it gently through the sugar until the entire surface is evenly coated.
Repeat with the remaining dough balls.
The sugar coating is more than a decorative finishing touch.
It helps create the distinctive sparkling appearance of traditional molasses cookies.
As the cookies spread and their surfaces crack during baking, the darker dough becomes visible between the lighter sugar-coated sections.
This produces the beautiful contrast that makes homemade molasses cookies so appetizing.
You can use regular granulated sugar for a classic appearance or coarse sparkling sugar for a slightly more noticeable crunch.
However, avoid creating an excessively thick coating if you prefer a balanced level of sweetness.
OoohDelish Tip: Roll the dough generously enough to create a visible sugar coating, but don’t press the sugar deeply into the dough. Let the cookies develop their natural cracks during baking.
Step 10: Arrange the Cookies on the Baking Sheets
Place the sugar-coated dough balls onto the parchment-lined baking sheets.
Leave approximately 2–3 inches (5–7.5 cm) between each ball.
Molasses cookies spread as they bake, so proper spacing helps prevent them from merging.
Depending on the size of your baking sheets, you can usually bake around 9–12 cookies per tray.
Keep the dough balls rounded.
There’s generally no need to flatten them before baking.
As the butter softens and the baking soda contributes to expansion, the cookies should spread naturally and develop their crackled tops.
If the dough has become noticeably warm while shaping, refrigerate the filled baking sheet for approximately 10 minutes before baking.
This can help reduce excessive spreading.
For more homemade cookies with beautiful natural crackle patterns, explore our Ube Crinkle Cookies Recipe. While ube cookies feature a dramatic purple-and-white powdered sugar coating, molasses cookies develop rich brown cracks beneath a sparkling granulated sugar exterior.
Step 11: Bake Until the Tops Are Beautifully Crackled
Place the baking sheet on the center rack of the preheated oven.
Bake at 350°F (175°C) for approximately 10–12 minutes.
Begin checking the cookies around the 10-minute mark.
During baking, the dough will begin to soften, expand, and spread.
The surface should gradually develop irregular cracks.
The finished cookies should have lightly set edges and soft-looking centers.
Because molasses cookies are naturally dark, judging them by color alone can be difficult.
Instead, look for edges that have set and tops that are visibly cracked.
The centers may still appear slightly soft, but they should not look wet or raw.
Avoid waiting until the entire surface becomes firm.
Cookies continue setting as they cool, and overbaking can produce a dry, hard texture rather than the soft, chewy center you’re trying to achieve.
If your cookies are larger than the recommended portion, they may need additional baking time.
OoohDelish Baking Secret: Remove the cookies when the edges are set and the centers still look tender. That’s one of the most useful techniques for achieving soft, chewy molasses cookies.
Step 12: Let the Cookies Rest on the Baking Sheet
Once the cookies are baked, carefully remove the baking sheet from the oven.
Place it on a heat-safe surface.
Allow the cookies to rest on the baking sheet for approximately 5 minutes.
This step is important because freshly baked molasses cookies may be delicate.
Their centers continue firming as the residual heat finishes setting the structure.
Trying to move the cookies immediately can cause them to bend or break.
As they rest, the edges become more stable while the centers retain their tenderness.
After five minutes, gently lift each cookie with a thin spatula and transfer it to a wire cooling rack.
Allow the cookies to cool until comfortable to handle.
The surface should feel lightly set, while the interior remains moist and chewy.
Avoid covering the cookies while they’re still warm because trapped steam can affect their sugar-coated exterior.
Step 13: Check the Texture and Serve
Once the cookies have cooled slightly, break one open to check the texture.
A properly baked molasses cookie should have a deep brown interior that looks tender and moist rather than dry or crumbly.
The center should be soft and pleasantly chewy.
The edges should offer a delicate bite, especially where the granulated sugar has formed a light crust.
The flavor should combine rich molasses sweetness with warm ginger, cinnamon, cloves, and nutmeg.
If your first batch turns out slightly firmer than expected, reduce the baking time by approximately one minute for the next batch, provided the centers are properly cooked.
If the cookies spread too much, make sure the dough is thoroughly chilled and the butter wasn’t excessively warm when mixing.
Serve your homemade molasses cookies with milk, coffee, or a cup of warm tea.
For a holiday dessert platter, pair them with our Recipe for Snickerdoodle Cookies Without Cream of Tartar. The snickerdoodles’ buttery cinnamon flavor provides a delicious contrast to the darker, more aromatic molasses cookies.
Step 14: Store the Cookies to Keep Them Soft
Allow the molasses cookies to cool completely before storing.
Place them in an airtight container at room temperature in a cool, dry kitchen.
For the best flavor and texture, enjoy them within approximately 4–5 days.
You can separate layers with parchment paper if the sugar-coated surfaces are delicate.
Avoid leaving the cookies uncovered for long periods because exposure to air can gradually dry them out.
If you’re preparing them for the holidays, you can also freeze the baked cookies.
Allow them to cool completely, then place them in a freezer-safe container with parchment paper between layers.
Freeze for up to approximately 2–3 months for best quality.
When you’re ready to serve, thaw the cookies in their covered container.
You can also freeze portions of unbaked dough before rolling them in sugar, then coat them just before baking.