


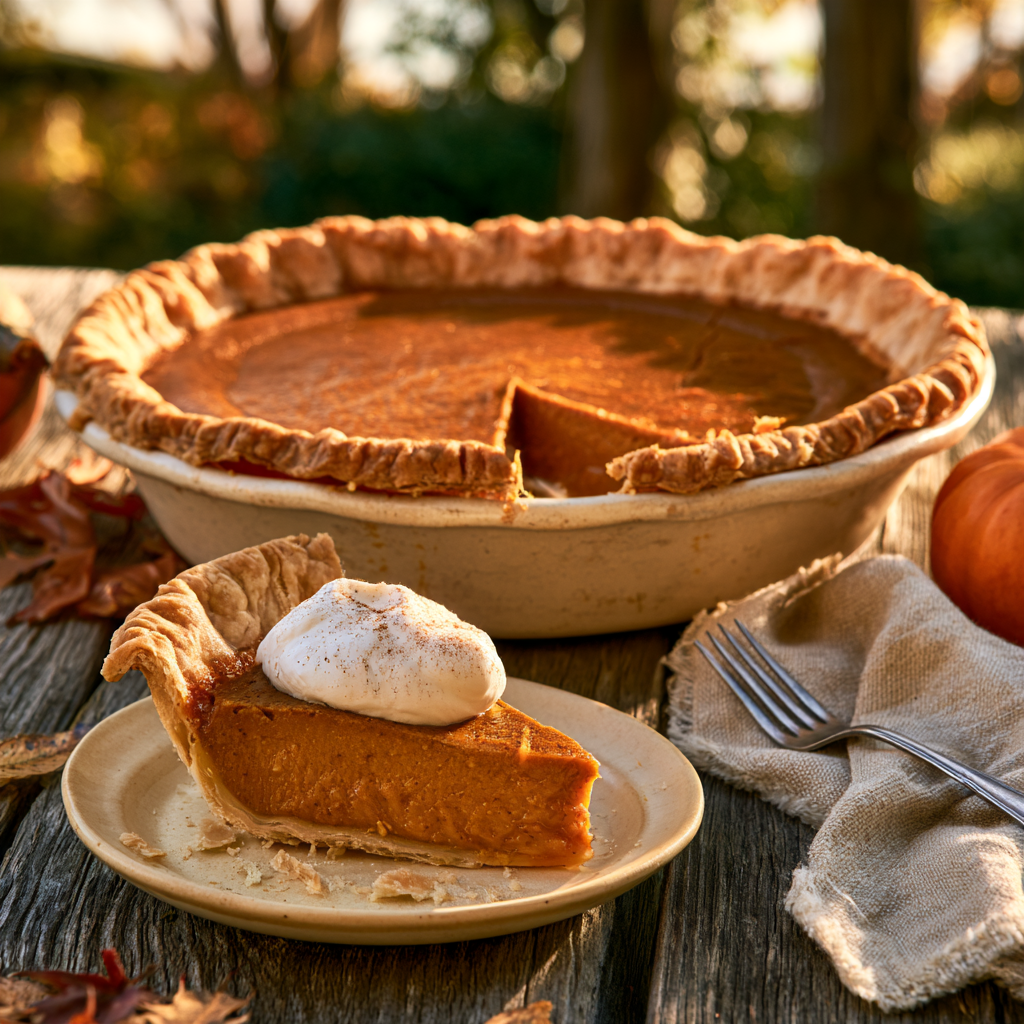
There’s something magical about the moment a homemade pumpkin pie comes out of the oven. The kitchen fills with the comforting aroma of cinnamon, ginger, nutmeg, and sweet pumpkin, while a beautiful golden crust surrounds a smooth, warmly spiced filling. It instantly brings to mind cozy autumn afternoons, family gatherings, and Thanksgiving dinners where everyone somehow manages to save a little room for dessert.
And when that first slice is served, topped with a soft swirl of whipped cream, it’s easy to understand why pumpkin pie has remained such a beloved American classic.
This Best Pumpkin Pie Recipe is everything you want from a homemade holiday dessert: a buttery, flaky crust, a wonderfully creamy pumpkin custard, the perfect balance of warming spices, and a rich but delicate sweetness that doesn’t overpower the natural pumpkin flavor.
The filling is silky rather than grainy, smooth rather than watery, and firm enough to slice beautifully without feeling dense or dry.
Best of all, making homemade pumpkin pie is much easier than you might think.
You don’t need complicated baking techniques, expensive equipment, or hours of hands-on preparation. With pure pumpkin purée, eggs, evaporated milk, brown sugar, a few aromatic spices, and a simple pie crust, you can create a beautiful dessert that feels special enough for Thanksgiving but approachable enough for a relaxing weekend baking project.
The real secret to an unforgettable pumpkin pie is getting three things just right: a flavorful, balanced filling, a properly baked crust, and a custard that’s removed from the oven before it overcooks.
Whether you’re preparing your very first Thanksgiving pumpkin pie or looking for a reliable recipe to replace one that’s turned out watery, cracked, or overly dense, this guide will help you understand what makes a truly delicious homemade pumpkin pie.
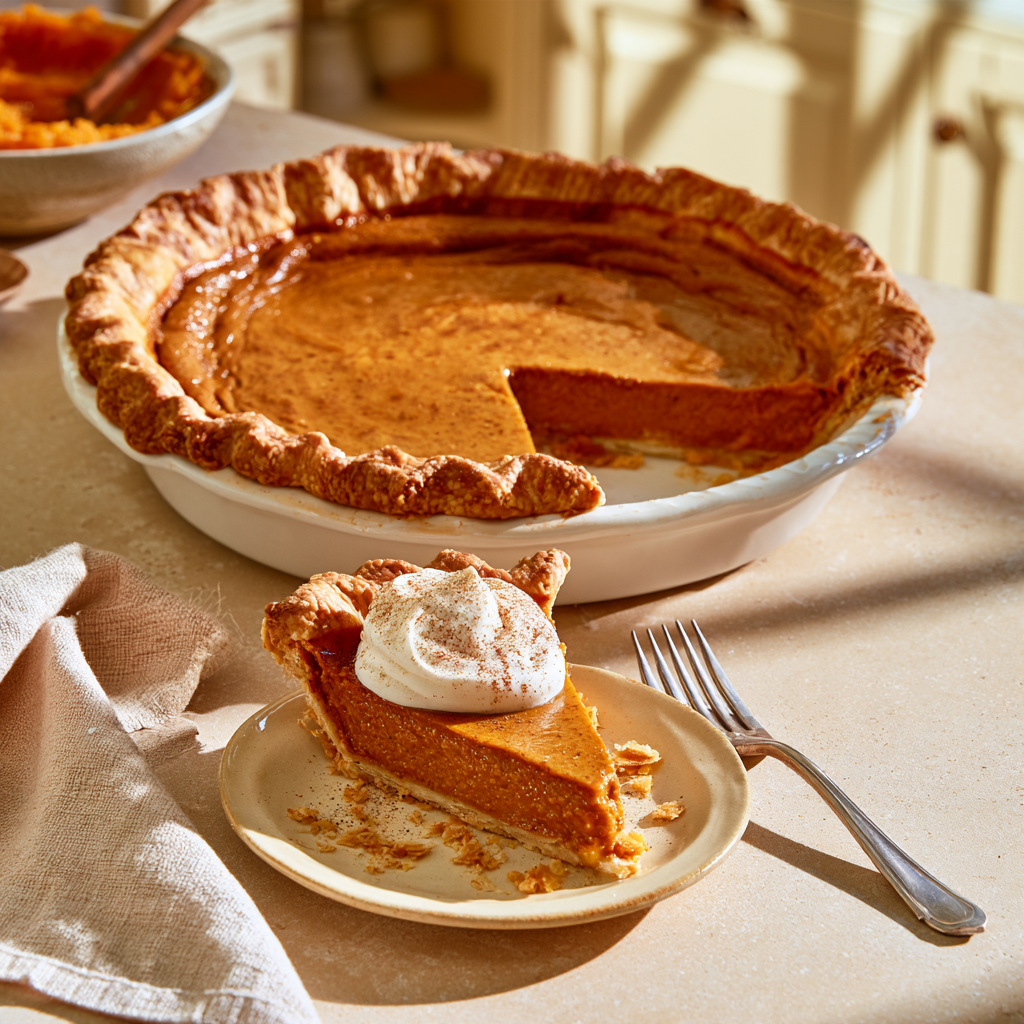
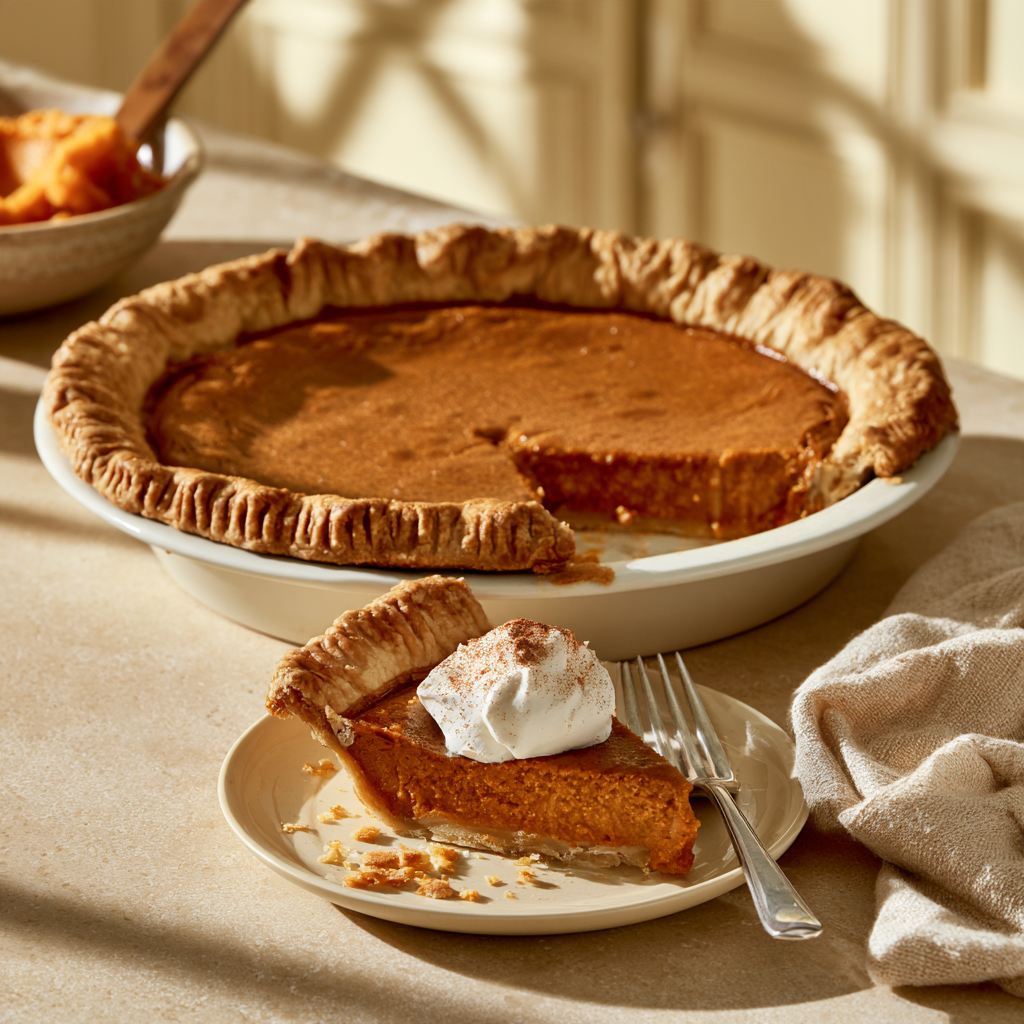
Best Pumpkin Pie Recipe
Equipment
- 9-inch (23 cm) deep-dish pie plate
- Large mixing bowl
- Small mixing bowl
- Hand whisk
- Rubber spatula
- Measuring cups
- Measuring spoons
- Digital kitchen scale (recommended)
- Rimmed baking sheet
- Pie crust shield or aluminum foil, optional
- Oven thermometer (optional)
- Instant-read kitchen thermometer, optional
- Wire cooling rack
- Oven mitts
- Sharp kitchen knife
- Pie server
- Refrigerator-safe pie cover
Ingredients
- Pie Crust
- 1 1/4 cups 150 g all-purpose flour
- 1/2 cup 113 g cold unsalted butter, cut into small cubes
- 1/2 teaspoon fine salt
- 1 teaspoon granulated sugar
- 3 –5 tablespoons 45–75 ml ice-cold water, as needed
- Pumpkin Pie Filling
- 1 can 15 oz / 425 g 100% pure pumpkin purée, not pumpkin pie filling
- 1 can 12 fl oz / 354 ml evaporated milk
- 2 large eggs room temperature
- 1/2 cup 100 g packed light brown sugar
- 1/4 cup 50 g granulated sugar
- 1 1/2 teaspoons ground cinnamon
- 1/2 teaspoon ground ginger
- 1/4 teaspoon ground nutmeg
- 1/8 teaspoon ground cloves
- 1/2 teaspoon fine salt
- 1 teaspoon pure vanilla extract
- Optional Toppings
- 1 cup 240 ml heavy whipping cream, whipped for serving
- 1 tablespoon powdered sugar for sweetening the whipped cream
- 1 pinch ground cinnamon for garnish
Instructions
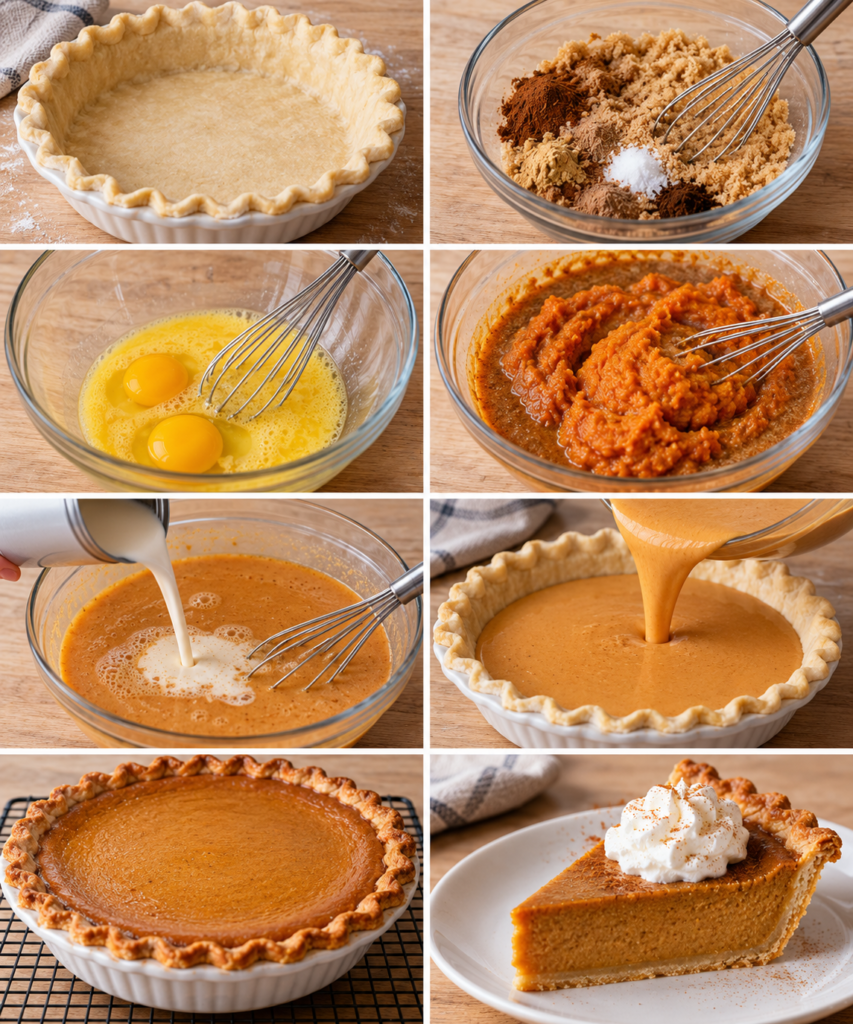
- Step 1: Preheat the Oven and Prepare Your Baking Station. Preheat your oven to 425°F (220°C) and position an oven rack in the lower third of the oven. This placement helps direct heat toward the bottom crust while allowing the creamy pumpkin filling to bake more evenly. Gather the pie plate, mixing bowls, whisk, spatula, measuring tools, and ingredients before beginning. Place a wire cooling rack in a convenient location for the finished pie. If using homemade pastry, make sure the dough has been prepared and properly chilled. The oven should reach the full recommended temperature before baking because this recipe begins with a short, high-temperature stage before finishing at a lower heat.
- Step 2: Prepare the Deep-Dish Pie Crust. Place one unbaked 9-inch (23 cm) deep-dish pie crust into a suitable pie plate with approximately 4-cup capacity. If using homemade pastry, gently roll it out on a lightly floured surface, transfer it to the dish, and press it into the bottom and sides without stretching. Trim any excessive pastry, leaving enough to fold the edge under and create a decorative crimp. If using a ready-made crust, check the package instructions and confirm that it is suitable for baking with a custard filling. Refrigerate the prepared crust while mixing the pumpkin filling. Keeping the pastry cold helps maintain its shape during baking. This recipe does not require blind-baking the crust first.
- Step 3: Combine the Brown Sugar and Pumpkin Pie Spices. In a small mixing bowl, combine 3/4 cup (150 g) packed light brown sugar, 1 1/2 teaspoons ground cinnamon, 1/2 teaspoon ground ginger, 1/4 teaspoon ground nutmeg, 1/8 teaspoon ground cloves, and 1/2 teaspoon fine salt. Whisk thoroughly until the spices are distributed throughout the sugar. Break apart any large brown sugar lumps so they don’t remain in the finished filling. Cinnamon provides the familiar sweet-spiced aroma, ginger adds gentle warmth, nutmeg contributes rich fragrance, and cloves give a subtle depth of flavor. Mixing these ingredients first helps prevent concentrated pockets of spice in the pumpkin custard.
- Step 4: Beat the Eggs Gently. Crack 2 large eggs into a separate large mixing bowl. Using a hand whisk, beat gently until the yolks and whites are fully combined. There’s no need to beat the eggs until fluffy or use an electric mixer. Pumpkin pie is a custard dessert, so incorporating excessive air isn’t necessary and may produce bubbles on the baked surface. The eggs play an important role in setting the pumpkin-and-milk mixture as it bakes. Whisk until smooth, then scrape down the bowl as needed to make sure the mixture is evenly combined.
- Step 5: Add the Pure Pumpkin Purée. Add one 15-ounce (425 g) can of 100% pure pumpkin purée to the beaten eggs. Whisk gently until the mixture becomes thick, smooth, and evenly orange. Add the prepared brown sugar and spice mixture, then continue whisking until fully incorporated. The mixture should have a rich pumpkin aroma with recognizable cinnamon and ginger notes. Make sure you’re using plain pumpkin purée rather than pre-seasoned pumpkin pie filling. Prepared pie filling may contain added sugar and spices, which would change the intended sweetness and flavor. If using homemade pumpkin purée, it should be smooth, thick, and free of excess liquid.
- Step 6: Gradually Incorporate the Evaporated Milk. Slowly pour one 12-fluid-ounce (354 ml) can of unsweetened evaporated milk into the pumpkin mixture, adding it in several portions while whisking gently. Continue until the filling is smooth, creamy, and evenly blended. The consistency should be pourable and noticeably thinner than plain pumpkin purée. Avoid vigorous beating because incorporating excessive air may contribute to bubbles or an uneven surface. If large bubbles appear, let the mixture stand briefly and gently tap the bowl to release some of them. Do not substitute sweetened condensed milk directly, since it contains substantial added sugar and would change the recipe’s sweetness and texture.
- Step 7: Fill the Prepared Pie Crust. Remove the chilled crust from the refrigerator and position the pie plate on a rimmed baking sheet if needed for easier handling and to catch drips. Slowly pour the prepared pumpkin custard into the unbaked pastry shell. The filling should settle naturally into an even layer. Leave enough space below the upper edge of the crust to prevent overflowing. If your pie shell is shallower than the recommended deep-dish size, do not force all the filling into it. Transfer any excess to a small oven-safe ramekin and bake separately, checking earlier for doneness. Gently tap the filled dish once or twice to release large surface bubbles. The filling should now look smooth, creamy, and beautifully pumpkin-orange.
- Step 8: Bake at 425°F (220°C) for 15 Minutes. Carefully transfer the filled pumpkin pie to the fully preheated oven. Bake at 425°F (220°C) for 15 minutes. This initial high-temperature stage helps the pastry begin baking and starts setting the custard. Avoid opening the oven door unnecessarily. The outer edges of the filling may begin to look slightly firmer while the center remains very soft. This is completely normal at this stage. Keep the pie supported securely on the baking sheet or oven rack and avoid moving it while the custard is still liquid.
- Step 9: Reduce the Temperature to 350°F (175°C). After the first 15 minutes, reduce the oven temperature to 350°F (175°C) without removing the pie. Continue baking for approximately 40–50 additional minutes. The total baking time will generally be around 55–65 minutes, depending on the oven, crust, and filling depth. During this second stage, the custard gradually thickens as the eggs set. Keep an eye on the crust edges during the final portion of baking. If they become too dark, carefully protect them with a pie shield or loosely fitted aluminum foil. Avoid repeatedly opening the oven, and begin checking for doneness before the end of the estimated baking window.
- Step 10: Check the Pumpkin Pie for Doneness. The pumpkin pie is ready when the outer edges of the custard look set and a small area in the center still moves with a gentle, gelatin-like wobble. Carefully nudge the supported pie plate to check the movement. The filling should not slosh or ripple like a liquid. For additional guidance, an instant-read thermometer inserted into the center may show approximately 160–170°F (71–77°C) when the custard is approaching the correct doneness. Avoid continuing to bake until the entire center becomes completely rigid, as this can cause a dry filling or cracked surface. Residual heat will continue setting the custard after removal from the oven.
- Step 11: Cool the Pumpkin Pie Safely. Carefully remove the baked pumpkin pie from the oven and transfer it to a wire cooling rack. Allow it to cool at room temperature for approximately 1 hour, or until it has cooled enough to refrigerate comfortably. As the pie cools, the filling continues firming and its texture becomes more stable. Slight settling is normal. Avoid cutting into the pie while it is hot because the custard may still be too soft to hold a clean slice. Since this recipe contains eggs and evaporated milk, refrigerate the pie within 2 hours of removing it from the oven. Do not leave homemade pumpkin pie on the countertop overnight.
- Step 12: Refrigerate Until Completely Set. Transfer the cooled pumpkin pie to the refrigerator and chill for approximately 3–4 hours, preferably until thoroughly cold and firm enough to slice neatly. An overnight chilling period is also convenient when preparing dessert ahead for Thanksgiving or another gathering. Once the pie is cool, cover it to help prevent drying and absorption of refrigerator odors. Chilling allows the pumpkin custard to develop its final smooth, sliceable texture. For the best presentation, avoid rushing this step. A thoroughly chilled pie usually produces much cleaner slices than one served immediately after baking.
- Step 13: Slice and Serve With Optional Toppings. Once the pumpkin pie is fully chilled, remove it from the refrigerator and cut it into 8 equal slices using a sharp knife. Wipe the knife between cuts to keep the edges neat. Carefully transfer the portions onto serving plates with a pie server. The finished filling should be smooth, creamy, and firm enough to retain its shape, while the pastry provides a tender, golden contrast. Serve plain or finish each slice with a small spoonful of lightly sweetened whipped cream. A delicate sprinkle of ground cinnamon, pumpkin pie spice, or chopped toasted pecans makes an attractive optional garnish. Add toppings shortly before serving rather than before storage.
- Step 14: Store Leftover Pumpkin Pie. Cover leftover pumpkin pie securely and refrigerate at 40°F (4°C) or below. Homemade pumpkin pie should generally be enjoyed within approximately 3–4 days when stored properly. Do not leave slices at room temperature for prolonged periods, especially during holiday gatherings. For longer storage, wrap the fully cooled pie or individual portions securely and freeze for approximately 1–2 months for best quality. Thaw frozen pumpkin pie in the refrigerator before serving. Keep in mind that freezing and thawing can slightly affect the creamy custard texture and may soften the pastry crust. For the best appearance and flavor, preparing the pie a day ahead and refrigerating it is usually preferable.
Notes
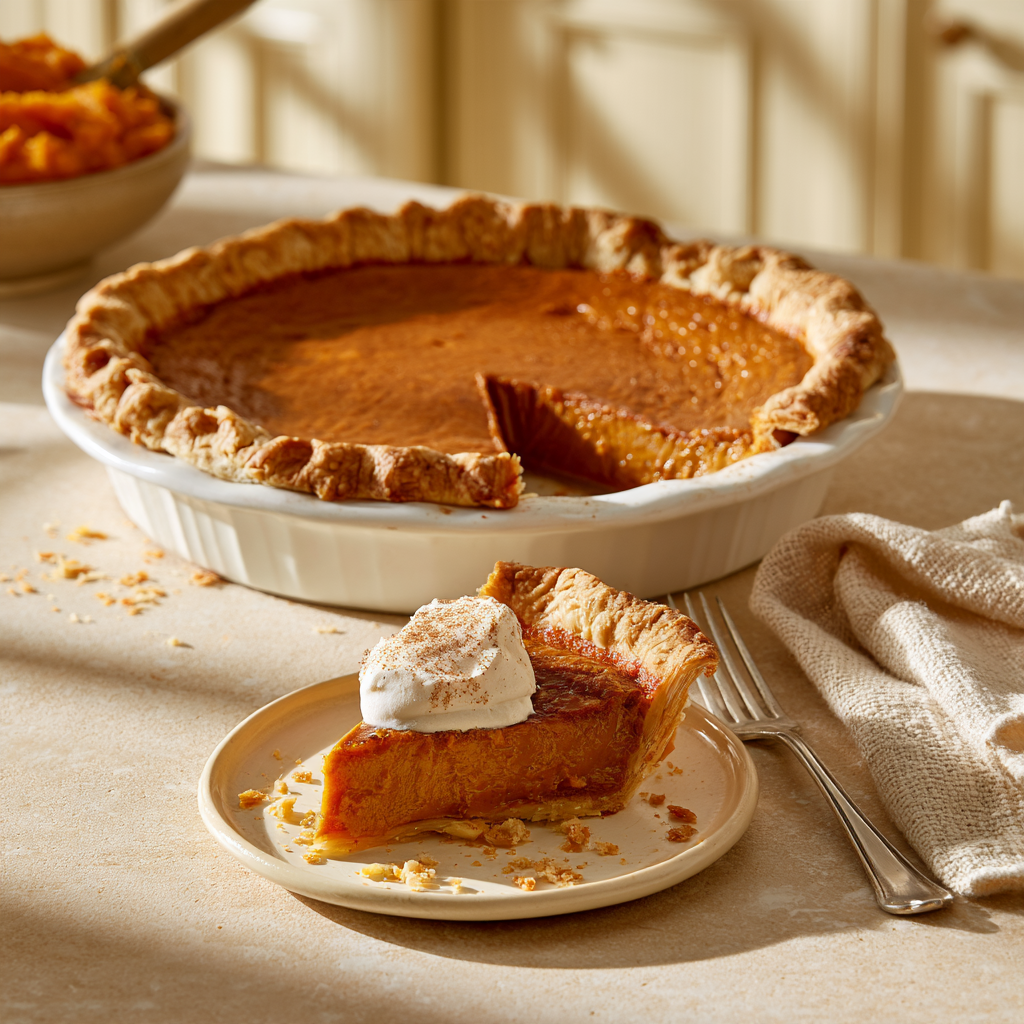
- Origins of Best Pumpkin Pie Recipe: From Ancient American Harvests to a Thanksgiving Classic
- Health Benefits of Best Pumpkin Pie Recipe: Nutrition, Vitamin A & How to Enjoy It Mindfully
- Best Pumpkin Pie Recipe: Health Benefits at a Glance
- 1. Pumpkin Pie Contains Beta-Carotene, a Source of Vitamin A
- How Much Vitamin A Does Pumpkin Provide?
- 2. Pumpkin Provides Dietary Fiber for Digestive Health
- 3. Pumpkin's Carotenoids Contribute Antioxidant Compounds
- 4. Evaporated Milk Contributes Calcium and Protein
- Calcium
- Protein
- 5. Eggs Provide Protein, Choline & Vitamin B12
- 6. Pumpkin Contributes Potassium and Other Minerals
- 7. Pumpkin Pie Spices Add Flavor Without Much Extra Sugar
- Cinnamon
- Ginger
- Nutmeg
- Cloves
- How to Make the Best Pumpkin Pie Recipe Step by Step
- Step 1: Preheat Your Oven to 425°F (220°C)
- Step 2: Prepare the Pie Crust
- Step 3: Combine the Brown Sugar and Pumpkin Pie Spices
- Step 4: Whisk the Eggs Until Smooth
- Step 5: Add the Pure Pumpkin Purée
- Why Pure Pumpkin Matters
- Step 6: Gradually Add the Evaporated Milk
- Step 7: Pour the Pumpkin Filling Into the Pie Crust
- Step 8: Bake at 425°F (220°C) for 15 Minutes
- Step 9: Reduce the Temperature to 350°F (175°C)
- Step 11: Cool the Pumpkin Pie on a Wire Rack
- Step 12: Refrigerate Until the Filling Is Firm
- Step 13: Slice and Serve With Whipped Cream
- Step 14: Store Leftover Pumpkin Pie Properly
Origins of Best Pumpkin Pie Recipe: From Ancient American Harvests to a Thanksgiving Classic
The origins of pumpkin pie are closely connected to North America, where pumpkins and other squashes were cultivated long before modern baking techniques existed.
However, the familiar pumpkin pie made with a pastry crust, eggs, milk, sweetener, and spices developed gradually through interactions between Indigenous American ingredients and European cooking traditions.
Pumpkins originated in the Americas.
European-style pastry pies, on the other hand, had already been prepared in Europe for centuries.
When European settlers encountered the abundance of pumpkins available in North America, they began adapting familiar recipes to incorporate this locally available ingredient.
The earliest versions were not necessarily sweet, smooth, or custard-like.
Some contained sliced pumpkin, herbs, apples, and other ingredients layered inside pastry.
Others were closer to baked pumpkin puddings.
Over time, American cooks began combining cooked pumpkin with eggs, milk, and spices to make a smoother filling.
This gradual evolution produced the foundation of the classic pumpkin custard pie.
The simplest historical explanation is that pumpkin pie developed from an Indigenous American crop combined with European pastry and custard traditions, then evolved into a distinctly American dessert.
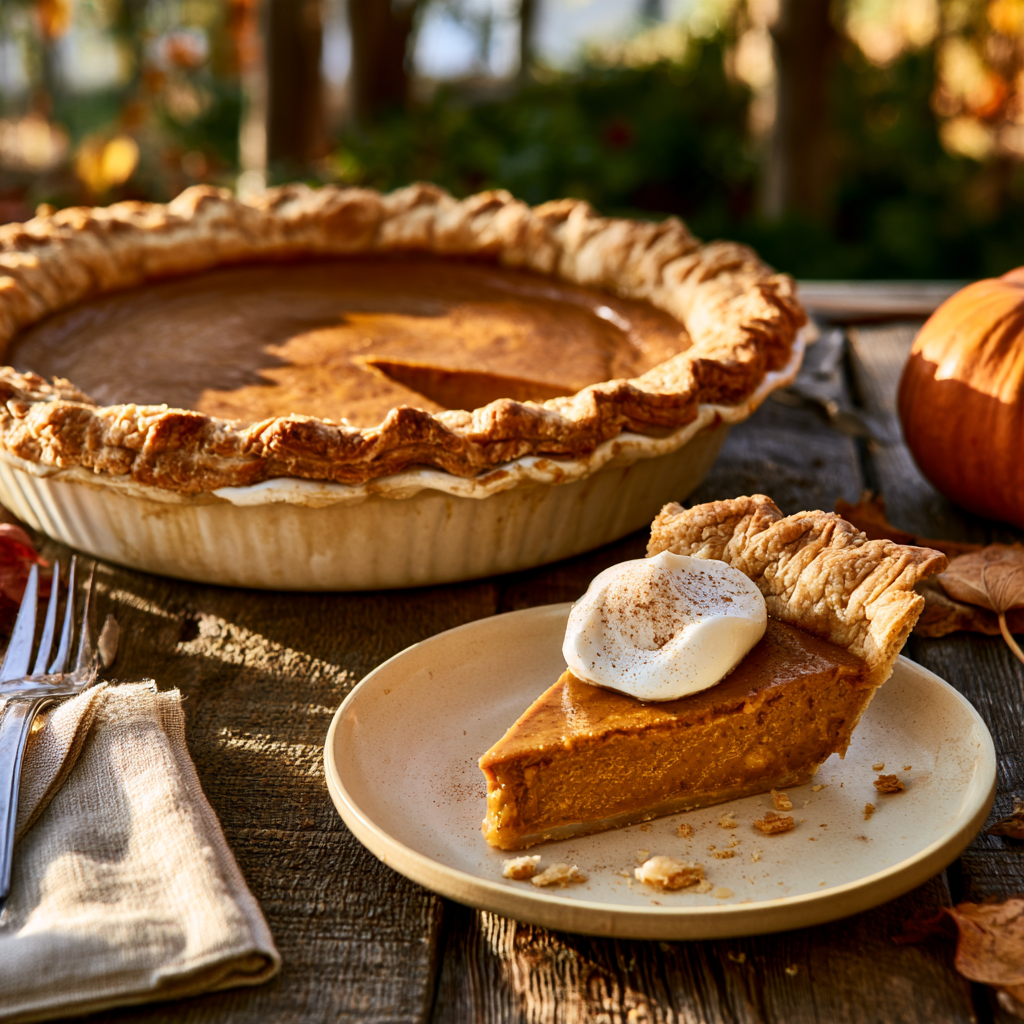
Health Benefits of Best Pumpkin Pie Recipe: Nutrition, Vitamin A & How to Enjoy It Mindfully
There’s something wonderfully comforting about a homemade pumpkin pie. The smooth, creamy filling, golden pastry crust, and familiar aroma of cinnamon, ginger, and nutmeg make every slice feel like a celebration of autumn. Whether it’s served at Thanksgiving dinner, a family gathering, or a cozy weekend dessert, pumpkin pie has a special way of bringing people together.
But beyond its irresistible flavor, you might be wondering: Is pumpkin pie healthy? Does pumpkin pie have nutritional benefits? And can a slice of this classic dessert fit into a balanced diet?
The answer is more interesting than you might expect.
Unlike some desserts made primarily from refined flour, sugar, and butter, a traditional Best Pumpkin Pie Recipe contains a substantial amount of real pumpkin purée. Pumpkin naturally provides beta-carotene, dietary fiber, potassium, and other vitamins and minerals. The eggs and evaporated milk also contribute protein and calcium, while the warm spices add distinctive flavor without requiring large quantities of additional sugar.
However, there’s an important distinction between the nutritional qualities of pumpkin and the nutritional profile of a finished pumpkin pie.
Traditional pumpkin pie also contains added sugar, dairy, and a pastry crust that contributes fat and calories. These ingredients make it a delicious dessert rather than an everyday health food.
The good news is that homemade pumpkin pie can absolutely fit into a balanced eating pattern when enjoyed in reasonable portions.
Preparing it yourself also gives you control over the pumpkin, sweetener, crust, spices, and toppings. You can make thoughtful ingredient choices while preserving the silky texture and comforting flavor that make this dessert so special.
At OoohDelish, we believe the best approach is to understand what the ingredients genuinely contribute, without exaggerating their health benefits.
Let’s explore the nutrition behind this homemade pumpkin pie recipe, including its vitamin A content, fiber, protein, calcium, antioxidants, calories, and ways to enjoy it a little more mindfully.
Best Pumpkin Pie Recipe: Health Benefits at a Glance
| Ingredient | Nutritional Contribution | What It Means for This Recipe |
|---|---|---|
| Pure pumpkin purée | Beta-carotene, dietary fiber, potassium, and other nutrients | Adds the signature pumpkin flavor, color, texture, and nutritional value |
| Beta-carotene | A carotenoid the body can convert into vitamin A | Contributes to normal vision and immune function |
| Dietary fiber | Supports normal digestive function | Pumpkin contributes some fiber to the finished pie |
| Eggs | Protein, choline, and vitamin B12 | Help the custard set while contributing nutrients |
| Evaporated milk | Calcium, protein, and phosphorus | Creates a creamy filling and contributes to bone-related nutritional needs |
| Brown sugar | Carbohydrates and sweetness | Adds flavor and energy but also increases added sugar |
| Cinnamon and ginger | Aromatic plant compounds | Provide warm flavor without requiring heavy toppings |
| Nutmeg and cloves | Concentrated natural flavor compounds | Add depth and fragrance in small amounts |
| Pastry crust | Carbohydrates and fat | Provides the flaky texture but contributes calories |
| Homemade preparation | Greater control over ingredients and serving sizes | Allows you to adjust sweetness, toppings, and portions |
Important: The nutritional benefits described here come from individual ingredients. A finished slice of pumpkin pie contains a mixture of nutrients, added sugar, and fat, so it shouldn’t be considered equivalent to eating plain pumpkin.
1. Pumpkin Pie Contains Beta-Carotene, a Source of Vitamin A
One of the most notable nutritional characteristics of this Best Pumpkin Pie Recipe comes from its main ingredient: pure pumpkin purée.
Pumpkin gets its beautiful orange color partly from carotenoids, naturally occurring pigments found in many colorful fruits and vegetables.
One of the most important carotenoids in pumpkin is beta-carotene.
Beta-carotene is considered a provitamin A carotenoid because the body can convert it into vitamin A.
Vitamin A plays several essential roles in maintaining normal health.
It supports vision, particularly the processes involved in seeing under low-light conditions. It also contributes to immune function and the maintenance of normal tissues.
This is one of the reasons orange vegetables, including pumpkin, carrots, and sweet potatoes, are valuable components of a varied diet.
How Much Vitamin A Does Pumpkin Provide?
According to USDA-derived nutritional data, approximately ½ cup (122 g) of plain canned pumpkin provides a substantial amount of beta-carotene and vitamin A activity.
For perspective, that serving contains roughly 950 micrograms of vitamin A activity expressed as retinol activity equivalents (RAE), although actual levels vary by product.
Our homemade pumpkin pie uses one 15-ounce (425 g) can of pure pumpkin purée for the entire filling.
When the pie is divided into eight slices, each serving contains approximately 53 g of pumpkin before accounting for the other ingredients.
That means every slice contributes some pumpkin-derived carotenoids.
However, the vitamin A content of the finished pie will vary according to the pumpkin product, preparation, and serving size.
OoohDelish Tip: Choose 100% pure pumpkin purée rather than premixed pumpkin pie filling. Pure pumpkin allows you to control the sugar and spices separately while preserving the natural pumpkin flavor.
If you enjoy desserts made with real pumpkin, our Libby’s Pumpkin Bread Recipe is another delicious autumn favorite. It uses pumpkin purée to create a moist, tender loaf, while pumpkin pie transforms the same seasonal ingredient into a smooth, creamy custard.
2. Pumpkin Provides Dietary Fiber for Digestive Health
Another useful nutrient found naturally in pumpkin is dietary fiber.
Fiber is an important part of a balanced eating pattern because it helps support normal digestive function.
Different types of fiber have different properties.
Some help increase stool bulk and support regular bowel movements, while others are fermented by microorganisms in the digestive system.
Fiber-rich foods can also contribute to feelings of fullness.
Pumpkin contains dietary fiber, making it nutritionally different from many dessert ingredients that provide little or none.
According to USDA reference values, approximately ½ cup of plain canned pumpkin contains around 3.5 g of dietary fiber.
However, the amount of pumpkin in each slice of pie is smaller than this reference serving.
Since our recipe uses 425 g of pumpkin divided among eight slices, the pumpkin alone contributes approximately 1.5 g of fiber per slice before considering the crust and other ingredients.
The exact amount varies.
This is a meaningful contribution, but pumpkin pie shouldn’t be described as a high-fiber food without calculating the final recipe.
If increasing fiber is your goal, foods such as beans, oats, whole grains, vegetables, and whole fruits provide more substantial amounts.
The practical benefit of pumpkin pie is that it includes a fiber-containing vegetable within a sweet dessert.
That doesn’t replace more nutritious sources of fiber, but it adds some nutritional variety.
3. Pumpkin’s Carotenoids Contribute Antioxidant Compounds
Pumpkin naturally contains several carotenoids, including beta-carotene and alpha-carotene.
These compounds are part of the broader family of pigments that give orange, yellow, and red foods their distinctive colors.
Carotenoids have been studied for their antioxidant properties and their roles in human nutrition.
However, it’s important to distinguish between the presence of antioxidant compounds in food and claims that a particular dessert can prevent disease.
Eating pumpkin pie has not been established as a treatment for inflammation, eye disease, heart disease, or other health conditions.
The more reliable nutritional statement is that pumpkin supplies carotenoids, including compounds the body can convert into vitamin A.
These nutrients are one reason pumpkin is a valuable vegetable to include in a varied eating pattern.
When pumpkin is combined with eggs, milk, sugar, and pastry, the final dessert still contains pumpkin-derived carotenoids.
However, the sugar and fat in the finished pie also need to be considered.
The takeaway: Pumpkin contributes genuinely useful plant nutrients, but the finished dessert shouldn’t be promoted as a medicinal or disease-preventing food.
4. Evaporated Milk Contributes Calcium and Protein
One ingredient that makes this homemade pumpkin pie especially creamy is evaporated milk.
Our recipe uses one 12-ounce (354 ml) can of evaporated milk.
Unlike ordinary milk, evaporated milk has had much of its water removed through processing.
This gives it a concentrated consistency that works particularly well in custard-style desserts.
When combined with pumpkin purée and eggs, it creates the smooth, rich filling that makes classic pumpkin pie so delicious.
Evaporated milk also contributes nutrients.
Calcium
Calcium is essential for maintaining normal bones and teeth.
It also plays important roles in muscle contraction, nerve signaling, and other biological processes.
Dairy milk naturally provides calcium, and evaporated milk retains a meaningful amount of this mineral.
Protein
Milk proteins contribute to normal tissue maintenance and other functions throughout the body.
Because evaporated milk is concentrated, it contains more protein per equal volume than ordinary milk.
However, the full can is divided among the entire pie.
A single slice therefore contains only a portion of the milk’s original protein.
Phosphorus
Dairy products also provide phosphorus, a mineral involved in bone structure, cell membranes, and normal energy metabolism.
Together, these nutrients contribute to the overall nutritional profile of pumpkin pie.
But the presence of calcium and protein doesn’t make the dessert equivalent to drinking milk or eating unsweetened yogurt.
Pumpkin pie also includes added sugar and pastry, so it is best considered an occasional dessert with some useful nutrients.
5. Eggs Provide Protein, Choline & Vitamin B12
Eggs are essential to the texture of a classic pumpkin pie.
Unlike cakes that depend on flour for much of their structure, pumpkin pie is a custard.
The eggs gradually thicken the pumpkin-and-milk mixture as it bakes.
This helps the filling transform from a pourable mixture into a smooth, creamy dessert that can be sliced after cooling.
Eggs also contain several important nutrients.
Protein: Supports normal tissue maintenance, growth, and the production of enzymes and other essential molecules.
Choline: Contributes to cell membrane structure and other normal biological functions.
Vitamin B12: Supports red blood cell formation and the normal functioning of the nervous system.
Selenium: Participates in antioxidant enzyme activity and thyroid hormone metabolism.
Our recipe uses two large eggs for the entire pie.
When divided into eight servings, the egg contribution to each slice is modest.
However, the eggs work together with the evaporated milk and pumpkin to give the finished pie a more varied nutritional composition than a dessert made solely from sugar and refined flour.
Important: Although pumpkin pie contains some protein, it shouldn’t automatically be described as a high-protein dessert.
6. Pumpkin Contributes Potassium and Other Minerals
Pumpkin also contains potassium, an essential mineral involved in several normal body functions.
Potassium helps maintain fluid balance and supports nerve signaling and muscle contraction.
The body needs potassium regularly, which is why it is important to consume a varied selection of potassium-containing foods.
Plain canned pumpkin provides approximately 250 mg of potassium per ½-cup serving, according to USDA-derived reference data.
The pumpkin portion in one slice of our pie contributes a smaller quantity.
Additional potassium may come from the evaporated milk and other ingredients.
Pumpkin also contains some iron and magnesium.
Iron participates in normal oxygen transport through the blood, while magnesium contributes to numerous metabolic and cellular functions.
The quantities vary depending on the pumpkin variety, canned product, and recipe.
These nutrients are welcome additions, but pumpkin pie should not be relied upon as a primary source of potassium, iron, or magnesium.
Vegetables, legumes, fruits, whole grains, and other nutrient-rich foods are generally more appropriate for meeting daily mineral needs.
7. Pumpkin Pie Spices Add Flavor Without Much Extra Sugar
One of the best parts of baking pumpkin pie is the wonderful aroma that fills the kitchen.
Cinnamon, ginger, nutmeg, and cloves create the warm, comforting flavor associated with autumn and Thanksgiving.
These spices contribute flavor even though they’re used in relatively small quantities.
Cinnamon
Cinnamon provides the most recognizable aroma in traditional pumpkin pie.
Its sweet, warm flavor complements pumpkin and brown sugar.
Ginger
Ginger adds a gentle sharpness that balances the creamy filling.
It helps prevent the overall flavor from tasting overly flat or sweet.
Nutmeg
Nutmeg contributes a rich, aromatic quality that works beautifully in custard desserts.
Because its flavor is relatively strong, only a small amount is needed.
Cloves
Cloves add a deeper, more concentrated spice note.
Used sparingly, they create a complex aroma without overpowering the pumpkin.
These spices contain naturally occurring plant compounds, some of which have been studied in scientific research.
However, the small culinary amounts used in pumpkin pie should not be expected to produce medicinal effects.
How to Make the Best Pumpkin Pie Recipe Step by Step
Step 1: Preheat Your Oven to 425°F (220°C)
Start by preheating your oven to 425°F (220°C).
Place an oven rack in the lower third of the oven. This position helps direct more heat toward the bottom crust while reducing the risk of the custard surface browning too quickly.
Allow the oven to preheat completely before placing the pie inside.
A properly heated oven is especially important for this pumpkin pie because the recipe begins with a short period of higher-temperature baking.
This initial heat helps the pastry begin setting and provides a strong start to the baking process.
After 15 minutes, the oven temperature will be lowered to allow the pumpkin custard to finish cooking more gently.
OoohDelish Tip: If your oven tends to run hot or cold, use an oven thermometer to check the actual temperature. Custard pies are sensitive to excessive heat, and an inaccurate oven can contribute to cracked surfaces or an underbaked crust.
Step 2: Prepare the Pie Crust
Place your unbaked pie crust into a 9-inch deep-dish pie plate.
If you’re using homemade pastry, gently roll it out on a lightly floured work surface until it’s large enough to fit the bottom and sides of the dish.
Carefully transfer the pastry to the pie plate without stretching it.
Press it gently into the bottom and around the sides.
Trim any excessive overhang, leaving enough pastry to create a decorative edge.
Fold the remaining edge under itself and crimp it using your fingers or a fork.
If you’re using a ready-made deep-dish crust, check that it is suitable for baking and has enough capacity to hold the filling.
Refrigerate the prepared crust while mixing the pumpkin filling.
Keeping the pastry cool helps the fat remain firm before it enters the oven, contributing to a better texture and reducing excessive shrinking.
Important: This version uses an unbaked pie crust. There’s no need to blind-bake it as part of the main recipe.
Step 3: Combine the Brown Sugar and Pumpkin Pie Spices
In a small mixing bowl, add:
- ¾ cup packed light brown sugar
- 1½ teaspoons ground cinnamon
- ½ teaspoon ground ginger
- ¼ teaspoon ground nutmeg
- ⅛ teaspoon ground cloves
- ½ teaspoon fine salt
Whisk until the brown sugar and spices are evenly combined.
If the brown sugar contains any large lumps, break them apart with the whisk or your fingers.
This step is more important than it might seem.
Mixing the spices with the sugar before adding them to the pumpkin mixture helps distribute the flavors more evenly.
Cinnamon provides the familiar warm flavor of pumpkin pie.
Ginger adds gentle warmth, nutmeg contributes a rich aroma, and cloves bring a deeper spicy note.
The salt balances the sweetness and enhances the overall flavor.
The mixture should smell wonderfully fragrant before it even reaches the pumpkin.
OoohDelish Tip: Avoid increasing the cloves too much. Their flavor is concentrated, and even a small additional quantity can overpower the delicate pumpkin custard.
Step 4: Whisk the Eggs Until Smooth
Crack 2 large eggs into a separate large mixing bowl.
Using a hand whisk, beat them gently until the yolks and whites are completely combined.
You don’t need an electric mixer.
In fact, whisking by hand is ideal because it gives you greater control and helps prevent excessive air from entering the custard.
The eggs are essential to the structure of pumpkin pie.
As the pie bakes, the egg proteins gradually set, helping transform the liquid pumpkin mixture into a smooth, sliceable custard.
However, incorporating too much air can create bubbles on the surface and contribute to an uneven appearance.
For this reason, whisk the eggs until smooth rather than beating them until fluffy.
OoohDelish Secret: Pumpkin pie is a custard, not a cake. Gentle mixing helps create a smooth, creamy filling rather than an excessively airy texture.
Step 5: Add the Pure Pumpkin Purée
Open your can of 100% pure pumpkin purée.
Add the entire 15-ounce (425 g) can to the beaten eggs.
Whisk gently until the pumpkin and eggs are thoroughly incorporated.
The mixture should become thick, smooth, and evenly orange.
Next, add the prepared brown sugar and spice mixture.
Continue whisking until the sugar is distributed and there are no obvious pockets of spices.
The filling should now have a rich pumpkin aroma with noticeable cinnamon and ginger notes.
Why Pure Pumpkin Matters
Make sure you’re using plain pumpkin purée rather than prepared pumpkin pie filling.
Commercial pumpkin pie filling commonly contains additional sugar and spices.
Using it in this recipe would change the sweetness and seasoning balance.
Pure pumpkin purée gives you control over the final flavor and provides a consistent base for the custard.
If you love baking with pumpkin, you might also enjoy our Libby’s Pumpkin Bread Recipe, which transforms pumpkin purée into a beautifully moist, warmly spiced loaf.
Step 6: Gradually Add the Evaporated Milk
Slowly pour one 12-fluid-ounce (354 ml) can of evaporated milk into the pumpkin mixture.
Add it in several portions, whisking gently after each addition.
This gradual mixing helps create an evenly blended custard.
Continue until the mixture becomes smooth, creamy, and pourable.
The finished filling should have a uniform orange color with fine specks of cinnamon, ginger, nutmeg, and cloves.
It should be thinner than pumpkin purée alone but thicker than ordinary milk.
Avoid substituting sweetened condensed milk directly.
Sweetened condensed milk contains added sugar and produces a different filling.
Evaporated milk provides the creamy consistency needed for this particular recipe without introducing the same level of sweetness.
OoohDelish Tip: If the filling contains large air bubbles, allow it to stand briefly and gently tap the bowl against the counter. This can help larger bubbles rise before baking.
Step 7: Pour the Pumpkin Filling Into the Pie Crust
Remove the chilled pie crust from the refrigerator.
Place the pie dish on a rimmed baking sheet to help catch any drips and make transferring it easier.
Slowly pour the prepared pumpkin filling into the unbaked pie shell.
The filling should spread naturally across the bottom.
If necessary, gently tap the pie plate to level the surface and release any large air bubbles.
Avoid overfilling.
The filling should remain below the top of the crust, leaving sufficient room for it to expand slightly during baking.
A 9-inch deep-dish crust with approximately 4-cup capacity is the intended size for this recipe.
If your crust is shallower, don’t force all the filling into it. Extra filling can be baked separately in an appropriate oven-safe dish, with a shorter baking time.
At this stage, the pumpkin filling should look smooth, creamy, and beautifully orange.
The crust should remain pale and unbaked.
This is exactly what you want before the pie enters the oven.
Step 8: Bake at 425°F (220°C) for 15 Minutes
Carefully transfer the pumpkin pie to the preheated oven.
Bake at 425°F (220°C) for 15 minutes.
This initial higher-temperature stage helps the pastry begin baking and starts the process of setting the filling.
Avoid opening the oven door unnecessarily during this stage.
The filling may begin to look slightly firmer around the outer edges, while the center remains very soft.
That’s normal.
Pumpkin pie requires a two-stage baking process in this recipe because the crust and custard respond differently to heat.
The crust benefits from an initial burst of heat, while the creamy egg-based filling needs gentler cooking to avoid overbaking.
After exactly 15 minutes, reduce the oven temperature.
Do not remove the pie just to adjust the temperature.
Step 9: Reduce the Temperature to 350°F (175°C)
After the initial 15 minutes, lower the oven temperature to 350°F (175°C).
Continue baking for approximately 40–50 minutes, depending on your oven and pie dish.
The total baking time will generally be around 55–65 minutes.
During this stage, the pumpkin filling gradually thickens as the eggs set.
The edges will begin to appear firmer and more matte.
The center should remain slightly softer.
Keep an eye on the pie during the final part of baking.
If the crust edges are becoming excessively dark, carefully protect them with a pie shield or loosely fitted aluminum foil.
Try not to open the oven repeatedly because sudden temperature changes can affect the baking process.
OoohDelish Tip: Begin checking the pie before the end of the estimated baking time. Every oven behaves differently, and preventing overbaking is much easier than correcting a dry or cracked custard afterward.
Step 10: Check When the Pumpkin Pie Is Perfectly Baked
This is one of the most important steps in the entire recipe.
A properly baked pumpkin pie should have edges that look set and a center that still has a gentle wobble.
Carefully nudge the pie plate while it’s supported securely.
If the entire filling moves like a liquid, the pie needs more time.
If the outer edges remain steady while a small central area moves gently like soft gelatin, the pie is approaching its ideal doneness.
The center should not be watery or slosh around.
Remember that pumpkin pie continues setting as it cools.
Waiting until the filling becomes completely firm inside the oven can lead to overbaking.
For additional accuracy, a digital thermometer inserted into the center can help assess doneness. A center temperature of approximately 160–170°F (71–77°C) is a useful custard-pie guide when combined with the appropriate visual signs.
Avoid allowing the filling to become excessively hot, since overcooked custard may tighten and crack as it cools.
The most important sign: set outer edges with a softly wobbling center, not a wet or completely liquid filling.
Step 11: Cool the Pumpkin Pie on a Wire Rack
Once the pie is properly baked, carefully remove it from the oven.
Place it on a wire cooling rack.
Allow it to cool without covering the surface while it’s very hot.
As the pie cools, the custard continues to set.
The filling becomes firmer, and its smooth texture develops.
You may notice that the center settles slightly during cooling.
This is normal.
Avoid cutting into the pie immediately.
Hot pumpkin custard is much softer than chilled pumpkin custard, and slicing too early can result in a messy portion.
Allow the pie to cool sufficiently, but because it contains eggs and dairy, refrigerate it within two hours of taking it out of the oven.
Do not leave it on the countertop overnight.
Step 12: Refrigerate Until the Filling Is Firm
Transfer the cooled pie to the refrigerator.
Chill for approximately 3–4 hours, or until the custard is fully set and the pie is cold enough to slice cleanly.
For the most convenient holiday preparation, bake the pie the day before serving.
An overnight refrigeration period allows the filling to become especially easy to cut.
Once the pie is cool, cover it to protect it from refrigerator odors and prevent the surface from drying.
The filling should be smooth, creamy, and firm enough to hold its shape.
This is where patience makes a real difference.
A properly chilled pumpkin pie slices much more neatly than a pie served while the filling is still warm.
OoohDelish Secret: For beautiful Thanksgiving slices, prepare the pie the day before, chill thoroughly, and use a clean knife when serving.
Step 13: Slice and Serve With Whipped Cream
Once your pumpkin pie is fully chilled, remove it from the refrigerator.
Use a sharp knife to cut the pie into approximately 8 equal slices.
For the cleanest presentation, wipe the knife blade between cuts.
Carefully transfer each slice onto a dessert plate using a pie server.
The filling should hold together beautifully, revealing a smooth pumpkin-orange interior.
Top with a small spoonful or swirl of lightly sweetened whipped cream.
If desired, finish with a delicate sprinkle of ground cinnamon or pumpkin pie spice.
The whipped cream adds a lovely contrast to the rich, warmly spiced custard.
You can also enjoy the pie plain if you prefer to appreciate the pumpkin flavor without additional toppings.
For a delicious autumn dessert table, pair this classic pie with our Pumpkin Bread with Brownie Chunks. Its moist pumpkin loaf and fudgy brownie pockets provide a completely different texture from the silky custard of traditional pumpkin pie.
Step 14: Store Leftover Pumpkin Pie Properly
Because homemade pumpkin pie contains eggs and milk, it must be stored in the refrigerator.
Cover leftover pie securely and refrigerate at 40°F (4°C) or below.
For best quality and food safety, consume refrigerated homemade pumpkin pie within approximately 3–4 days.
Avoid leaving the pie at room temperature for extended periods.
If you’re serving it at a holiday gathering, return leftovers to the refrigerator promptly.
Pumpkin pie can also be frozen for longer storage, although the creamy filling may change texture slightly after thawing.
For best quality, freeze tightly wrapped portions for approximately 1–2 months.
Thaw them safely in the refrigerator.
A properly stored pie remains a convenient make-ahead dessert for busy holiday celebrations.
Frequently Asked Questions About Best Pumpkin Pie Recipe
Want to make the best pumpkin pie recipe with a beautifully flaky, buttery crust and a rich, silky-smooth pumpkin filling? These helpful answers explain how to choose pumpkin purée, use evaporated milk, balance homemade pumpkin spices, prevent soggy crusts, recognize when the custard is perfectly baked, and avoid cracks or watery slices. Whether you’re baking for Thanksgiving, Christmas, or a cozy fall gathering, these practical tips will help you create a delicious homemade pumpkin pie.
1. What makes this the best homemade pumpkin pie recipe?
A memorable homemade pumpkin pie combines a flaky butter crust, a creamy pumpkin custard, and a balanced blend of warm spices. This OoohDelish version uses pure pumpkin purée, evaporated milk, two eggs, brown sugar, granulated sugar, cinnamon, ginger, nutmeg, cloves, and vanilla. The pumpkin brings a naturally earthy sweetness, while the eggs help the filling set into smooth, tender slices. The homemade crust adds a buttery contrast to the soft filling. If you enjoy pumpkin desserts beyond traditional pies, try our Pumpkin Churro Cheesecake Bars for another creamy fall treat.
2. What ingredients do you need for the best pumpkin pie recipe?
The proposed filling uses 425 g pure pumpkin purée, 354 ml evaporated milk, two large eggs, 100 g brown sugar, and 50 g granulated sugar. For seasoning, add 1 1/2 teaspoons cinnamon, 1/2 teaspoon ginger, 1/4 teaspoon nutmeg, 1/8 teaspoon cloves, 1/2 teaspoon fine salt, and 1 teaspoon vanilla extract. The homemade crust contains 150 g all-purpose flour, 113 g cold unsalted butter, salt, a little sugar, and enough ice-cold water to bring the dough together. The formula is intended for one 9-inch pumpkin pie, yielding approximately eight slices.
3. Can I use pumpkin pie filling instead of pumpkin purée?
No, pumpkin pie filling and pure pumpkin purée are not interchangeable without adjusting the recipe. Pure pumpkin purée is unsweetened and generally contains only cooked pumpkin or suitable pumpkin-type squash. Canned pumpkin pie filling already contains sugar and spices, sometimes along with other ingredients. Since this recipe includes its own brown sugar, granulated sugar, cinnamon, ginger, nutmeg, and cloves, using pre-seasoned filling can make the pie excessively sweet or strongly spiced. Choose a 15-ounce (425 g) can labeled 100% pure pumpkin.
4. Can you make pumpkin pie with fresh pumpkin instead of canned pumpkin?
Yes, homemade pumpkin purée can replace canned pumpkin in many pumpkin pie recipes. Choose a small cooking pumpkin, roast or steam it until tender, remove the skin, and blend the flesh until completely smooth. Measure 425 g of finished purée for this recipe. Fresh pumpkin can contain more water than canned purée, so drain excess moisture if necessary before mixing the filling. Avoid adding butter, milk, or sugar to the purée. For another recipe that celebrates the flavor of pure pumpkin, explore our Libby’s Pumpkin Bread Recipe .
5. Why does this pumpkin pie recipe use evaporated milk?
Evaporated milk helps create a rich, smooth pumpkin custard without adding the sweetness of condensed milk. It is regular milk with much of its water removed, giving it a concentrated dairy flavor and creamy consistency. This recipe uses one 12-fluid-ounce can, approximately 354 ml. Combined with 425 g pumpkin purée and two eggs, it forms the base of the filling. Use unsweetened evaporated milk rather than sweetened condensed milk, which contains significant added sugar and would require changing the other ingredients.
6. Can I substitute heavy cream, whole milk, or condensed milk for evaporated milk?
Heavy cream or a combination of cream and milk can work in pumpkin pie recipes developed for those ingredients. However, they do not behave exactly like evaporated milk, and their different fat and water contents can affect the texture and baking time. Whole milk alone generally produces a lighter, less rich custard. Sweetened condensed milk is particularly different because it contains substantial sugar. For this proposed formulation, keep the specified 354 ml of evaporated milk unless you are deliberately testing a revised recipe.
7. Which spices give homemade pumpkin pie its classic flavor?
Cinnamon, ginger, nutmeg, and cloves create the signature warm flavor of classic pumpkin pie. In this recipe, cinnamon leads with 1 1/2 teaspoons, followed by 1/2 teaspoon ground ginger, 1/4 teaspoon nutmeg, and 1/8 teaspoon cloves. The smaller amount of cloves is important because their flavor can become overpowering. Brown sugar adds gentle caramel notes, while vanilla rounds out the filling. For another comforting fall dessert featuring warm spices, explore our Apple Cider Donut Loaf .
8. Can I replace the individual spices with pumpkin pie spice?
Yes, a prepared pumpkin pie spice blend can be used as a convenient substitute. This recipe’s individual spices add up to approximately 2 3/8 teaspoons, although different spice blends contain different proportions of cinnamon, ginger, nutmeg, cloves, and sometimes allspice. Start with roughly 2 to 2 1/2 teaspoons of a commercial blend, depending on its strength and your preference. Because this is a variation, the flavor won’t be identical to the original spice mix. Keep the vanilla and salt amounts unchanged unless your blend contains salt.
9. How do you make a flaky homemade pumpkin pie crust?
Keep the butter cold, handle the dough gently, and add just enough ice water to hold it together. This crust uses 150 g all-purpose flour and 113 g cold unsalted butter, plus salt, sugar, and approximately 3–5 tablespoons of ice-cold water as needed. Work the butter into the flour while leaving small visible pieces, then bring the dough together without excessive kneading. Chill the dough before rolling and placing it into the pie dish. Cold butter and gentle handling help produce flaky, tender pastry.
10. Should I blind-bake the pie crust before adding pumpkin pie filling?
Blind-baking is optional and depends on the baking method used in your recipe. Some pumpkin pie recipes fill a chilled, unbaked crust and begin baking at a higher oven temperature. Others partially blind-bake the crust first for a firmer bottom. If you choose blind-baking, line the chilled pastry with parchment and fill it with pie weights to help prevent shrinking. Partially bake according to a compatible method before adding the custard. Don’t combine two different crust-baking methods without adjusting the full recipe.
11. How do you prevent a soggy bottom crust on pumpkin pie?
A thoroughly chilled pie crust, properly heated oven, and suitable baking surface help prevent a soggy bottom. Roll the dough evenly and avoid stretching it into the pie dish. Use a metal pie plate when practical, since metal generally transfers heat efficiently to the crust. Some recipes recommend placing the pie on a preheated baking sheet or baking stone, provided the dish is suitable for that method. Partial blind-baking can also help when incorporated into the recipe. Avoid letting liquid filling sit in the unbaked shell for a long time.
12. What temperature and how long should you bake pumpkin pie?
Many traditional 9-inch pumpkin pies use a two-stage baking method. A common approach begins at 425°F (220°C) for about 15 minutes, followed by 350°F (175°C) for approximately 35–45 additional minutes. However, this is general guidance, not a confirmed baking schedule for the proposed OoohDelish formulation. The correct timing depends on the depth of the pan, the quantity of filling, and oven performance. Use a sufficiently deep 9-inch pie dish, avoid overfilling, and follow the finalized recipe instructions after testing.
13. How do you know when homemade pumpkin pie is perfectly baked?
Look for set edges and a center that gently jiggles rather than sloshes. Pumpkin pie contains eggs, so its filling behaves like a custard and continues setting as it cools. A properly baked pie often has a slightly wobbly center surrounded by firmer outer filling. If using a food thermometer, the center should reach at least 160°F (71°C) for an egg-based dish. Baking far beyond the point of setting can cause a grainy texture or cracks. Cool the pie completely before attempting neat slices.
14. Why did my pumpkin pie crack, turn grainy, or become watery?
Cracks and graininess often indicate overbaking, while a watery or loose center may indicate insufficient baking or excess moisture. Pumpkin custard becomes firm as its eggs cook, but excessive heat causes the proteins to tighten and can damage the silky texture. A watery center can also result from using thin homemade pumpkin purée or adding too much milk. Measure the filling ingredients carefully, avoid prolonged high heat, and check the pie before the expected finish. Minor surface cracks can be covered with whipped cream.
15. Can you make pumpkin pie ahead of time, and how should you store or freeze it?
Yes, pumpkin pie is an excellent make-ahead Thanksgiving dessert. Bake it, allow it to cool, and refrigerate within two hours. Because the filling contains eggs and dairy, store the pie covered at 40°F (4°C) or below, and use refrigerated leftovers within approximately 3–4 days. For longer storage, cool the pie completely, wrap it securely, and freeze for about 1–2 months for best quality. Thaw overnight in the refrigerator. The custard or crust may soften slightly after freezing.
16. What are the best toppings and desserts to serve with homemade pumpkin pie?
Freshly whipped cream is the classic topping for homemade pumpkin pie. You can whip 1 cup (240 ml) heavy cream with a little powdered sugar and finish each slice with a light dusting of cinnamon. Vanilla ice cream, toasted pecans, or a small drizzle of caramel are other delicious options. For an inviting Thanksgiving dessert table, serve the pie alongside our Pumpkin Bread with Brownie Chunks or Soft and Chewy Molasses Cookies . The different textures and warm fall flavors complement each other.